Setup Wizard
Follow the Zone Configurator setup wizard to connect your devices and prepare your first room configuration.
The Setup Wizard guides you through configuring a new device in Zone Configurator. It runs automatically the first time you open the add-on, or you can launch it manually to add additional devices.
Starting the Wizard
The wizard launches automatically when:
- You open Zone Configurator for the first time
- You have no devices configured
To add another device manually:
- Click the menu icon (☰) in the top left
- Select Add New Device
Step 1: Select Your Device
Choose the Everything Presence device you want to configure from the list of available devices.
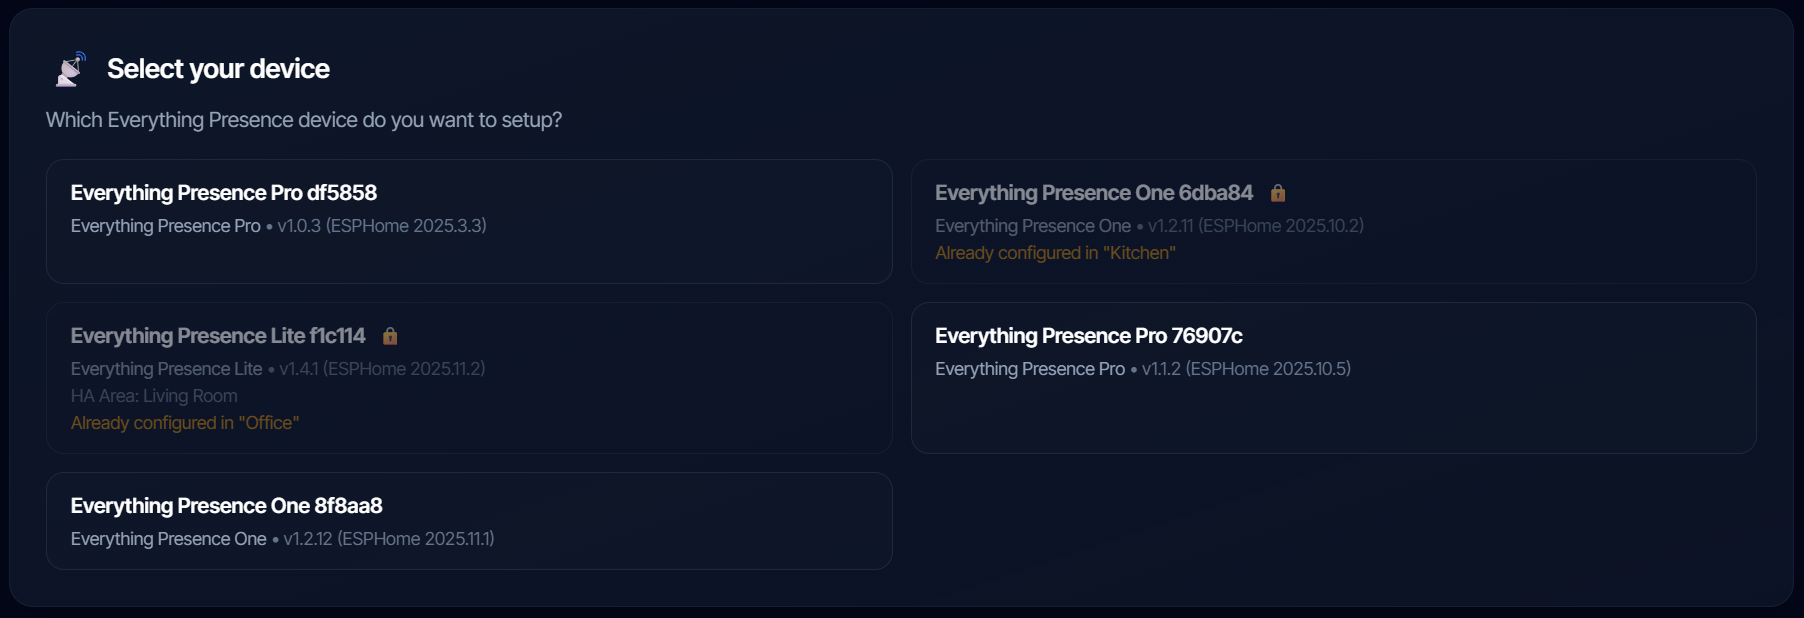
The wizard automatically discovers devices connected to Home Assistant. If your device doesn't appear:
- Ensure the device is powered on and connected to WiFi
- Check that the device appears in Home Assistant under Settings → Devices & Services
Step 2: Entity Discovery
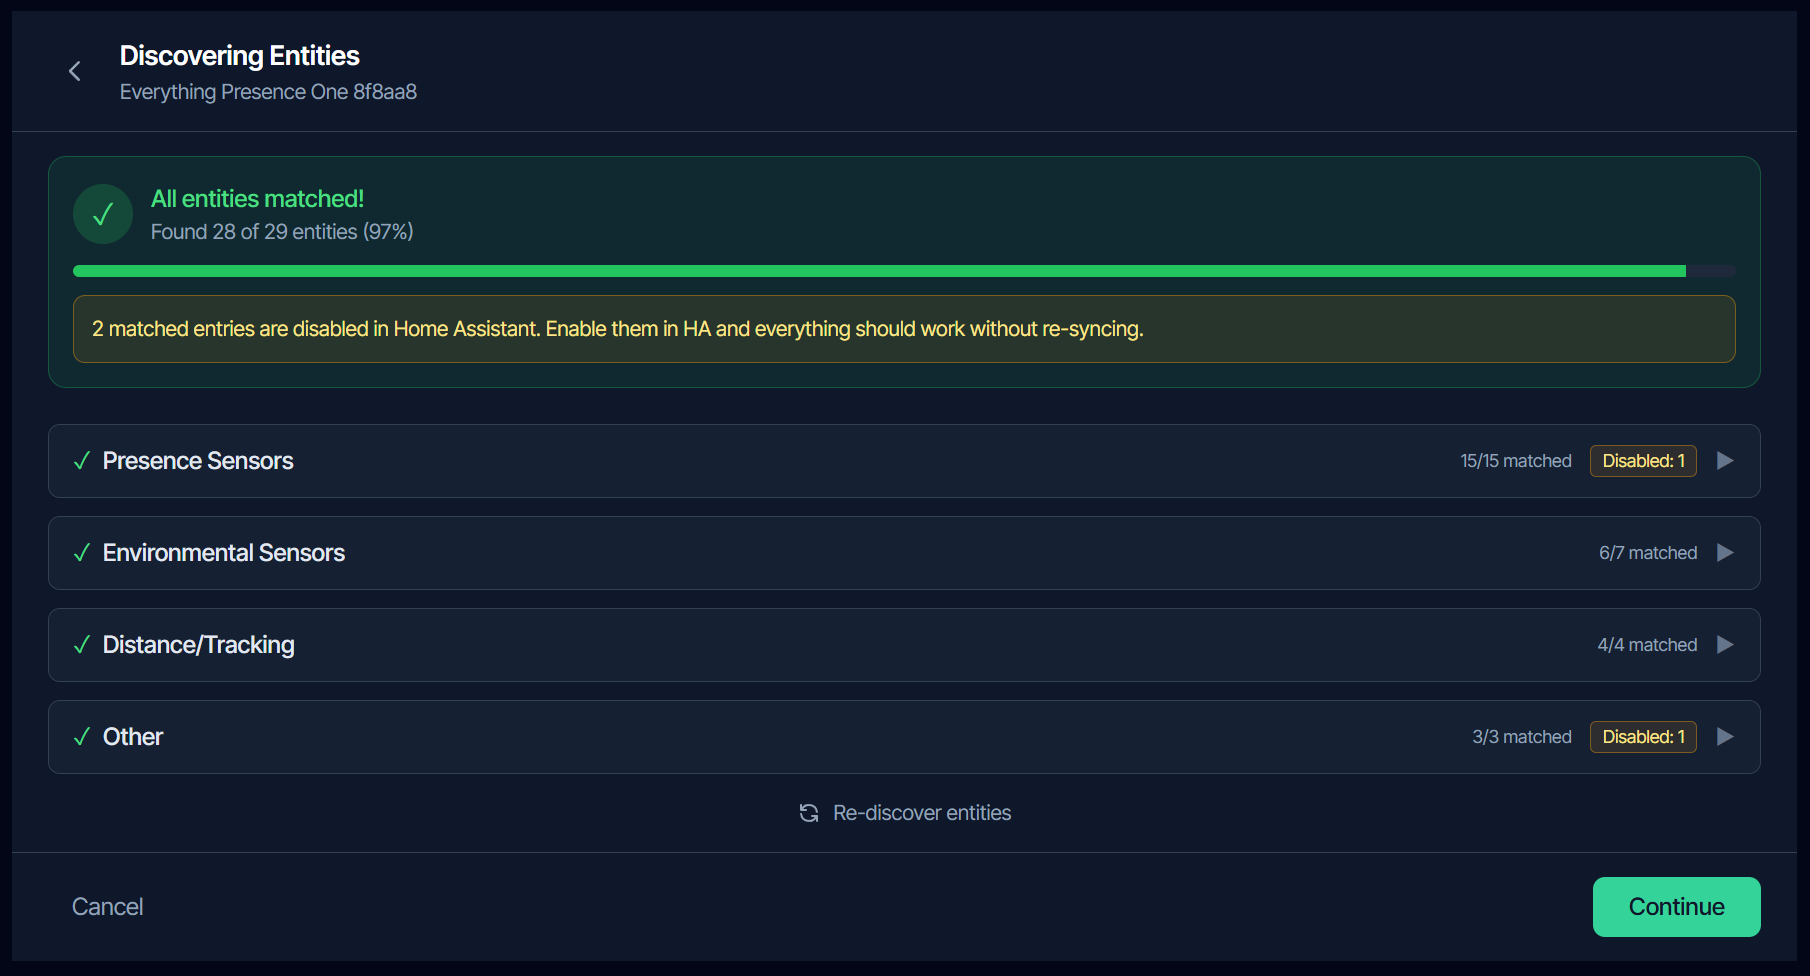
The wizard scans Home Assistant for entities belonging to your selected device and maps them automatically.
Understanding the Discovery Results
After scanning, you'll see a summary showing how many entities were matched:
| Status | Icon | Meaning |
|---|---|---|
| All matched | ✓ Green | Every required entity was found automatically |
| Needs attention | ! Yellow | Some entities need review or manual selection |
Match Confidence Indicators
Each entity shows an icon indicating how confident the match is:
| Icon | Color | Meaning | Action Needed |
|---|---|---|---|
| ✓ | Green | Exact match | None - verified correct |
| ~ | Yellow | Partial match | Verify it's the right entity |
| ! | Orange | Multiple matches | Select the correct entity |
| ✗ | Red | No match found | Manually select an entity |
| ✎ | Blue | Manually overridden | You changed this mapping |
Entity Groups
Entities are organized into expandable groups:
- Core Sensors - Occupancy, presence, mmWave status
- Environmental - Temperature, humidity, illuminance, CO2
- Tracking - Target positions (X, Y, speed, distance)
- Zones - Zone coordinates and polygon entities
- Settings - Configuration entities (max distance, sensitivity, etc.)
Groups with unmatched entities expand automatically so you can address them.
Handling Conflicts (Multiple Matches)
When the discovery finds multiple entities that could match, it marks them for review:
- Look for the orange "Review" label
- Click the dropdown to see all candidates
- Select the correct entity
- The display shows
[disabled]or[hidden]next to entities with those states
Tip: If you renamed your device in Home Assistant, entity IDs may not match the expected pattern. Check that the selected entity belongs to your device.
Disabled Entities Warning
If matched entities are disabled in Home Assistant, you'll see a yellow warning:
"X matched entries are disabled in Home Assistant. Enable them in HA and everything should work without re-syncing."
To fix disabled entities:
- Note which entities are marked "Disabled in HA"
- Go to Home Assistant → Settings → Devices & Services → ESPHome
- Find your device and click on it
- Click on the disabled entity
- Click Enable and confirm
- Return to Zone Configurator - no re-sync needed
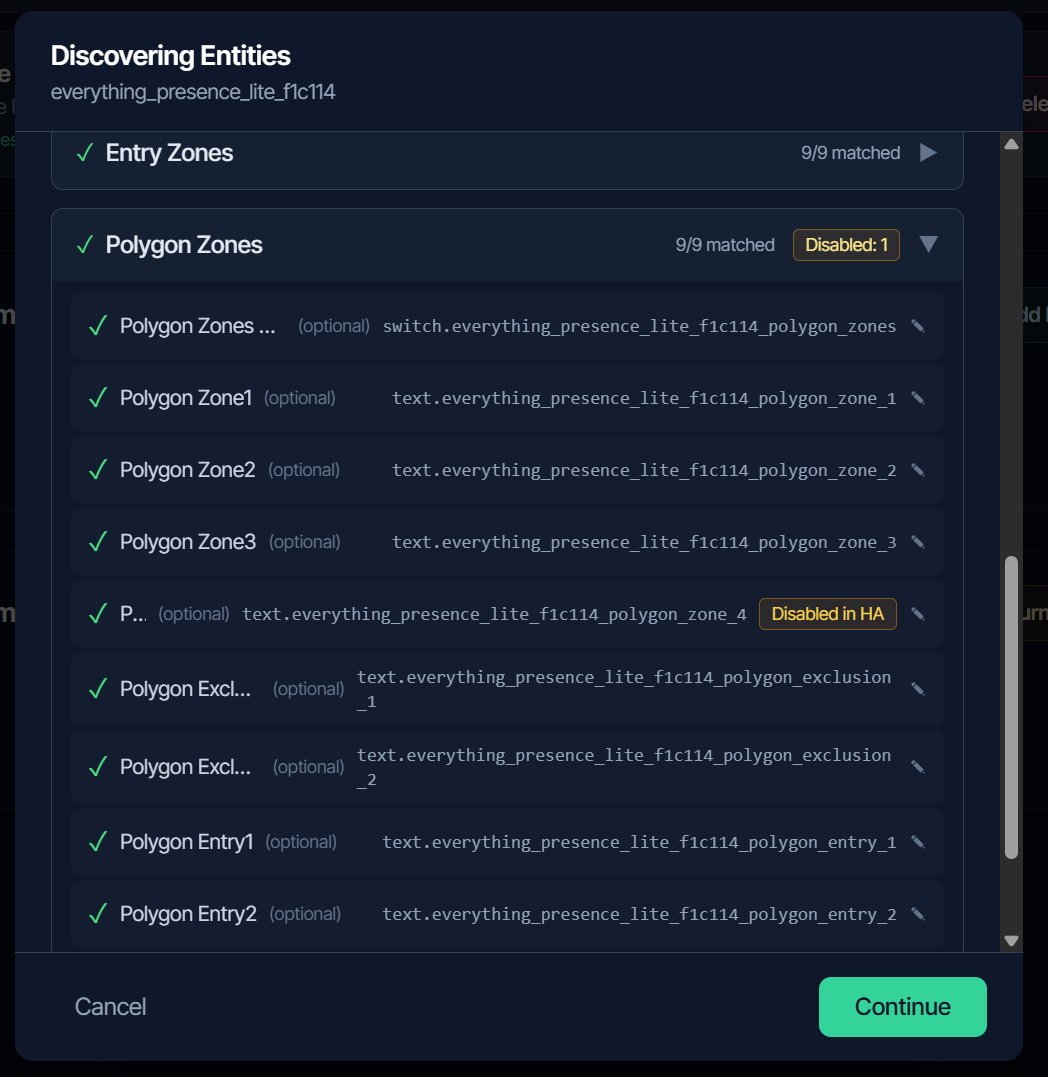
Manually Changing a Mapping
To override an automatic match:
- Click the ✎ (edit) icon next to any entity
- A dropdown appears with all available entities for that type
- Select the correct entity
- The icon changes to ✎ to show it was manually set
What Gets Mapped
Here are some things that get mapped, these may vary depending on which device you have.
| Entity Type | Purpose | Required |
|---|---|---|
| Occupancy | Main presence detection state | Yes |
| Target positions | X/Y coordinates for tracking | Yes |
| Zone states | Zone occupancy status | No |
| Distance | Detection distance | Yes |
| Environmental sensors | Temperature, humidity, light | No |
| Settings controls | Max distance, sensitivity, etc. | No |
If Entities Are Missing
If important entities don't appear:
- Click Re-discover entities at the bottom
- If still missing, check in Home Assistant:
- Is the device online? (Check Settings → Devices & Services)
- Is the ESPHome integration working?
- Are entities disabled? (Enable them in HA)
- Try restarting the device
- Verify your firmware is up to date
Completing Entity Discovery
Once all required entities show a match (green or manually set):
- Review any yellow/orange items to confirm they're correct
- Address any disabled entity warnings if needed
- Click Continue to proceed to room setup
Step 3: Create a Room
Give your room a name (e.g., "Living Room", "Office", "Bedroom").
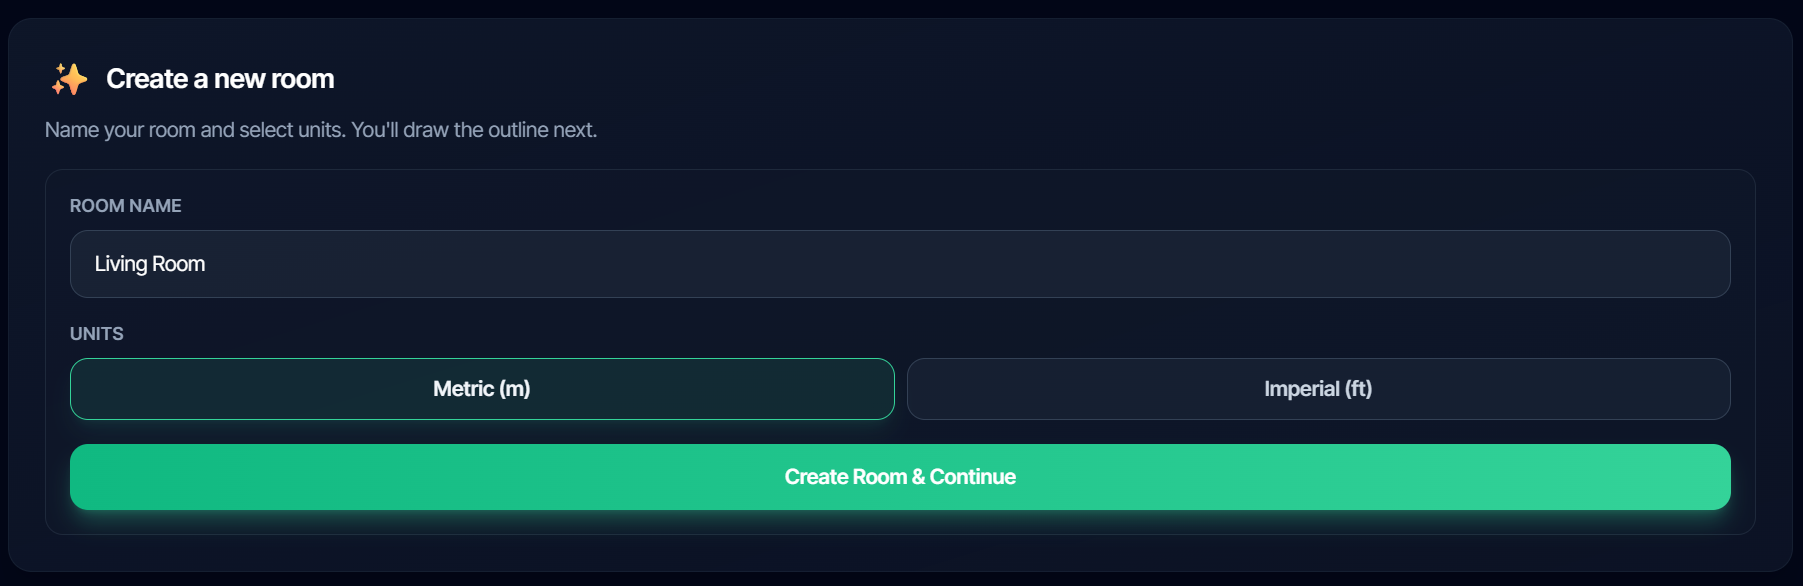
This name is used throughout Zone Configurator to identify where the device is installed.
Step 4: Room Outline (Optional)
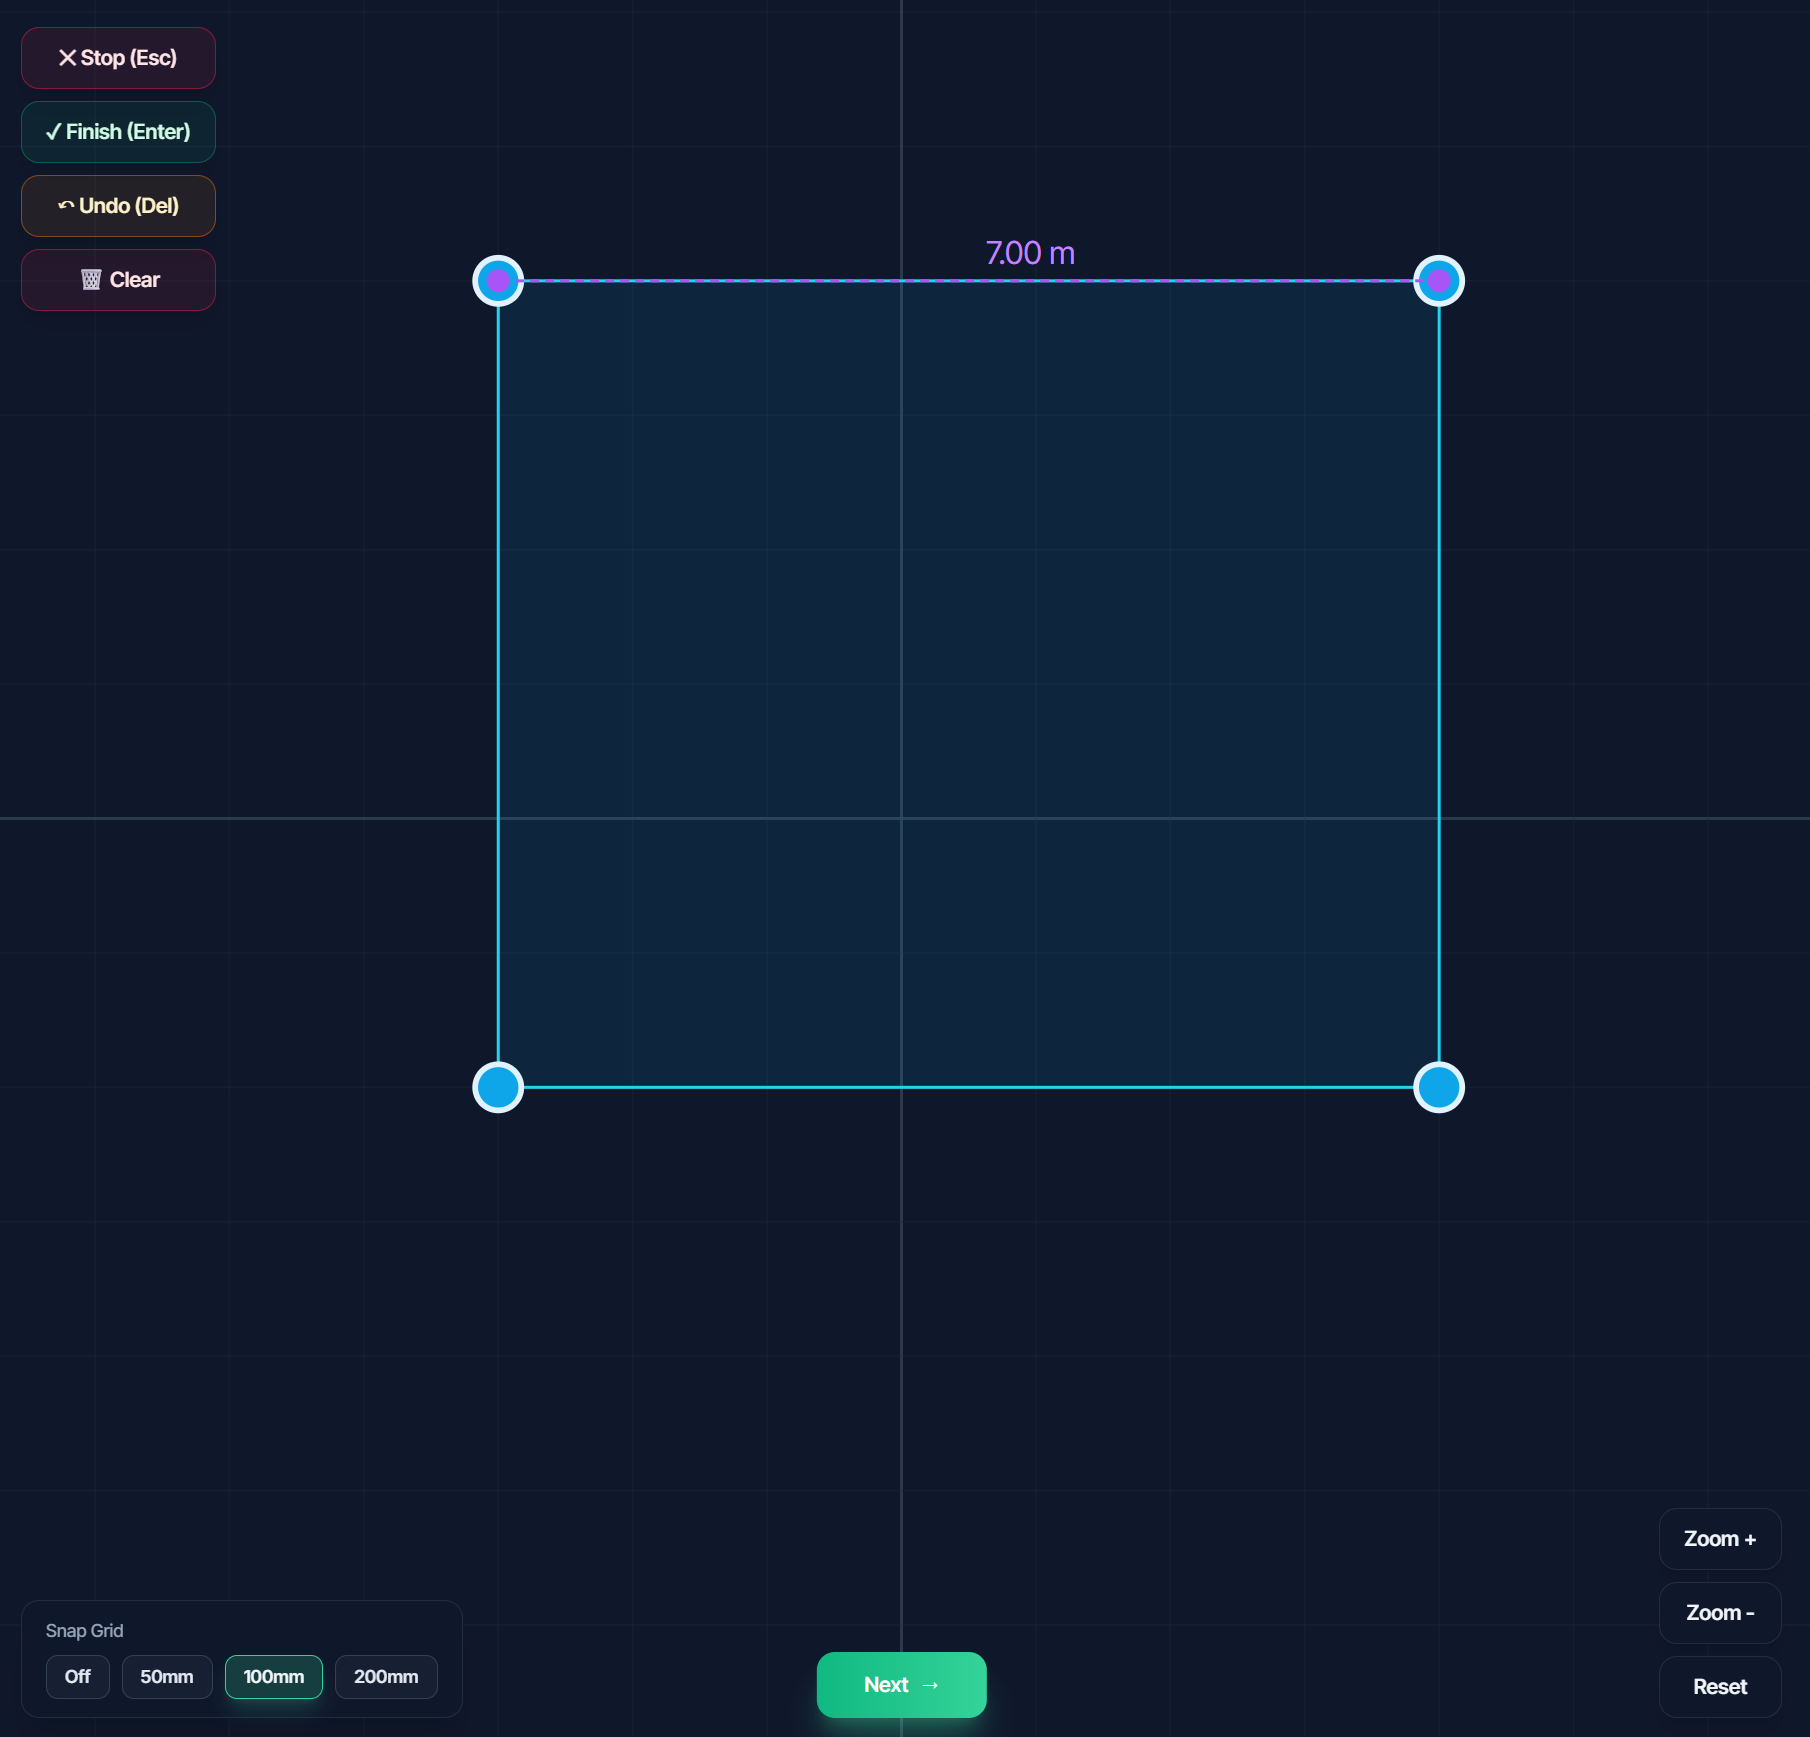
Draw the outline of your room to visualize the detection area. This step is optional but recommended for accurate zone placement.
Drawing Your Room
- Click to place the first corner point
- Continue clicking to add more points
- Press Enter or click the first point to close the shape
- Press Esc to cancel
Keyboard Shortcuts
| Key | Action |
|---|---|
| A | Add point at cursor |
| Enter | Complete the shape |
| Esc | Cancel drawing |
| Del | Delete last point |
Tip: You can refine your room layout later using the Room Builder.
Step 5: Add Doors
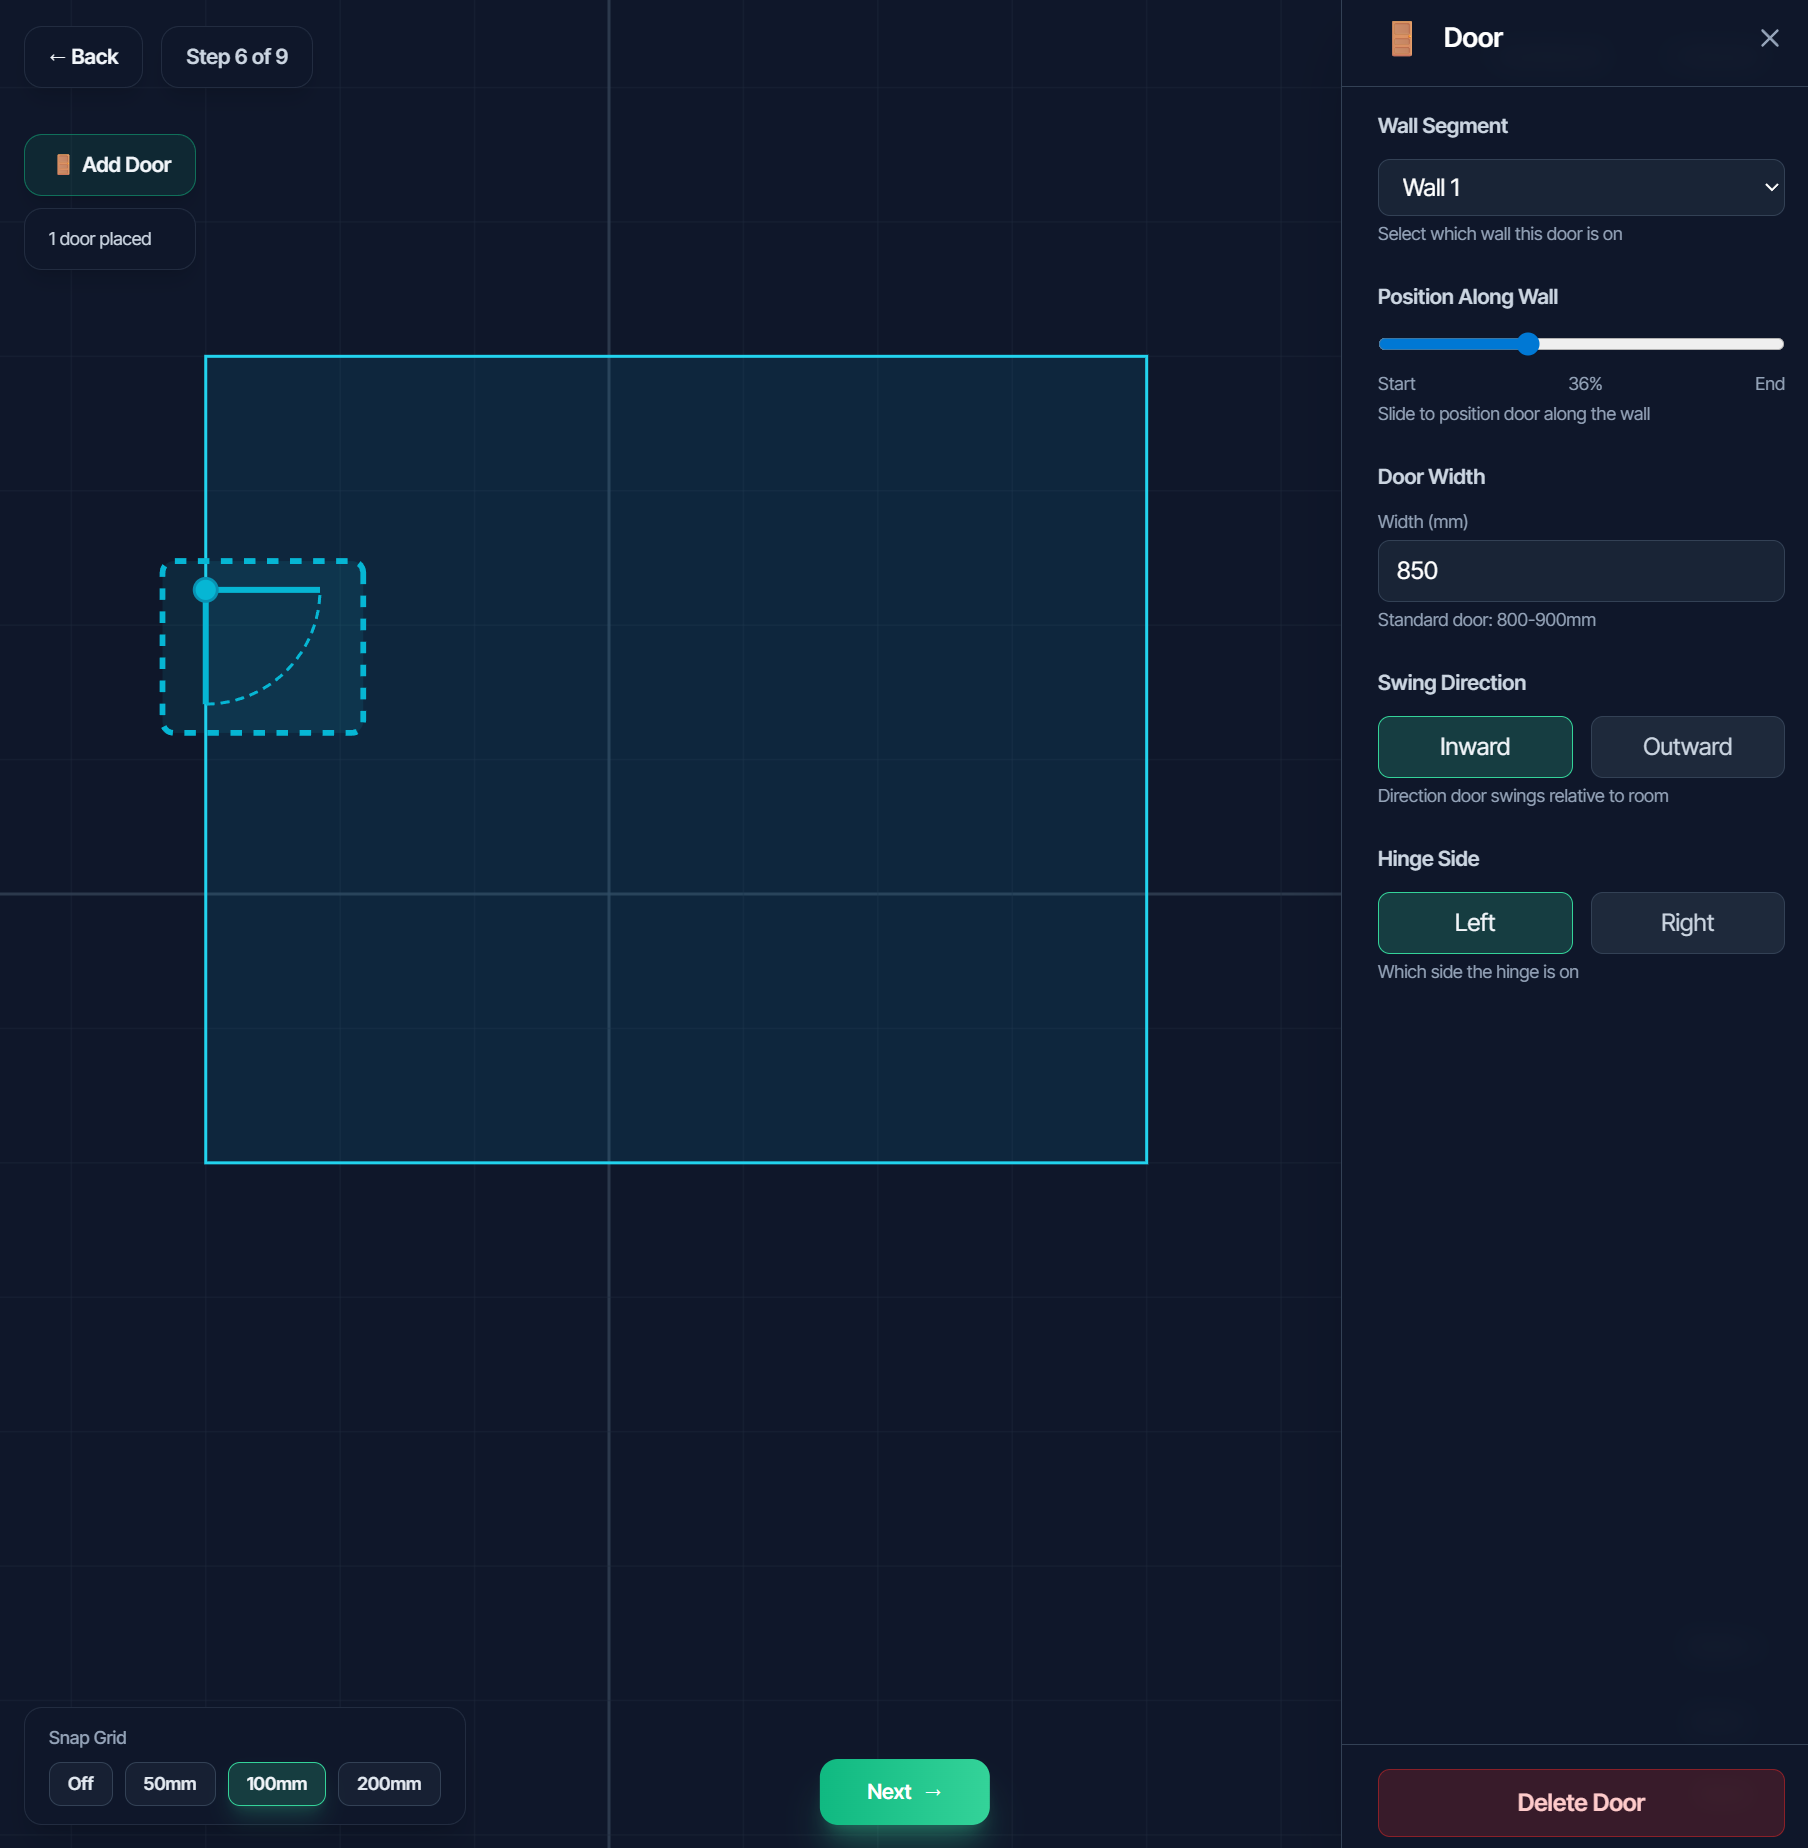
Click on a wall to add a door. You can change the placement, hinge side and open side.
Step 6: Add Furniture (Optional)
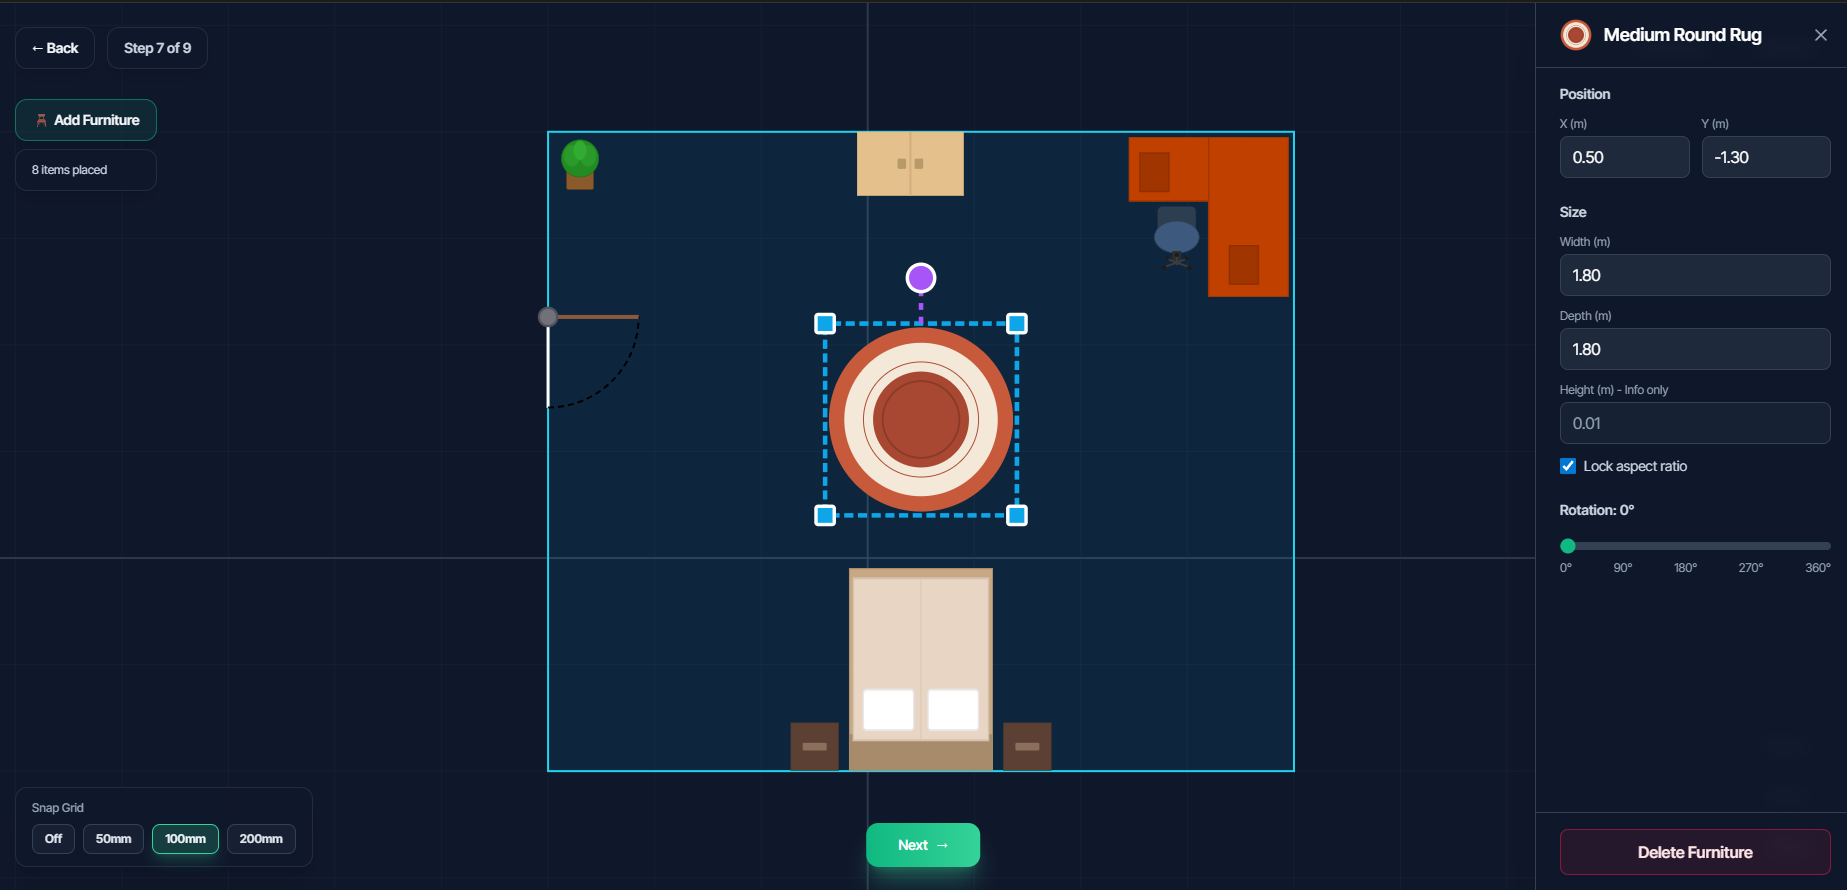
Add furniture to your room to visualize obstacles and help with zone placement. This step is optional but helps you understand how furniture affects sensor coverage.
Adding Furniture
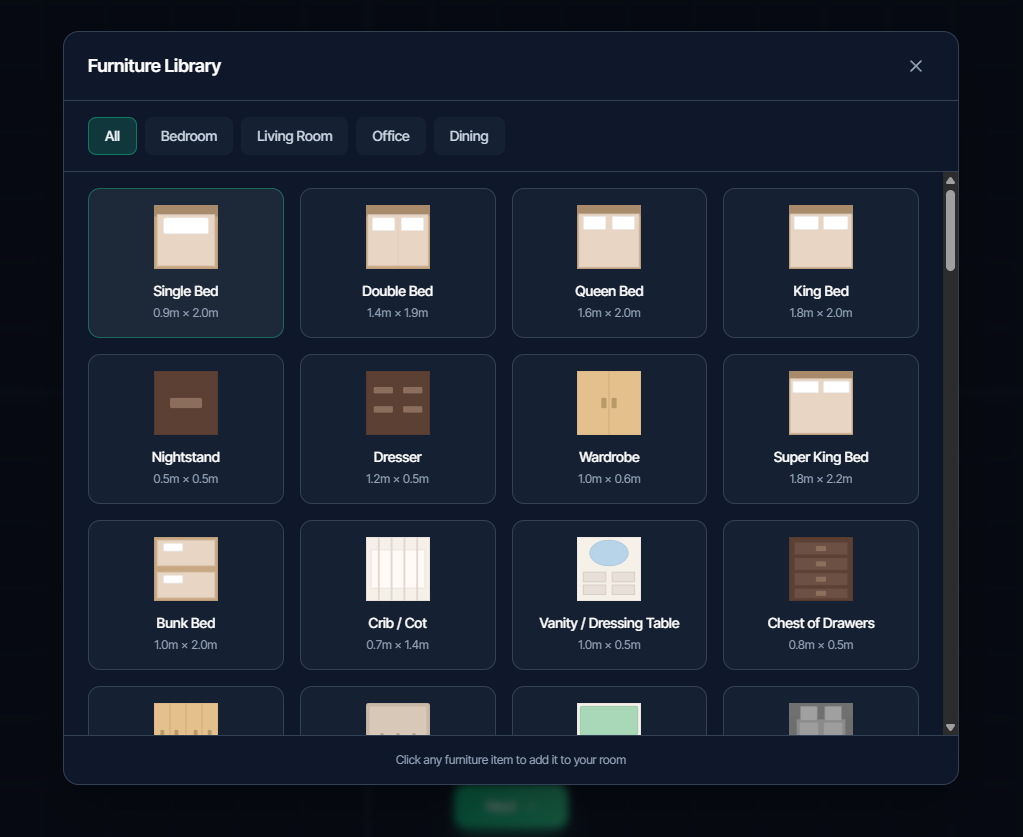
- Click Add Furniture or the furniture icon
- Select a furniture type from the catalog
- Click in the room to place it
- Drag to reposition as needed
Available Furniture Types
- Sofa / Couch
- Bed (various sizes)
- Desk
- Dining table
- Coffee table
- Chair / Armchair
- Wardrobe / Closet
- TV / Monitor
Adjusting Furniture
- Move: Drag the furniture item
- Rotate: Use the rotation handle or enter degrees
- Resize: Drag corner handles
- Delete: Select and press Del
Tip: Place furniture where it actually is in your room - this helps identify areas that may block detection and assists with accurate zone placement later.
Why Add Furniture?
- Visualize potential blind spots behind large items
- Plan zone placement around seating areas
- Understand how room layout affects sensor coverage
- Create a realistic representation of your space
Step 7: Device Placement
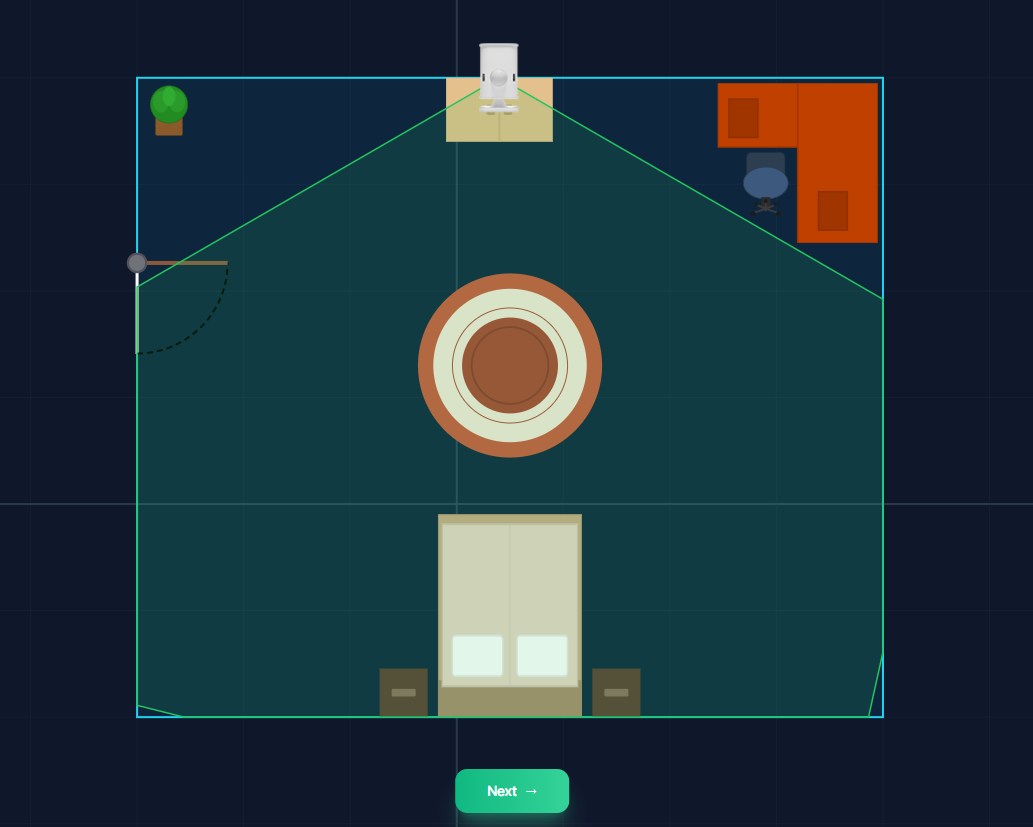
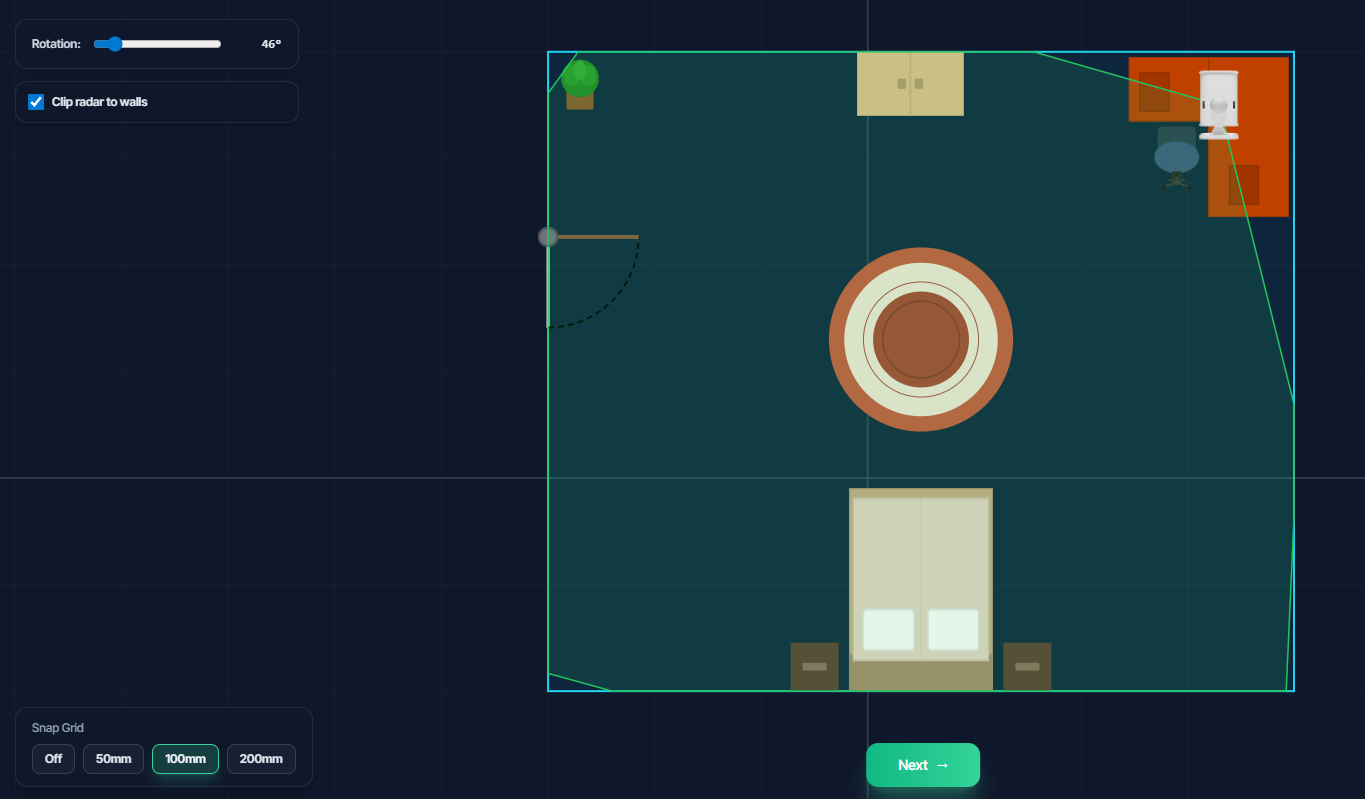
Position the sensor icon to match where your device is physically installed in the room.
Positioning
- Drag the sensor icon to move it
- Use the rotation slider to set the direction the sensor is facing
- The field-of-view cone shows the detection area
Installation Angle
If your sensor is mounted at an angle (tilted down from the ceiling or wall), you can set the installation angle. This helps calculate accurate target positions.
Completing the Wizard
Click Finish to save your configuration. You'll be taken to the Live Dashboard where you can:
- Watch real-time target tracking
- Open the Zone Editor to create detection zones
- Access the Room Builder to add furniture and doors
Next Steps
- Live Dashboard - See your device in action
- Zone Editor - Create detection zones
- Room Builder - Add walls, doors, and furniture