Room Builder
Build a room layout in Zone Configurator and use it as the basis for visualising sensors and detection zones.
The Room Builder lets you create a visual representation of your room, including walls, doors, and furniture. This helps you place zones accurately and understand how your sensor covers the space.
Accessing Room Builder
- From the Live Dashboard, click the menu icon (☰)
- Select Room Builder
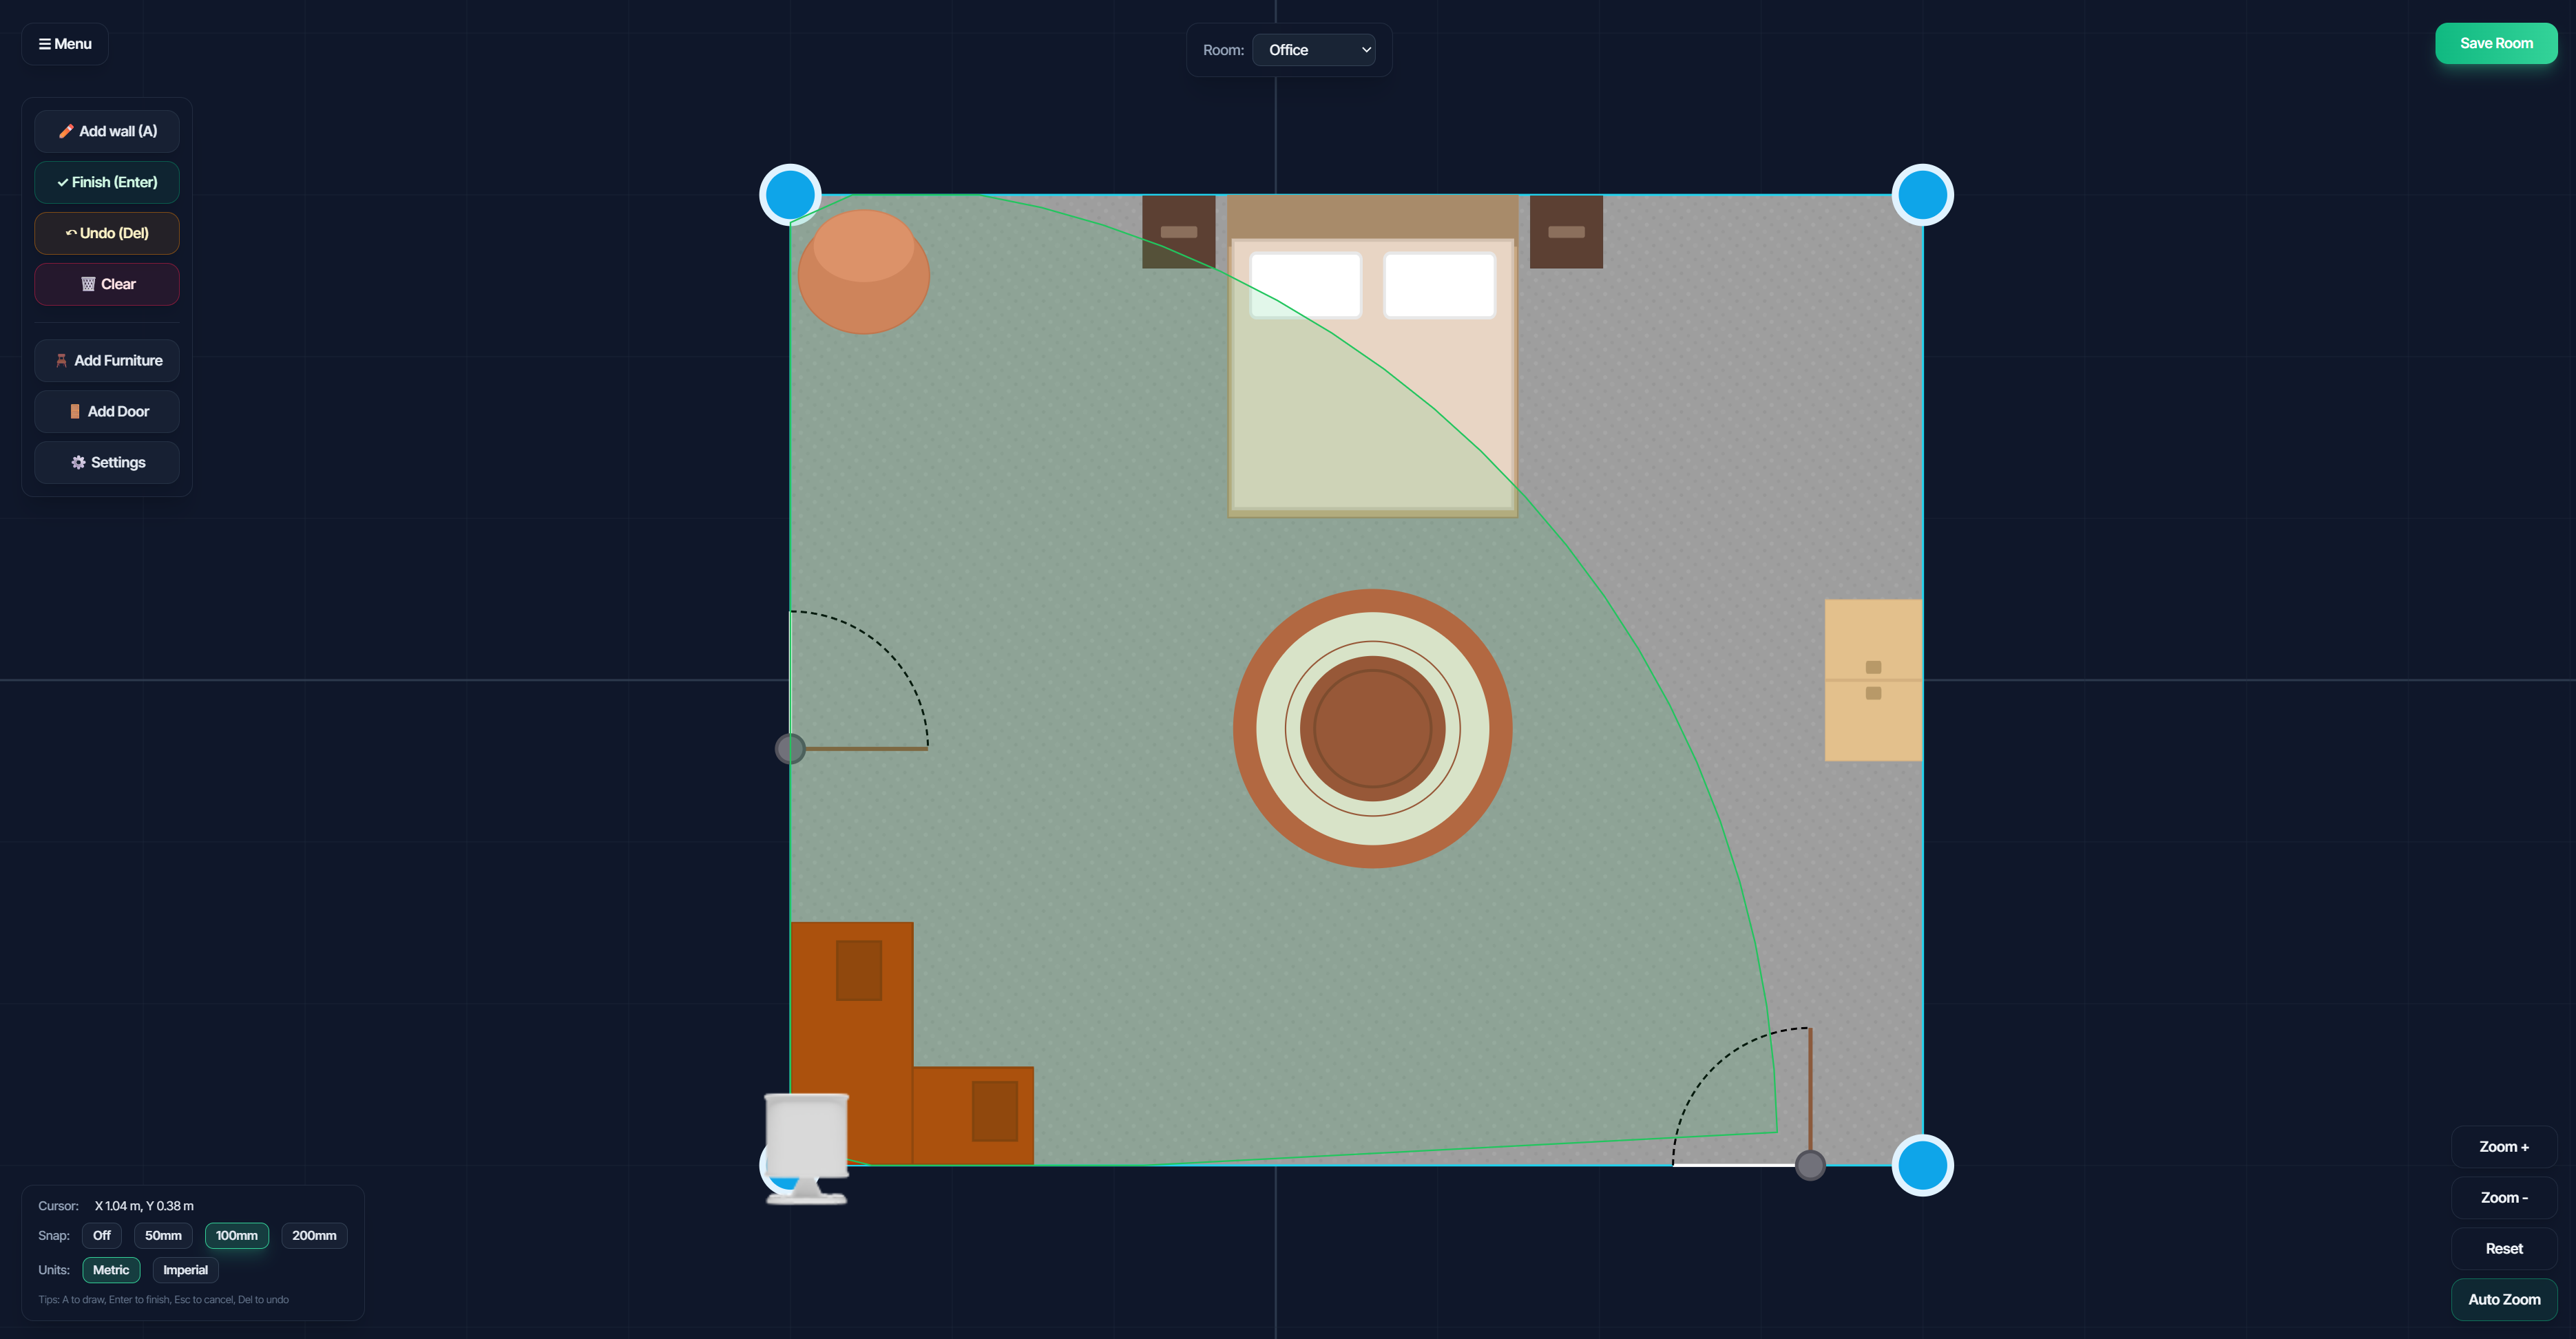
Drawing Room Outlines
Keyboard Shortcuts
| Key | Action |
|---|---|
| A | Add point at cursor position |
| Enter | Complete and close the shape |
| Esc | Cancel current drawing |
| Del | Delete the last placed point |
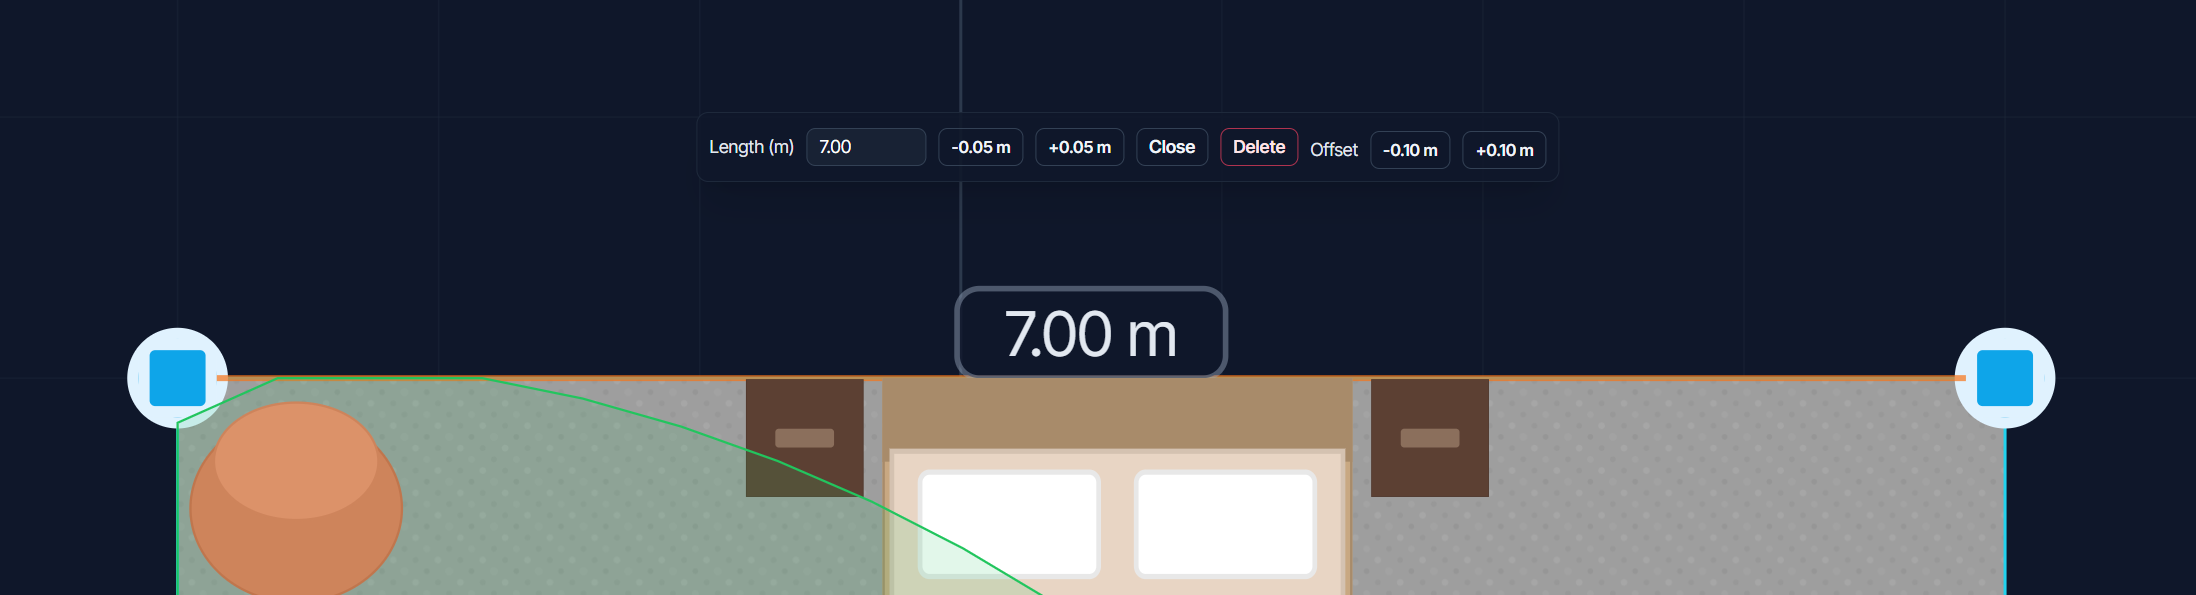
Editing Walls
After drawing, you can adjust your walls:
- Click on a wall segment to select it
- Drag the segment to move it
- Drag corner points to reshape
- Use the properties panel to enter exact dimensions
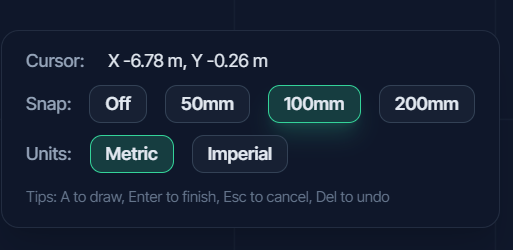
Snap Grid
Enable the snap grid for precise placement:
- Walls snap to grid intersections
- Makes it easier to create straight, aligned walls
- Toggle grid in display settings
Adding Doors
Doors help visualize entry points and can be used with entry zones for detection.
Placing a Door
- Click Add Door
- Click on a wall segment where the door should go
- Adjust the door position along the wall
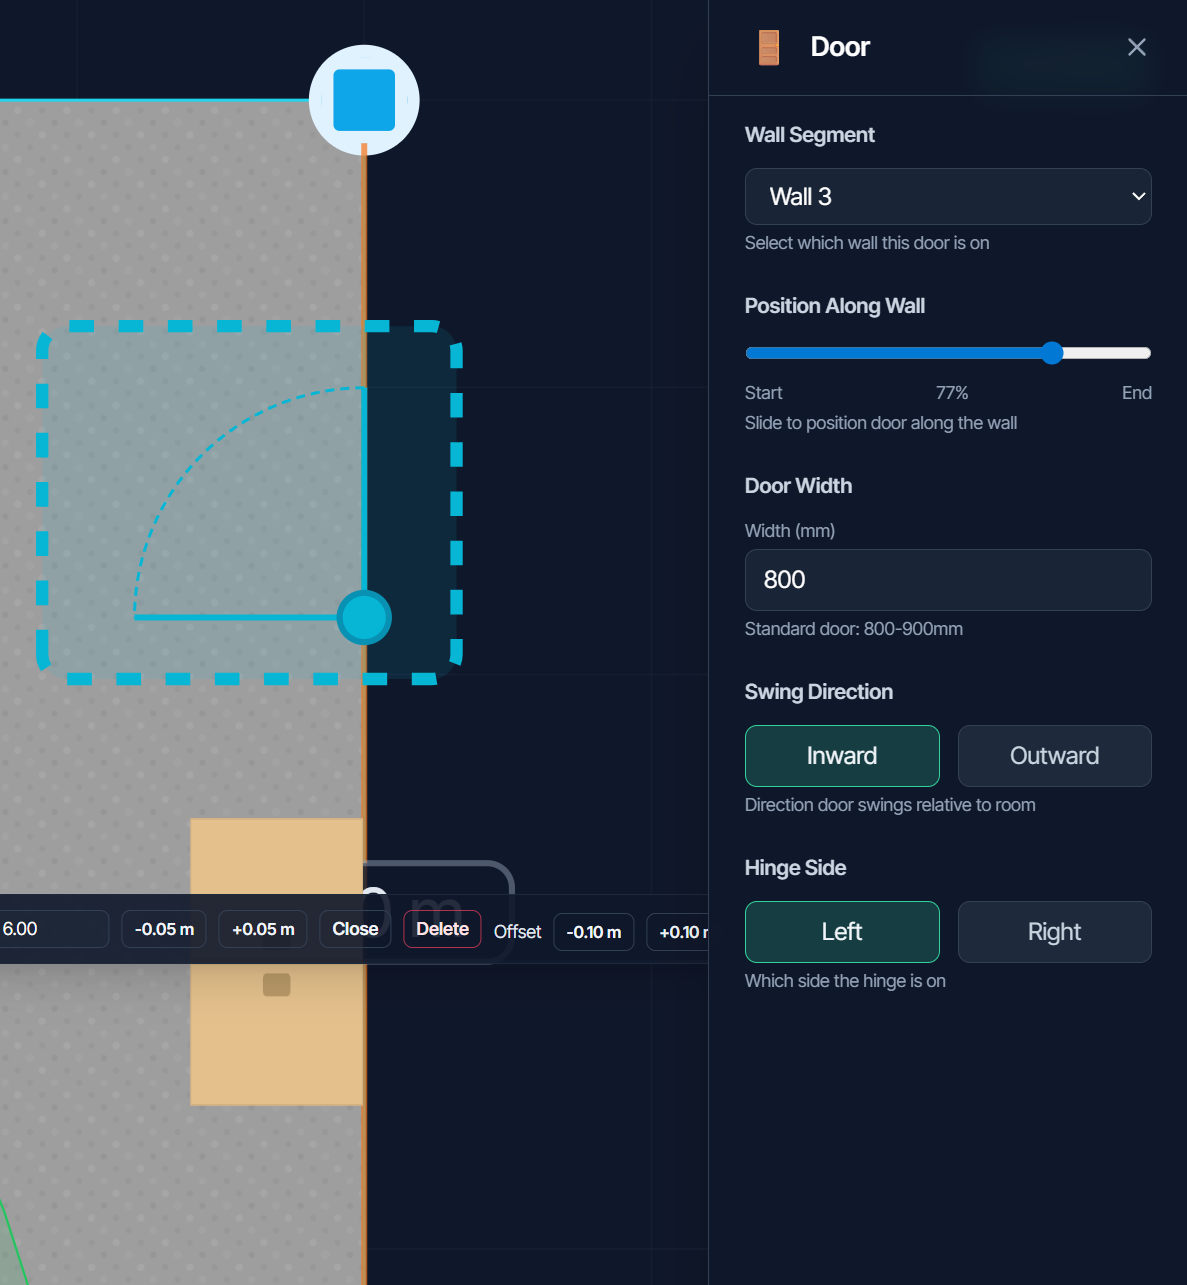
Door Properties
| Property | Description |
|---|---|
| Width | Door opening width (in cm) |
| Swing | Direction the door opens (left/right/both) |
| Position | Location along the wall segment |
Adding Furniture
Furniture helps visualize the room and identify areas that may affect detection.
Placing Furniture
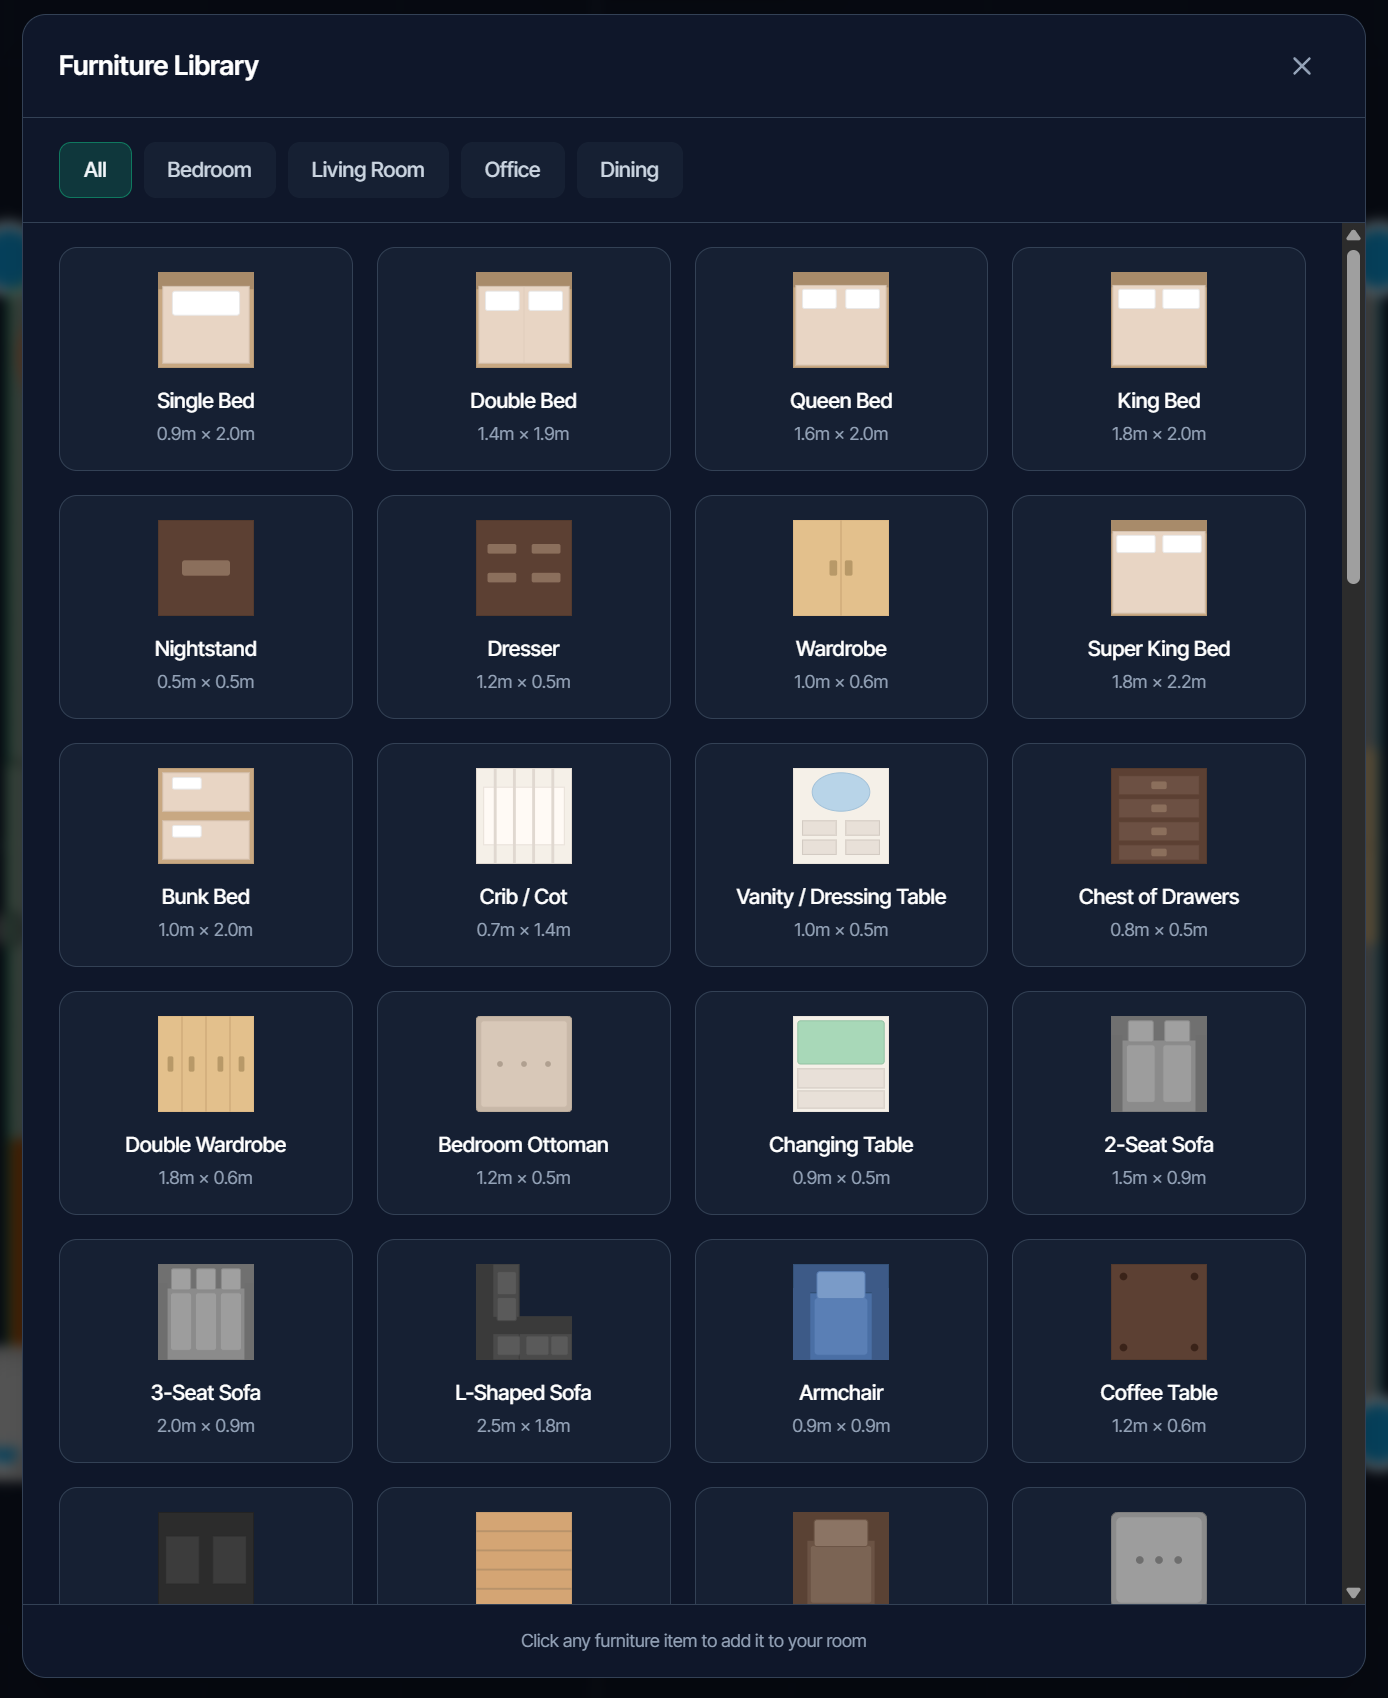
- Click Add Furniture
- Choose from the furniture catalog (sofa, bed, desk, table, chair, etc.)
- Click in the room to place it
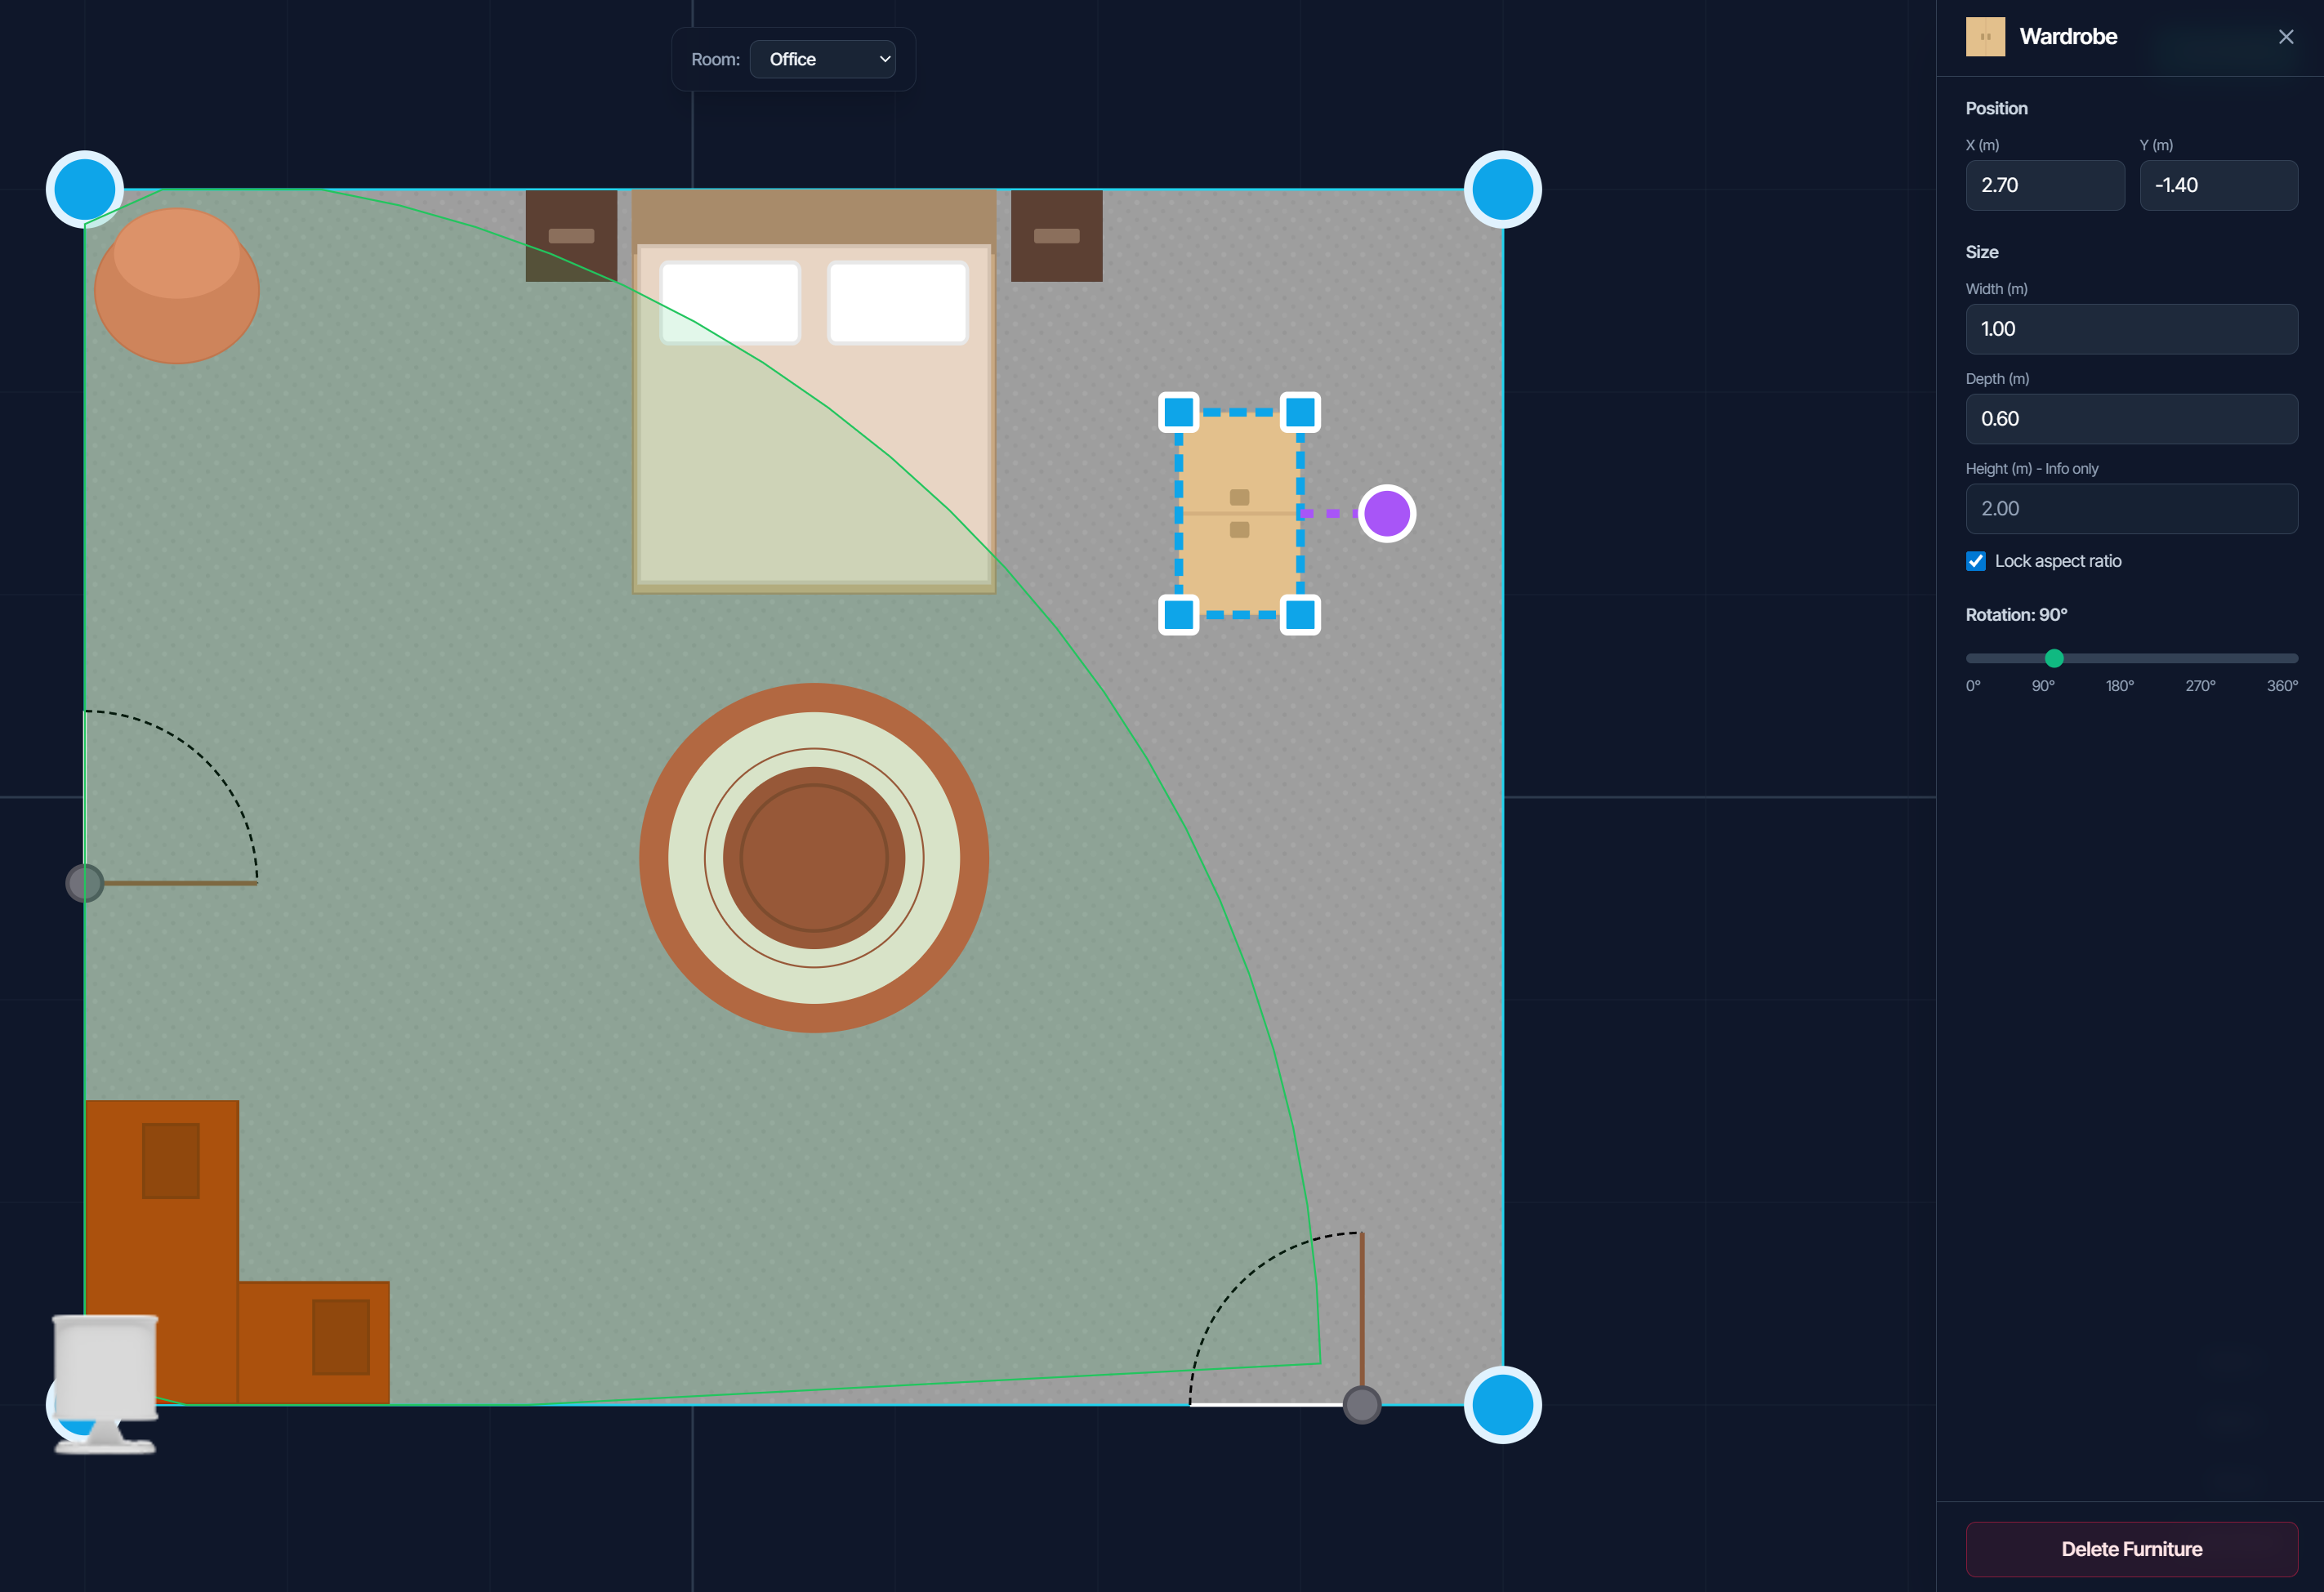
- Drag to reposition
Furniture Controls
| Action | How |
|---|---|
| Move | Drag the furniture item |
| Rotate | Use the rotation handle or enter degrees |
| Resize | Drag the corner handles |
| Delete | Select and press Del or click Delete |
Available Furniture
- Sofa / Couch
- Bed (single, double, king)
- Desk
- Dining table
- Coffee table
- Chair / Armchair
- Wardrobe / Closet
- TV / Monitor
- Plant
- Custom rectangle
Device Placement
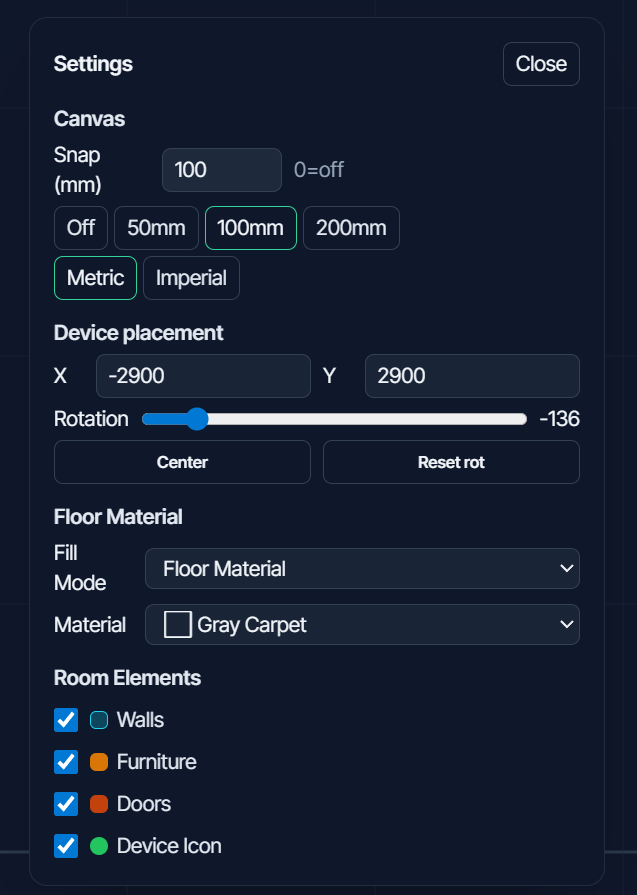
Position the sensor icon to match your physical installation.
Setting Device Position
- Drag the sensor icon to the correct location
- Use the rotation slider in the settings menu to set which direction it faces
- The field-of-view cone updates to show coverage
Floor Materials
Customize the floor appearance for better visualization:
- Open Display Settings
- Select Floor Material
- Choose from: Wood, Tile, Carpet, Concrete, or None
Display Settings
Toggle what's visible in the room view:
| Setting | Description |
|---|---|
| Show Walls | Toggle room outline visibility |
| Show Doors | Toggle door visibility |
| Show Furniture | Toggle furniture visibility |
| Show Device | Toggle sensor icon and FOV cone |
| Show Grid | Toggle snap grid overlay |
| Show Zones | Toggle zone overlay |
Saving Your Room
Click Save to store your room configuration. The layout persists across sessions and is used in:
- Live Dashboard
- Zone Editor
- Heatmap view
Tips for Accurate Room Building
- Measure your room - Use a tape measure for accurate dimensions
- Start with walls - Draw the outline first, then add details
- Position furniture where it blocks detection - This helps identify dead zones
- Place the device accurately - Tracking visualization depends on correct device position
- Use the grid - Enable snap grid for cleaner, aligned layouts
Next Steps
- Zone Editor - Create detection zones on your room layout
- Live Dashboard - See targets move through your room
- Entry/Exit Zones - Set up doorway detection