Zone Editor
Create and edit detection zones with Zone Configurator. Define the areas you want your presence sensor to monitor.
The Zone Editor lets you create and manage detection zones for your EPL or Pro sensor. Zones trigger automations when targets enter or exit specific areas of your room.
Note: Zone creation is available for Everything Presence Lite (EPL) and Everything Presence Pro. EP1 devices use distance-based detection instead.
Accessing the Zone Editor
- From the Live Dashboard, click the menu icon (☰)
- Select Zone Editor
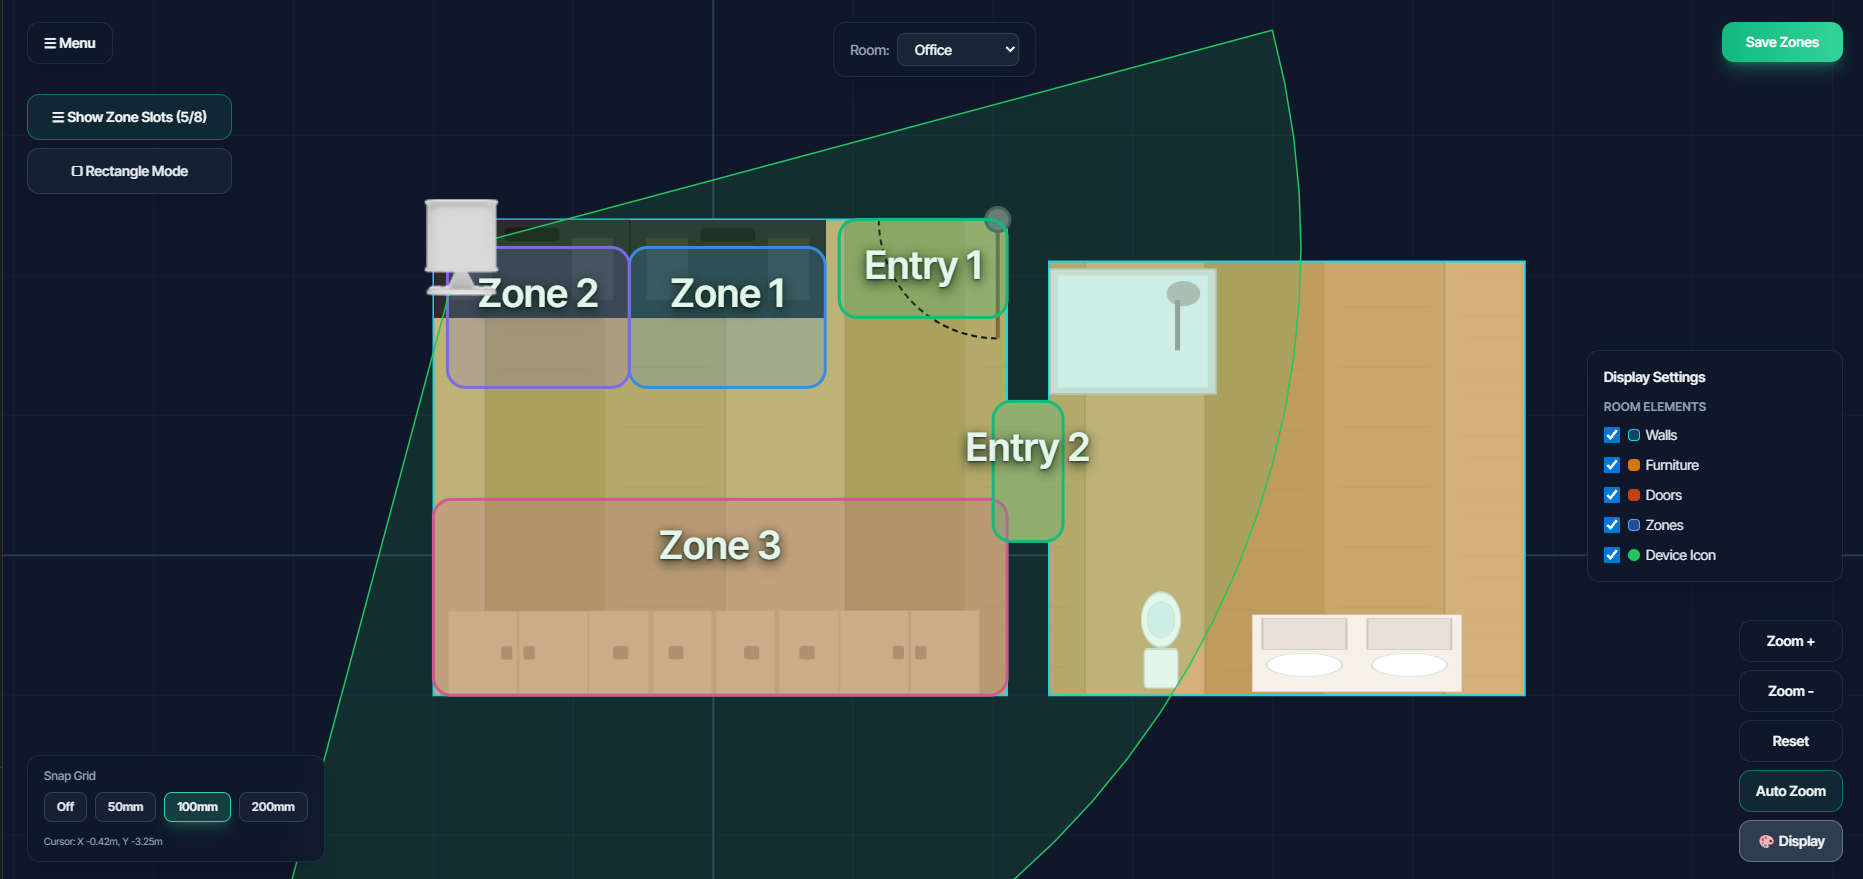
Zone Types
Regular Zones (Detection Areas)
Standard zones that report occupancy when a target is detected inside them. Use these for:
- Lighting control (desk area, seating area)
- Room subdivisions
- Activity-specific triggers
Exclusion Zones (Occupancy Masks)
Areas where detection should be ignored. The sensor still tracks targets, but they won't trigger occupancy in exclusion zones. Use these for:
- Windows (to ignore passing traffic outside)
- Areas with moving objects (fans, curtains, pets)
- Doorways to adjacent rooms
Entry Zones
Special zones that track entry and exit events. When combined with Assumed Presence, these enable advanced scenarios like:
- Counting people entering/leaving
- Knowing someone is home even when stationary outside detection range
- Entry notifications
Drawing Modes
The Zone Editor offers two drawing modes, which can be toggled using the mode buttons at the top of the screen.
Rectangle Mode
Uses pre-defined zone slots for quick, simple zone creation. This is the default mode.
Available Slots:
- Zone 1-4 - Regular detection zones
- Exclusion 1-2 - Exclusion zones
- Entry 1-2 - Entry/exit zones
Polygon Mode
Allows freeform polygon drawing for complex shapes that don't fit a rectangle.
Creating Zones
Creating Zones in Rectangle Mode
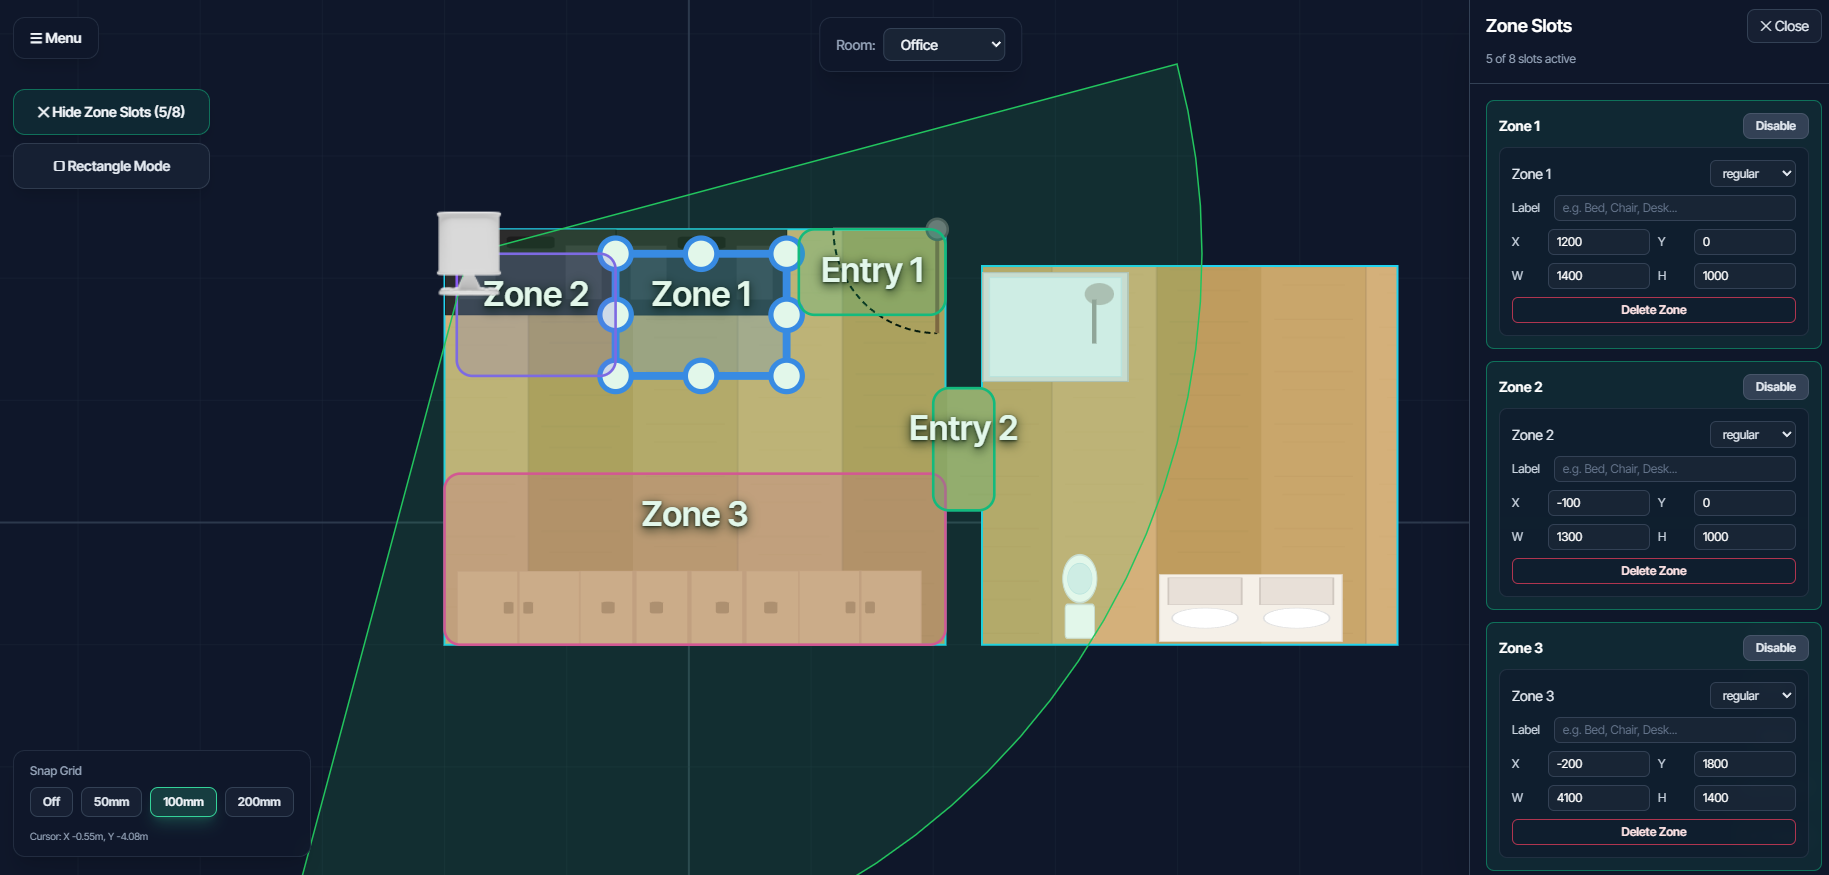
- Click Show Zone Slots in the toolbar to reveal the zone slots panel
- Find the slot you want to use (e.g., "Zone 1" or "Exclusion 1")
- Click the Enable button next to that slot
- A rectangular zone appears on the canvas at a default position
- Drag the zone to reposition it
- Use the corner/edge handles to resize
Creating Zones in Polygon Mode
- Switch to Polygon Mode using the mode toggle
- Click + Zone, + Exclusion, or + Entry button depending on the zone type needed
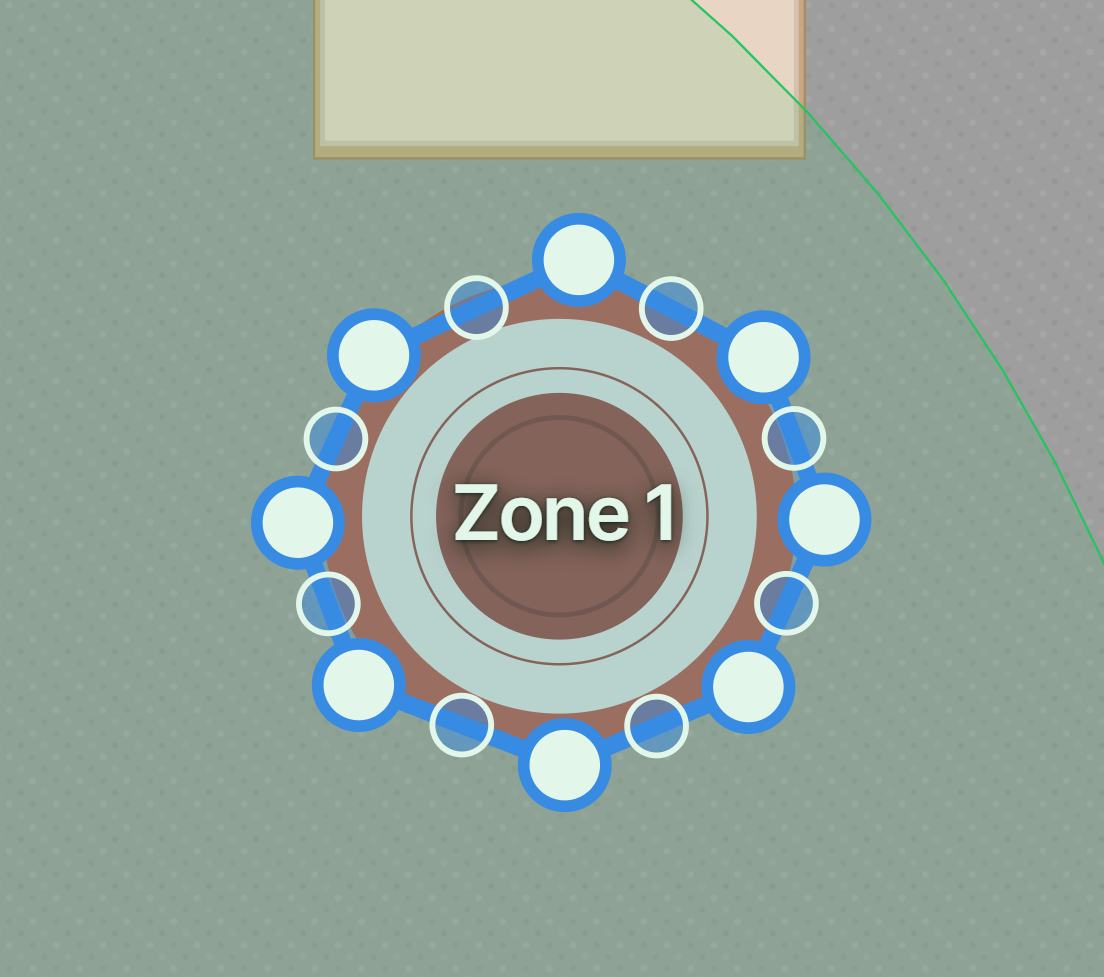
- A triangular starter zone appears on the canvas
- Click on the zone to select it
- Drag corner points to reshape the polygon
- Double-click an edge to add new points for more complex shapes
Switching Between Modes
You can switch between Rectangle and Polygon modes at any time. If you have existing zones, a confirmation dialog will appear warning that mode-specific zones may be affected.
Editing Zones
In Rectangle Mode
- Click Show Zone Slots to view all zone slots
- Enabled zones show their current coordinates (X, Y, Width, Height)
- To adjust a zone:
- Drag the zone on the canvas to reposition
- Drag handles to resize
- Enter precise values in the slot's coordinate fields
- To remove a zone, click Disable next to its slot
In Polygon Mode
- Click on a zone to select it
- Drag the zone to move it
- Drag corner points to reshape
- Double-click an edge to add a new point
- Use the Delete button to remove the zone
Zone Properties
| Property | Description |
|---|---|
| Name/Label | Label shown on the zone (e.g., "Desk", "Sofa") |
| Type | Regular, Exclusion, or Entry (determined by slot in Rectangle mode) |
| X, Y | Position coordinates (in mm from sensor) |
| W, H | Width and Height (in mm) - Rectangle mode only |
Understanding Coordinates
Zone coordinates are measured in millimeters from the sensor position:
- X - Left/right position (negative = left, positive = right)
- Y - Distance from sensor (always positive, away from sensor)
Saving Zones to Device
After creating or editing zones, click Save to Device to push the configuration to your device.
Important: Zones are not active until saved to the device. The button highlights when you have unsaved changes.
What Happens When You Save
- Zone coordinates are sent to the device via Home Assistant
- The device firmware processes the zones
- Zone occupancy entities update in real-time
- Zones persist on the device (survive restarts)
Zone Limits
EPL and Pro support:
- 4 regular zones (Zone 1-4)
- 2 exclusion zones (Exclusion 1-2)
- 2 entry zones (Entry 1-2) - EPL only
If you need more coverage:
- Combine smaller areas into larger zones
- Use exclusion zones strategically
- Consider zone placement priority
Troubleshooting Zones
| Issue | Solution |
|---|---|
| Zone not activating | Check target is within zone boundaries on live view |
| Zone always active | Zone may be too large or overlapping sensor position |
| Save fails | Verify device is online and connected |
| Zones reset after restart | Ensure you clicked "Save to Device" |
| Zone activates unexpectedly | Check for exclusion zones to mask false triggers |
| Can't find zone slots | Click "Show Zone Slots" button in toolbar |
Next Steps
- Entry/Exit Zones & Assumed Presence - Advanced entry detection
- Live Dashboard - Watch zones activate in real-time
- Room Builder - Add room context for better zone placement