Everything Presence Pro — Integrate the Carbon Dioxide (CO2) Module
Add the optional CO2 module to Everything Presence Pro. Follow the hardware and firmware setup guide and check the sensor readings in Home Assistant.
Enhance your Everything Presence Pro with CO₂ monitoring for air quality awareness.
What You Need
- Everything Presence Pro (powered off)
- CO₂ sensor module (SCD40, sold separately, available here)
Remove the front cover
We need to remove the front cover of the EP Pro first to install the CO2 sensor. Find more details here on the best way to do that.
Install the CO₂ Sensor
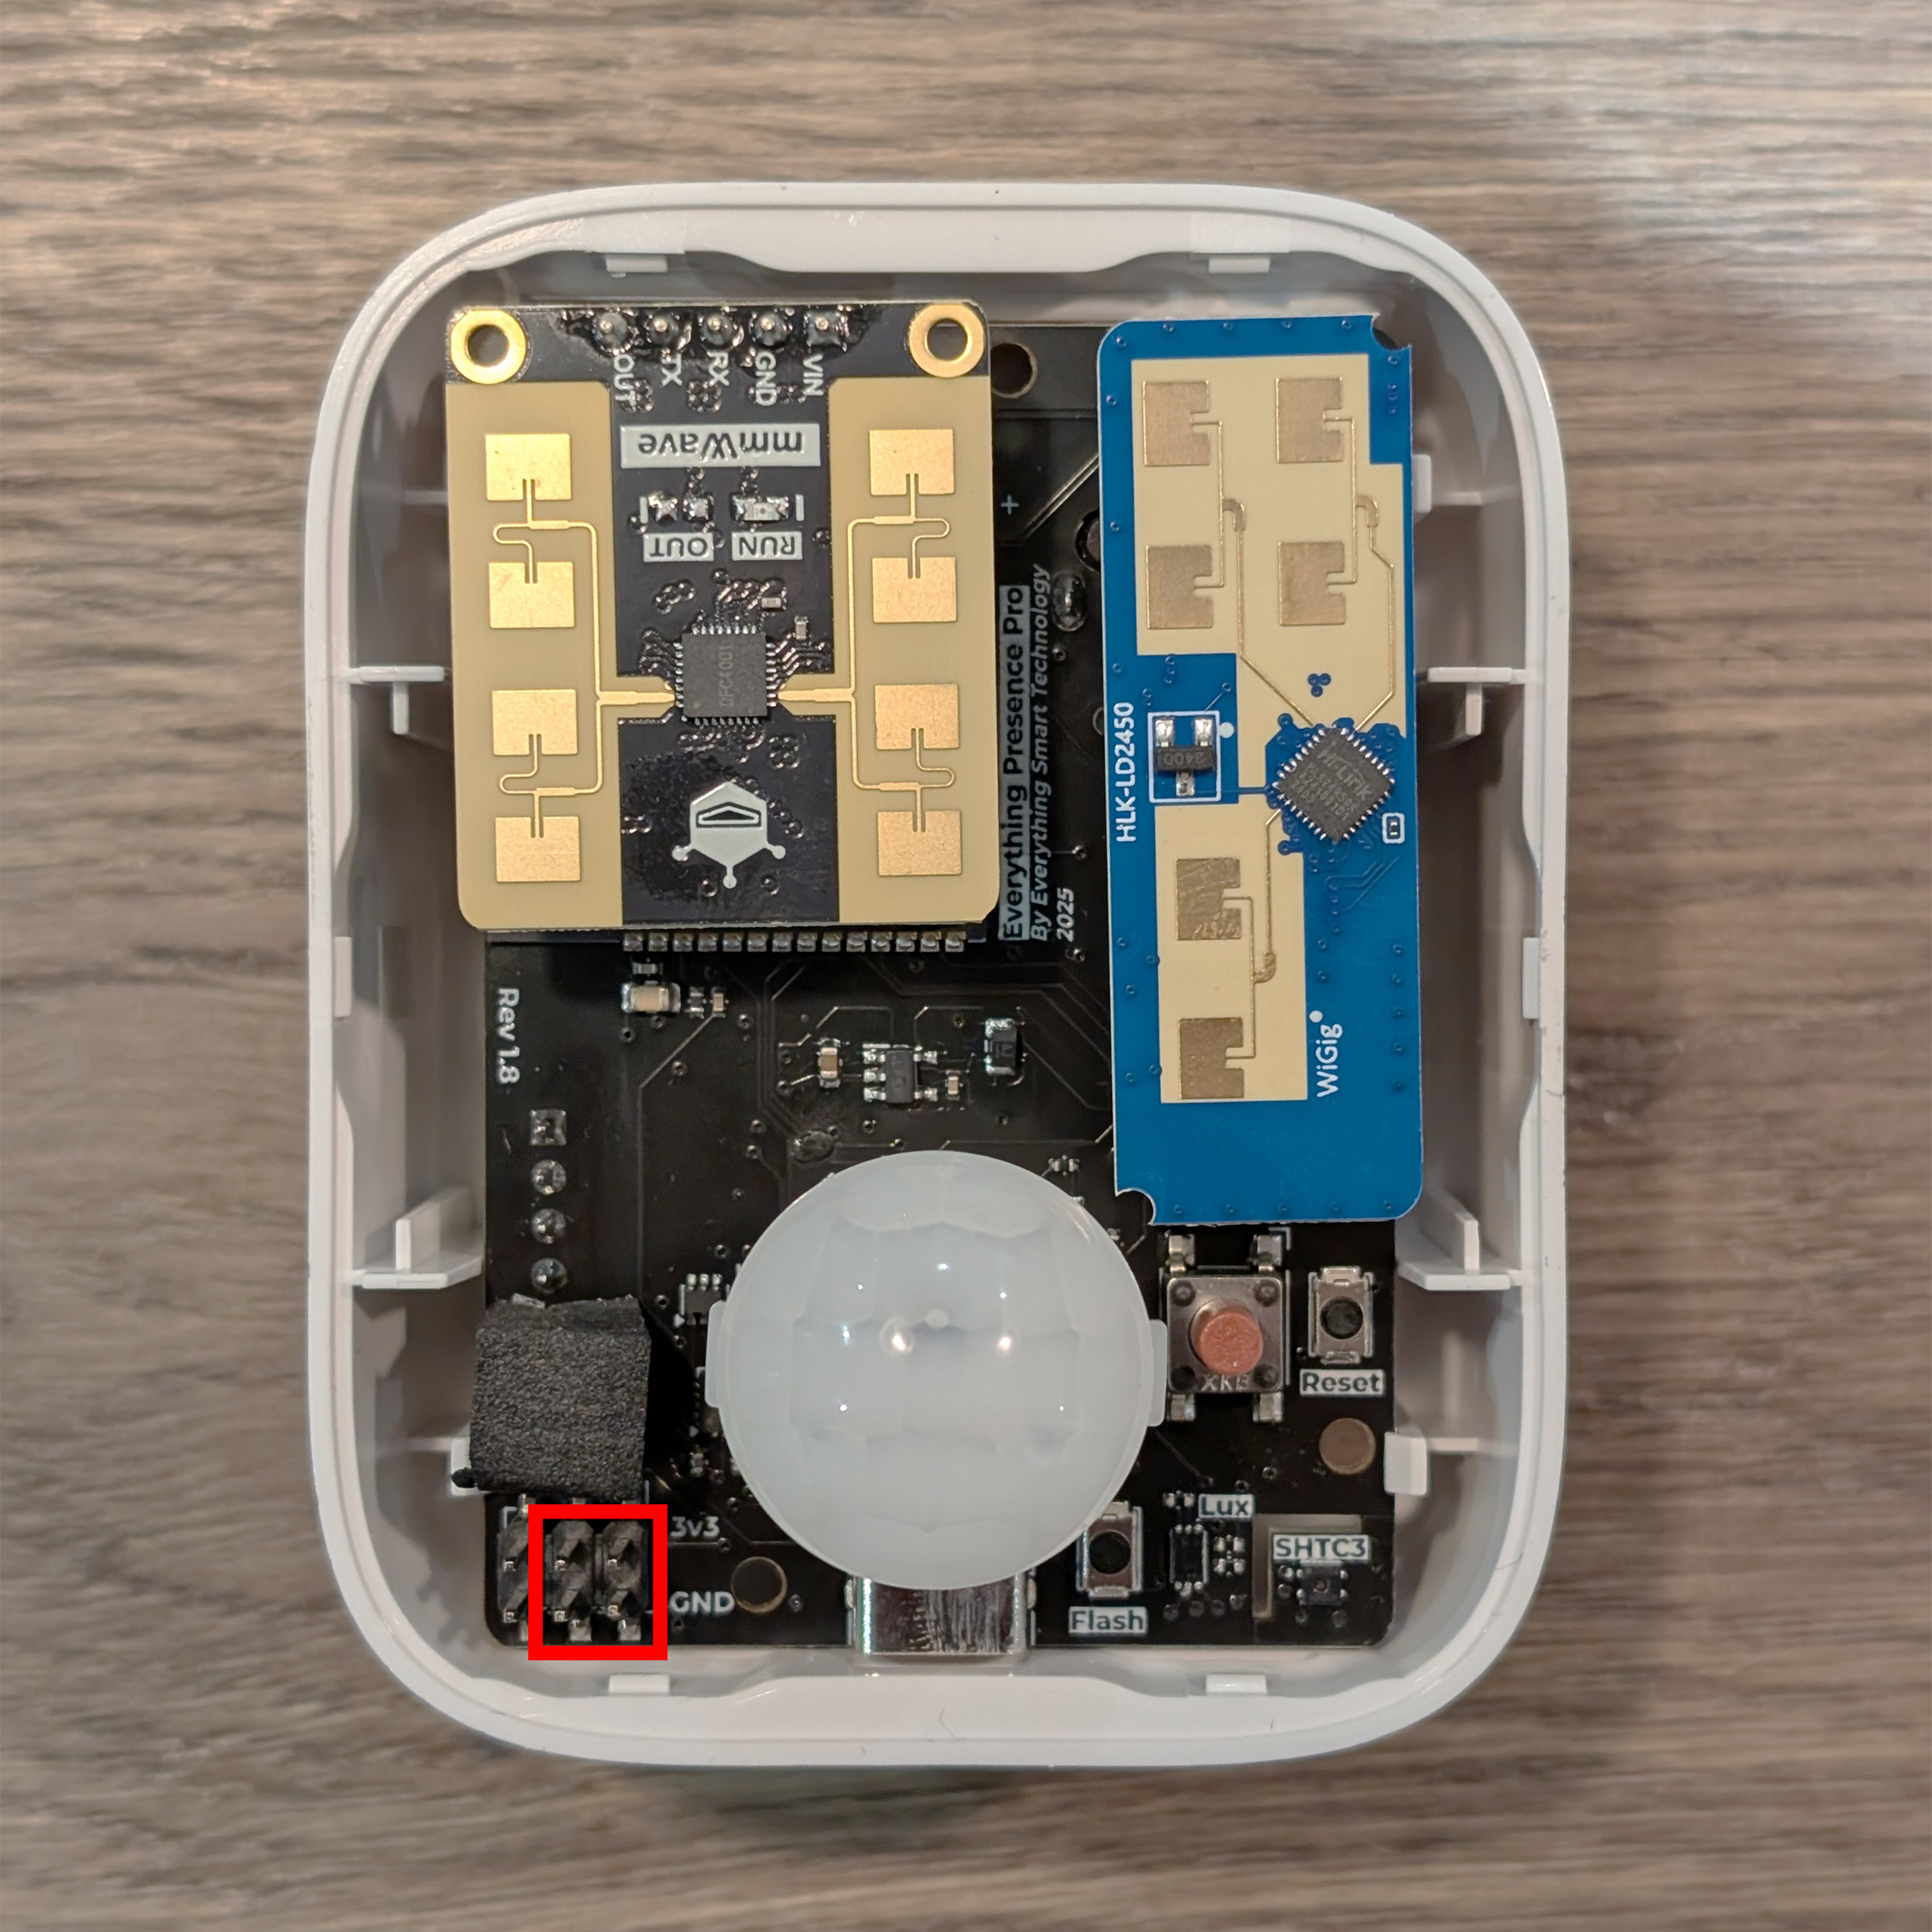
Locate the GPIO Header
- Remove power from your Pro device
- Locate the GPIO header on the Pro board
Connect the Module
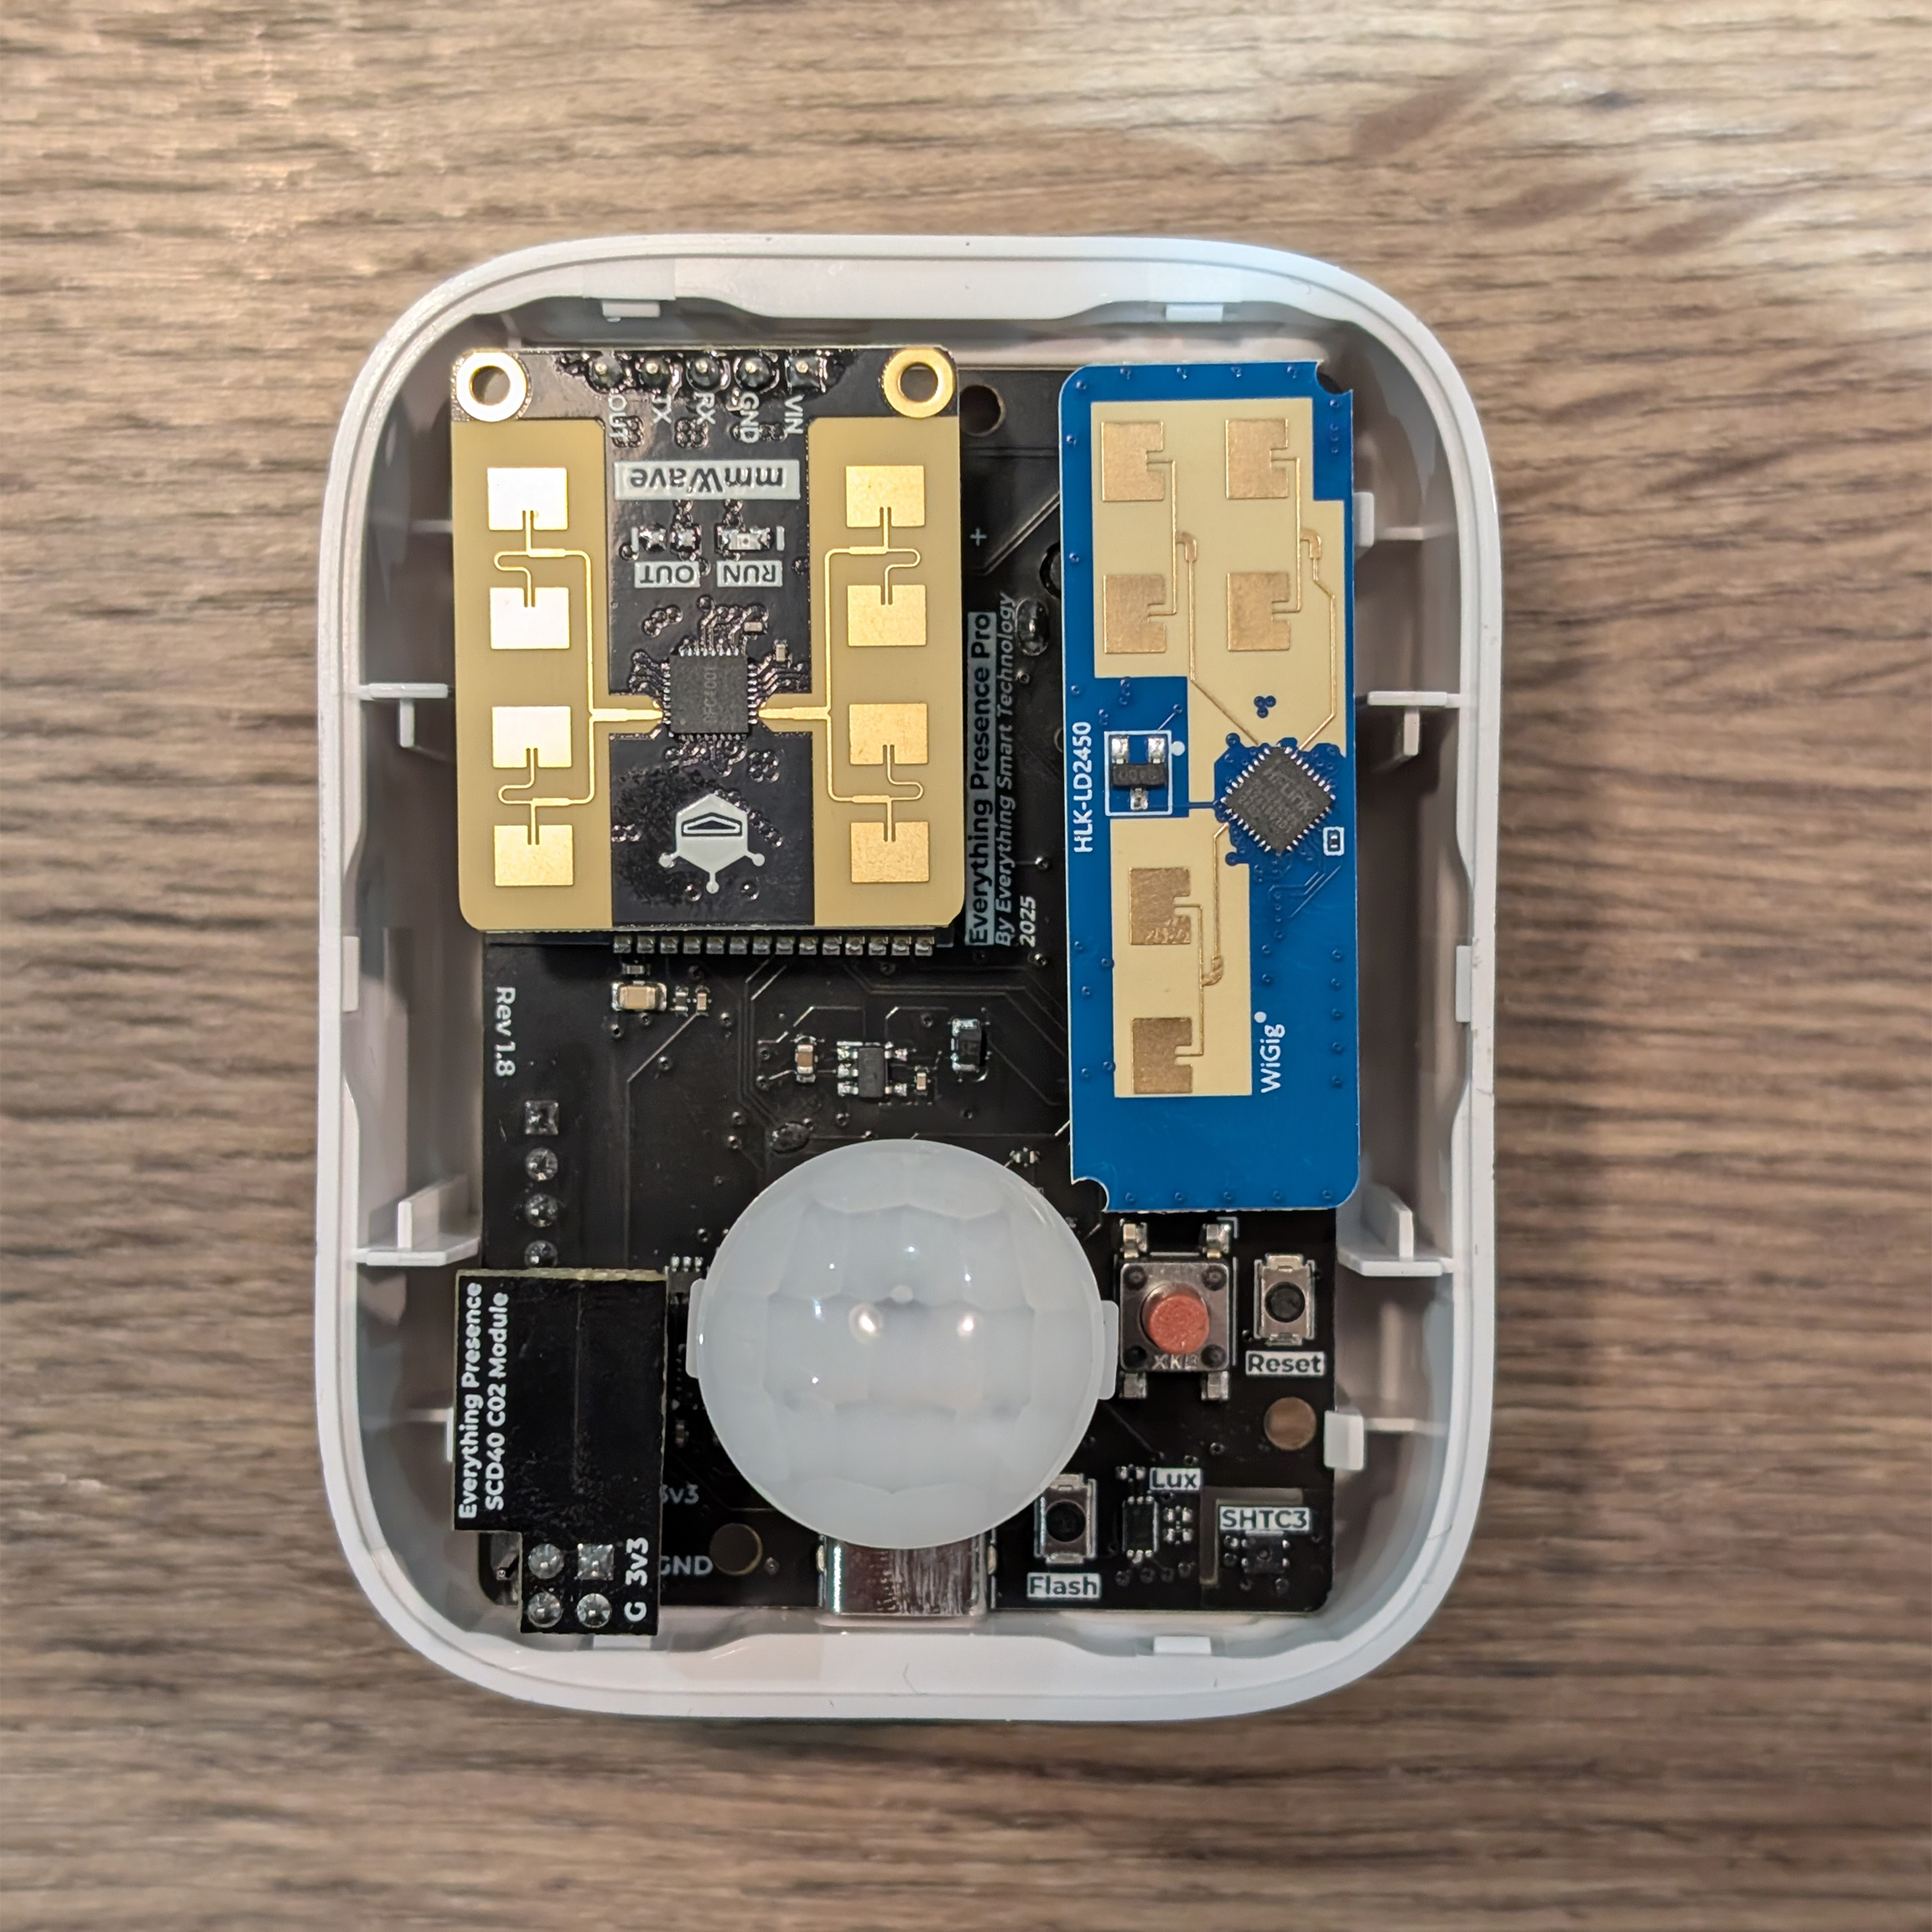
- Align the CO₂ sensor module with the GPIO pins, ensuring:
- 3.3V on the sensor matches 3.3V on the board
- GND on the sensor matches GND on the board
- SDA (GPIO4) and SCL (GPIO16) pins are correctly aligned
- Firmly push the CO₂ module onto the GPIO pins
Warning
Important: The module only fits one way. Do not force it if the pins don't align.
TipThere is a foam cushion that will sit on the PCB to support the CO2 sensor pre-installed.
Enable CO₂ in Firmware
After physically installing the module, you need to enable CO₂ support in the firmware.
Option 1: Switch Firmware from Home Assistant (Recommended)
If your Pro is already connected to Home Assistant:
- Go to Settings → Devices & Services → ESPHome
- Find your Pro device and click Configure
- Locate the CO2 Sensor select entity
- Change from Disabled to Enabled
- Press the Apply update button
- Wait for the device to update and restart (takes 1-2 minutes)
The CO₂ sensor entities will appear automatically after the restart.
Option 2: Flash via Web Browser
Warning
This option will be available soon, use option 1 for now.
If you prefer to flash directly or are setting up for the first time:
- Connect your Pro to your computer via USB-C
- Visit the firmware flasher below
- Select your options:
- Network: WiFi or Ethernet (match your current setup)
- CO2 Module: Yes
- Bluetooth Proxy: Your preference
- Click Connect and follow the on-screen instructions
/flash/everything-presence-pro.html
Verify in Home Assistant
Once the firmware update is complete, the CO₂ sensor should automatically appear in Home Assistant:
- CO2 - Carbon dioxide concentration in ppm
- Calibrate CO2 - Button to calibrate the sensor
Understanding CO₂ Readings
The CO₂ sensor measures carbon dioxide concentration in parts per million (ppm). Here's what typical readings mean:
| CO₂ Level | Air Quality | Action |
|---|---|---|
| 400-450 ppm | Fresh outdoor air | Ideal |
| 450-700 ppm | Good indoor air | No action needed |
| 700-1000 ppm | Acceptable | Consider ventilation |
| 1000-2000 ppm | Poor | Open windows |
| 2000+ ppm | Very poor | Improve ventilation immediately |
Tip: CO₂ levels are an excellent indicator of ventilation quality. Use automations to trigger fans, send notifications, or change the LED colour when levels exceed your preferred threshold.
LED Environmental Mode
With the CO₂ module installed, you can use Environmental Mode for the RGB LED:
- Set LED Mode to "Environmental" or "Environmental + Presence"
- The LED will indicate air quality:
- Green (steady) - Good air quality (< 800 ppm)
- Yellow (slow pulse) - Moderate (800-1200 ppm)
- Red (fast pulse) - Poor (> 1200 ppm)
See LED Modes & Customization for more details.
Calibrating the CO₂ Sensor
The SCD40 CO₂ sensor is factory-calibrated but may need recalibration over time for best accuracy.
When to Calibrate
- After installing the sensor for the first time
- If readings seem consistently off by more than 50-100 ppm
- After the sensor has been stored for extended periods
- Periodically (every 6-12 months) for best accuracy
How to Calibrate
- Place the Pro in fresh outdoor air, or near an open window with good airflow
- Wait at least 5 minutes for the sensor to stabilize
- In Home Assistant, find the Calibrate CO2 button entity
- Press the button to calibrate to 419 ppm (current atmospheric CO₂ average)
Important: The sensor must be exposed to fresh air during calibration. Indoor air typically has higher CO₂ levels due to human respiration.
Troubleshooting
CO₂ Entity Not Appearing
- Verify the module is firmly seated on the GPIO pins
- Check that CO₂ firmware is installed (CO2 Sensor entity should show "Enabled")
- Restart the device from Home Assistant
- If still not working, try reflashing the CO₂ firmware via USB
Readings Seem Inaccurate
- Allow 24-48 hours for the sensor to stabilize after first install
- Calibrate the sensor in fresh outdoor air
- Ensure the sensor isn't near heat sources or in direct sunlight
Environmental LED Mode Not Working
Environmental LED mode requires the CO₂ module to be installed and the CO₂ firmware variant enabled. Without the module, this mode has no effect.