Home Assistant Entities Overview
Explore Everything Presence One sensors and controls in Home Assistant and understand how the device entities work.
After adding your EP1 device to Home Assistant, you can explore its available sensors and their functions.
Overview
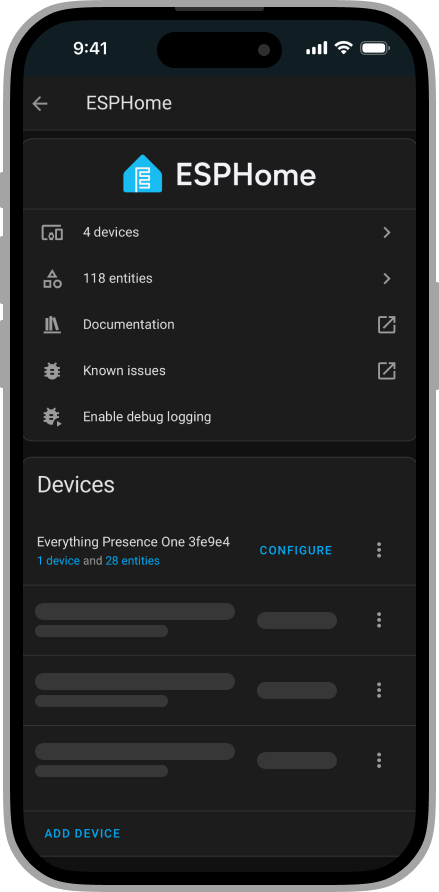
To view all sensors and entities:
- Open Home Assistant.
- Navigate to ESPHome.
- Select your EP1 device.
Temperature, Humidity, and Illuminance
- Temperature: Measures the current room temperature in Celsius using the built-in sensor. You can apply a configurable offset to adjust the reading — see the Configuration Section on the device in Home Assistant for options.
- Humidity: Reports the relative humidity level detected by the device.
- Illuminance: Measures ambient light in lux. Ensure the EP1's side slots are unobstructed for accurate readings.
Temperature, humidity, and illuminance sensors support configurable offsets in the Home Assistant UI (requires EP1 software v1.16 or higher).
Motion Detection: mmWave, PIR, and Occupancy
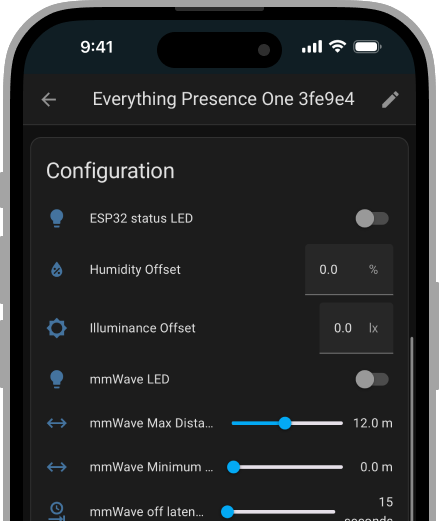
- mmWave: Detects motion with a configurable Off Latency (default: 15s) before resetting to "clear."
- PIR Sensor: Detects motion and resets after a user-configurable timeout (default: 10s).
- Occupancy: Combines mmWave and PIR data — if either detects motion, Occupancy is set to "Detected." Both must be clear before switching to "Off."
Adjusting Distance and Sensitivity (SEN0395 & SEN0609)
Tip
You must press "Set Sensitivity" or "Set Distance" for changes to take effect.
SEN0395 mmWave Sensor
- Sensitivity: Adjust how easily motion is detected (useful for filtering false positives).
- Distance: Set max detection range (up to 8m).
- On Latency: Delay before reporting presence (0-2 seconds).
- Off Latency: Delay before clearing presence (1-600 seconds, default 15s).
SEN0609 mmWave Sensor
- Trigger Sensitivity: Controls how easily initial motion is detected (scale: 0-9).
- Sustain Sensitivity: Adjusts detection sensitivity after initial motion (scale: 0-9).
- Distance Controls:
- Minimum & Maximum Distance: Define the detection range (up to 25m).
- Trigger Distance: Configurable distance for the initial trigger, can be used for more granular control.
- On Latency: Delay before reporting presence (0-2 seconds).
- Off Latency: Delay before clearing presence (10-600 seconds, default 15s).
Distance Zones (Beta, SEN0395 Only, v1.3.16b)
The latest beta firmware adds distance zones, allowing up to four configurable zones for motion detection.
- Define a start and end distance for each zone.
- Helps exclude unwanted areas (e.g., fans triggering false motion).
- Zones cannot overlap and must be in ascending order.
To enable additional zones
- Click Entities not shown → Select an entity → Enable.
- Refresh Home Assistant after 30 seconds.
- Set distances and press Set Distance to apply changes.
Advanced mmWave Mode (SEN0609 Only)
The SEN0609 sensor supports two operating modes, selectable via the mmWave Mode entity:
Presence Detection Mode (Default)
This is the standard mode optimized for reliable presence detection. The sensor reports whether someone is present and uses the sensitivity and latency settings described above.
Best for: Most users, automations that need to know if a room is occupied.
Distance and Speed Mode
Warning
Diagnostic Use Only — This mode is intended for troubleshooting and diagnostics, not for day-to-day use. For reliable presence detection in automations, use the default Presence Detection mode.
This advanced mode provides real-time tracking data about detected targets, including distance, speed, and energy readings. This is useful for debugging sensor behavior or understanding what the sensor is detecting.
Best for: Troubleshooting false positives/negatives, understanding detection patterns, temporary diagnostics.
Enabling Distance and Speed Mode
- Find the mmWave Mode entity (disabled by default)
- Click Entities not shown in your device page
- Enable the mmWave Mode entity
- Change the mode to Distance and Speed
Distance and Speed Entities
When Distance and Speed mode is enabled, these additional sensors become available (all disabled by default):
| Entity | Description |
|---|---|
| mmWave Target Distance | Distance to detected target in metres |
| mmWave Target Speed | Speed of detected target in m/s |
| mmWave Target Energy | Signal energy/strength of the detection |
| mmWave Target Count | Number of targets currently detected |
Distance Mode Settings
| Entity | Description | Range |
|---|---|---|
| Distance/Speed Update Rate | How often distance/speed values update | 0.3s, 0.4s, 0.5s |
| mmWave Threshold Factor | Detection threshold sensitivity (lower = more sensitive) | 1-20 |
| Micro-motion Detection | Enables detection of very small movements | On/Off |
Advanced Configuration Entities
These entities are hidden by default and intended for advanced users or troubleshooting.
| Entity | Type | Description |
|---|---|---|
| mmWave sensor | Switch | Starts/stops the mmWave sensor (diagnostic) |
| UART presence output | Switch | Enables UART output of presence data |
| UART target output | Switch | Enables UART output of target tracking data |
| Factory Reset mmWave | Button | Resets mmWave sensor to factory defaults |
Enabling Hidden Entities
- In Home Assistant, go to your EP1 device
- Click Entities not shown at the bottom
- Select the entity you want to enable
- Click Enable and wait 30 seconds for it to appear
Turning Off LEDs
You can disable two onboard LEDs:
- mmWave LED: Stops flashing when the sensor is active.
- ESP32 Status LED: Turns off the main device indicator light.
LED settings can be controlled directly from the Home Assistant UI.
Related Resources
- How to Tune Your EP1 Sensor - Placement tips and sensitivity adjustments
- Automation Examples - Create automations using these entities
- Troubleshooting - Common issues and solutions