Installation
Install Zone Configurator and prepare it for use with your Everything Presence devices and Home Assistant setup.
This guide walks you through installing Zone Configurator. Choose the method that matches your Home Assistant installation type.
Choose Your Installation Method
| Home Assistant Type | Installation Method |
|---|---|
| Home Assistant OS | Add-on (recommended) |
| Home Assistant Supervised | Add-on (recommended) |
| Home Assistant Core | Docker Container |
| Home Assistant Container | Docker Container |
Add-on Installation (Home Assistant OS / Supervised)
Prerequisites
- Home Assistant OS or Supervised installation
- At least one Everything Presence device (Pro, Lite, or One) already set up in Home Assistant
Step 1: Add the Repository
- In Home Assistant, go to Settings → Add-ons
- Click the Add-on Store button (bottom right)
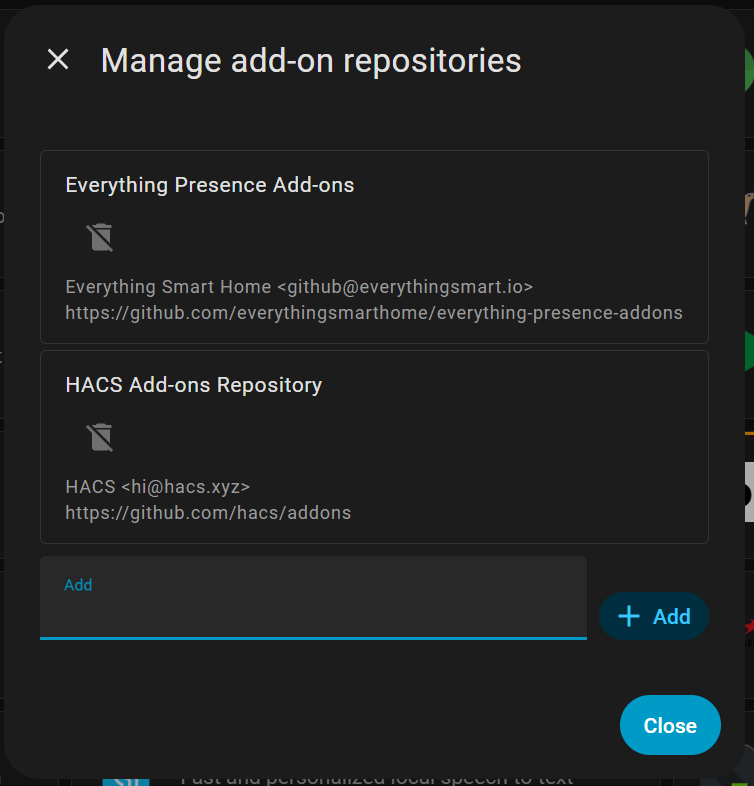
- Click the three dots menu (top right) and select Repositories
- Add the following repository URL:
https://github.com/EverythingSmartHome/everything-presence-addons
- Click Add then Close
Step 2: Install the Add-on
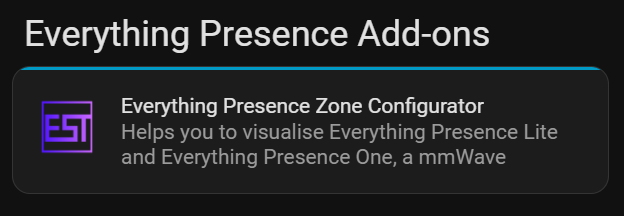
- The add-on store will refresh. Scroll down to find Everything Presence MMWave Configurator
- Click on the add-on
- Click Install
- Wait for the installation to complete
Step 3: Start the Add-on
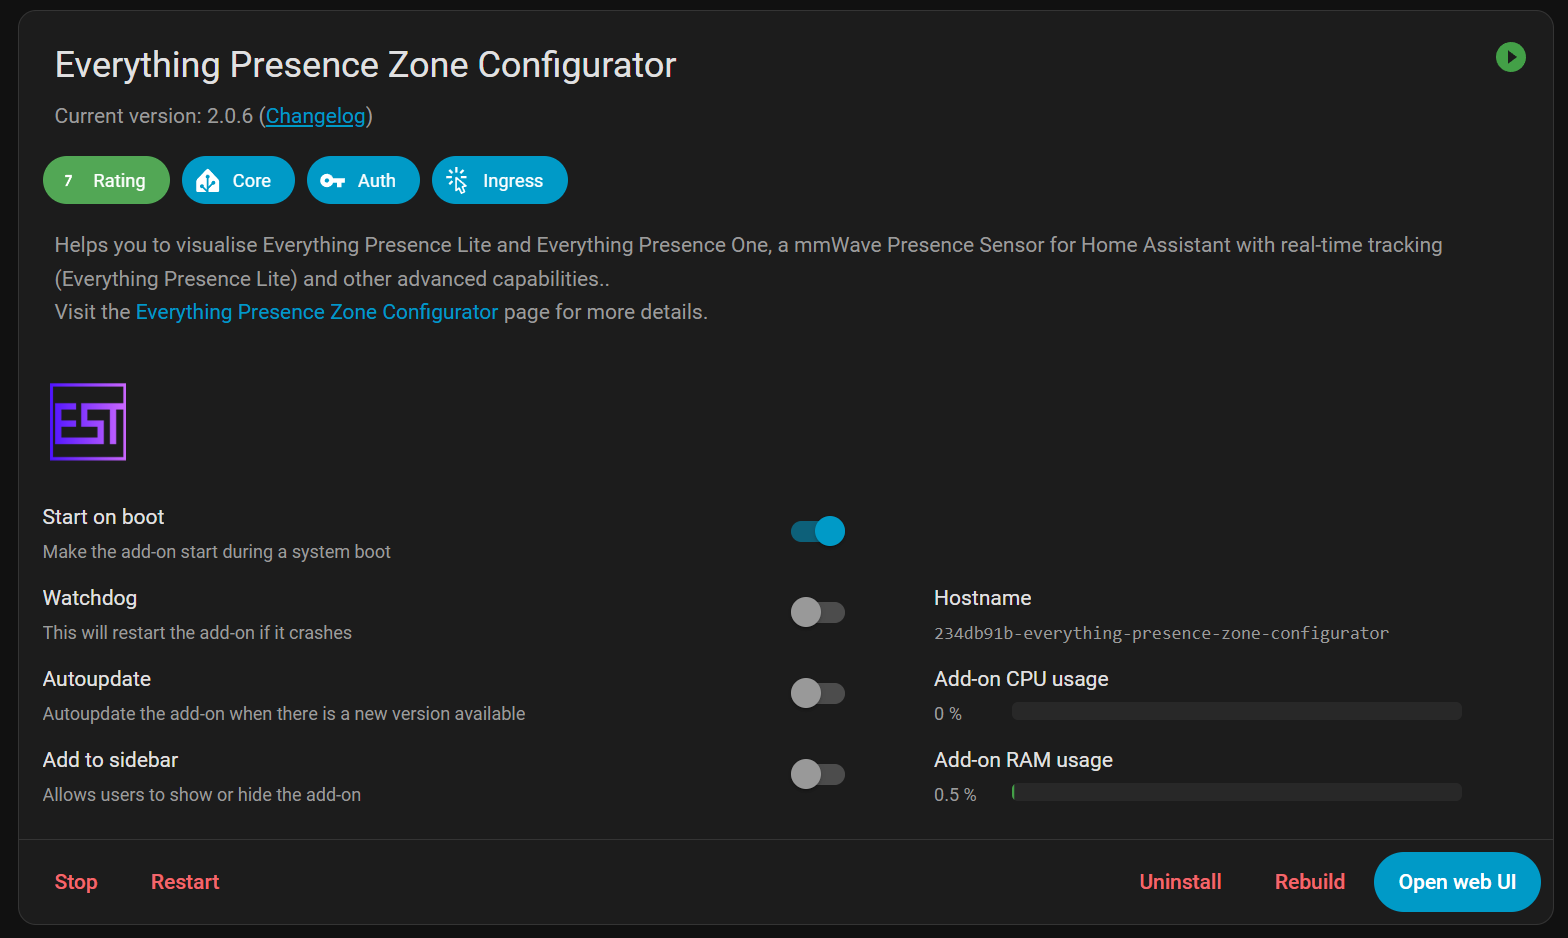
- After installation, click Start
- Enable Show in sidebar for easy access
- Optionally enable Start on boot to have it run automatically
Port change (v2.0.11): The default app port is now 42069. If you are upgrading from an older version, open the add-on Configuration tab, set port to 42069, then restart the add-on to restore ingress access.
Step 4: Open Zone Configurator
- Click Zone Configurator in your Home Assistant sidebar
- The Setup Wizard will launch automatically if this is your first time
Docker Installation (Home Assistant Core / Container)
If you're running Home Assistant Core or Container, you can run Zone Configurator as a standalone Docker container.
Prerequisites
- Docker installed on your system
- Home Assistant running and accessible
- At least one Everything Presence device (Pro, Lite, or One) already set up in Home Assistant
- A Home Assistant long-lived access token
Step 1: Create a Long-Lived Access Token
- In Home Assistant, click your profile (bottom left of sidebar)
- Scroll to Long-Lived Access Tokens
- Click Create Token
- Give it a name like "Zone Configurator"
- Copy the token (you won't be able to see it again)
Step 2: Create docker-compose.yaml
Create a docker-compose.yaml file:
services:
  zone-configurator:
    image: everythingsmarthome/everything-presence-mmwave-configurator:latest
    container_name: zone-configurator
    restart: unless-stopped
    ports:
      - "42069:42069"
    environment:
      HA_BASE_URL: "http://YOUR_HA_IP:8123"
      HA_LONG_LIVED_TOKEN: "YOUR_TOKEN_HERE"
    volumes:
      - ./config:/config
Port change (v2.0.11): The default app port is now 42069. To keep the old behavior, set PORT=3000 and map 3000:3000 instead.
Replace:
YOUR_HA_IPwith your Home Assistant IP address or hostnameYOUR_TOKEN_HEREwith the long-lived access token you created
Step 3: Start the Container
docker-compose up -d
Step 4: Access Zone Configurator
Open your browser and go to:
http://YOUR_SERVER_IP:42069
The Setup Wizard will launch automatically if this is your first time.
Updating the Docker Container
To update to the latest version:
docker-compose pull
docker-compose up -d
Troubleshooting Installation
| Issue | Solution |
|---|---|
| Repository not appearing | Refresh the page and check the URL is correct |
| Add-on won't start | Check the add-on logs for errors |
| Sidebar icon missing | Ensure "Show in sidebar" is enabled in add-on settings |
| Docker: Connection refused | Verify HA_BASE_URL is correct and Home Assistant is accessible |
| Docker: 401 Unauthorized | Check your long-lived access token is correct |
| Docker: Container won't start | Check logs with docker logs zone-configurator |
Next Steps
- Setup Wizard - Configure your first device