Everything Presence Lite — Hardware Overview
Explore Everything Presence Lite hardware, connections and components to understand your device before installation and setup.
Overview
Learn about the components included with Everything Presence Lite and their functions.
What's in the Box?
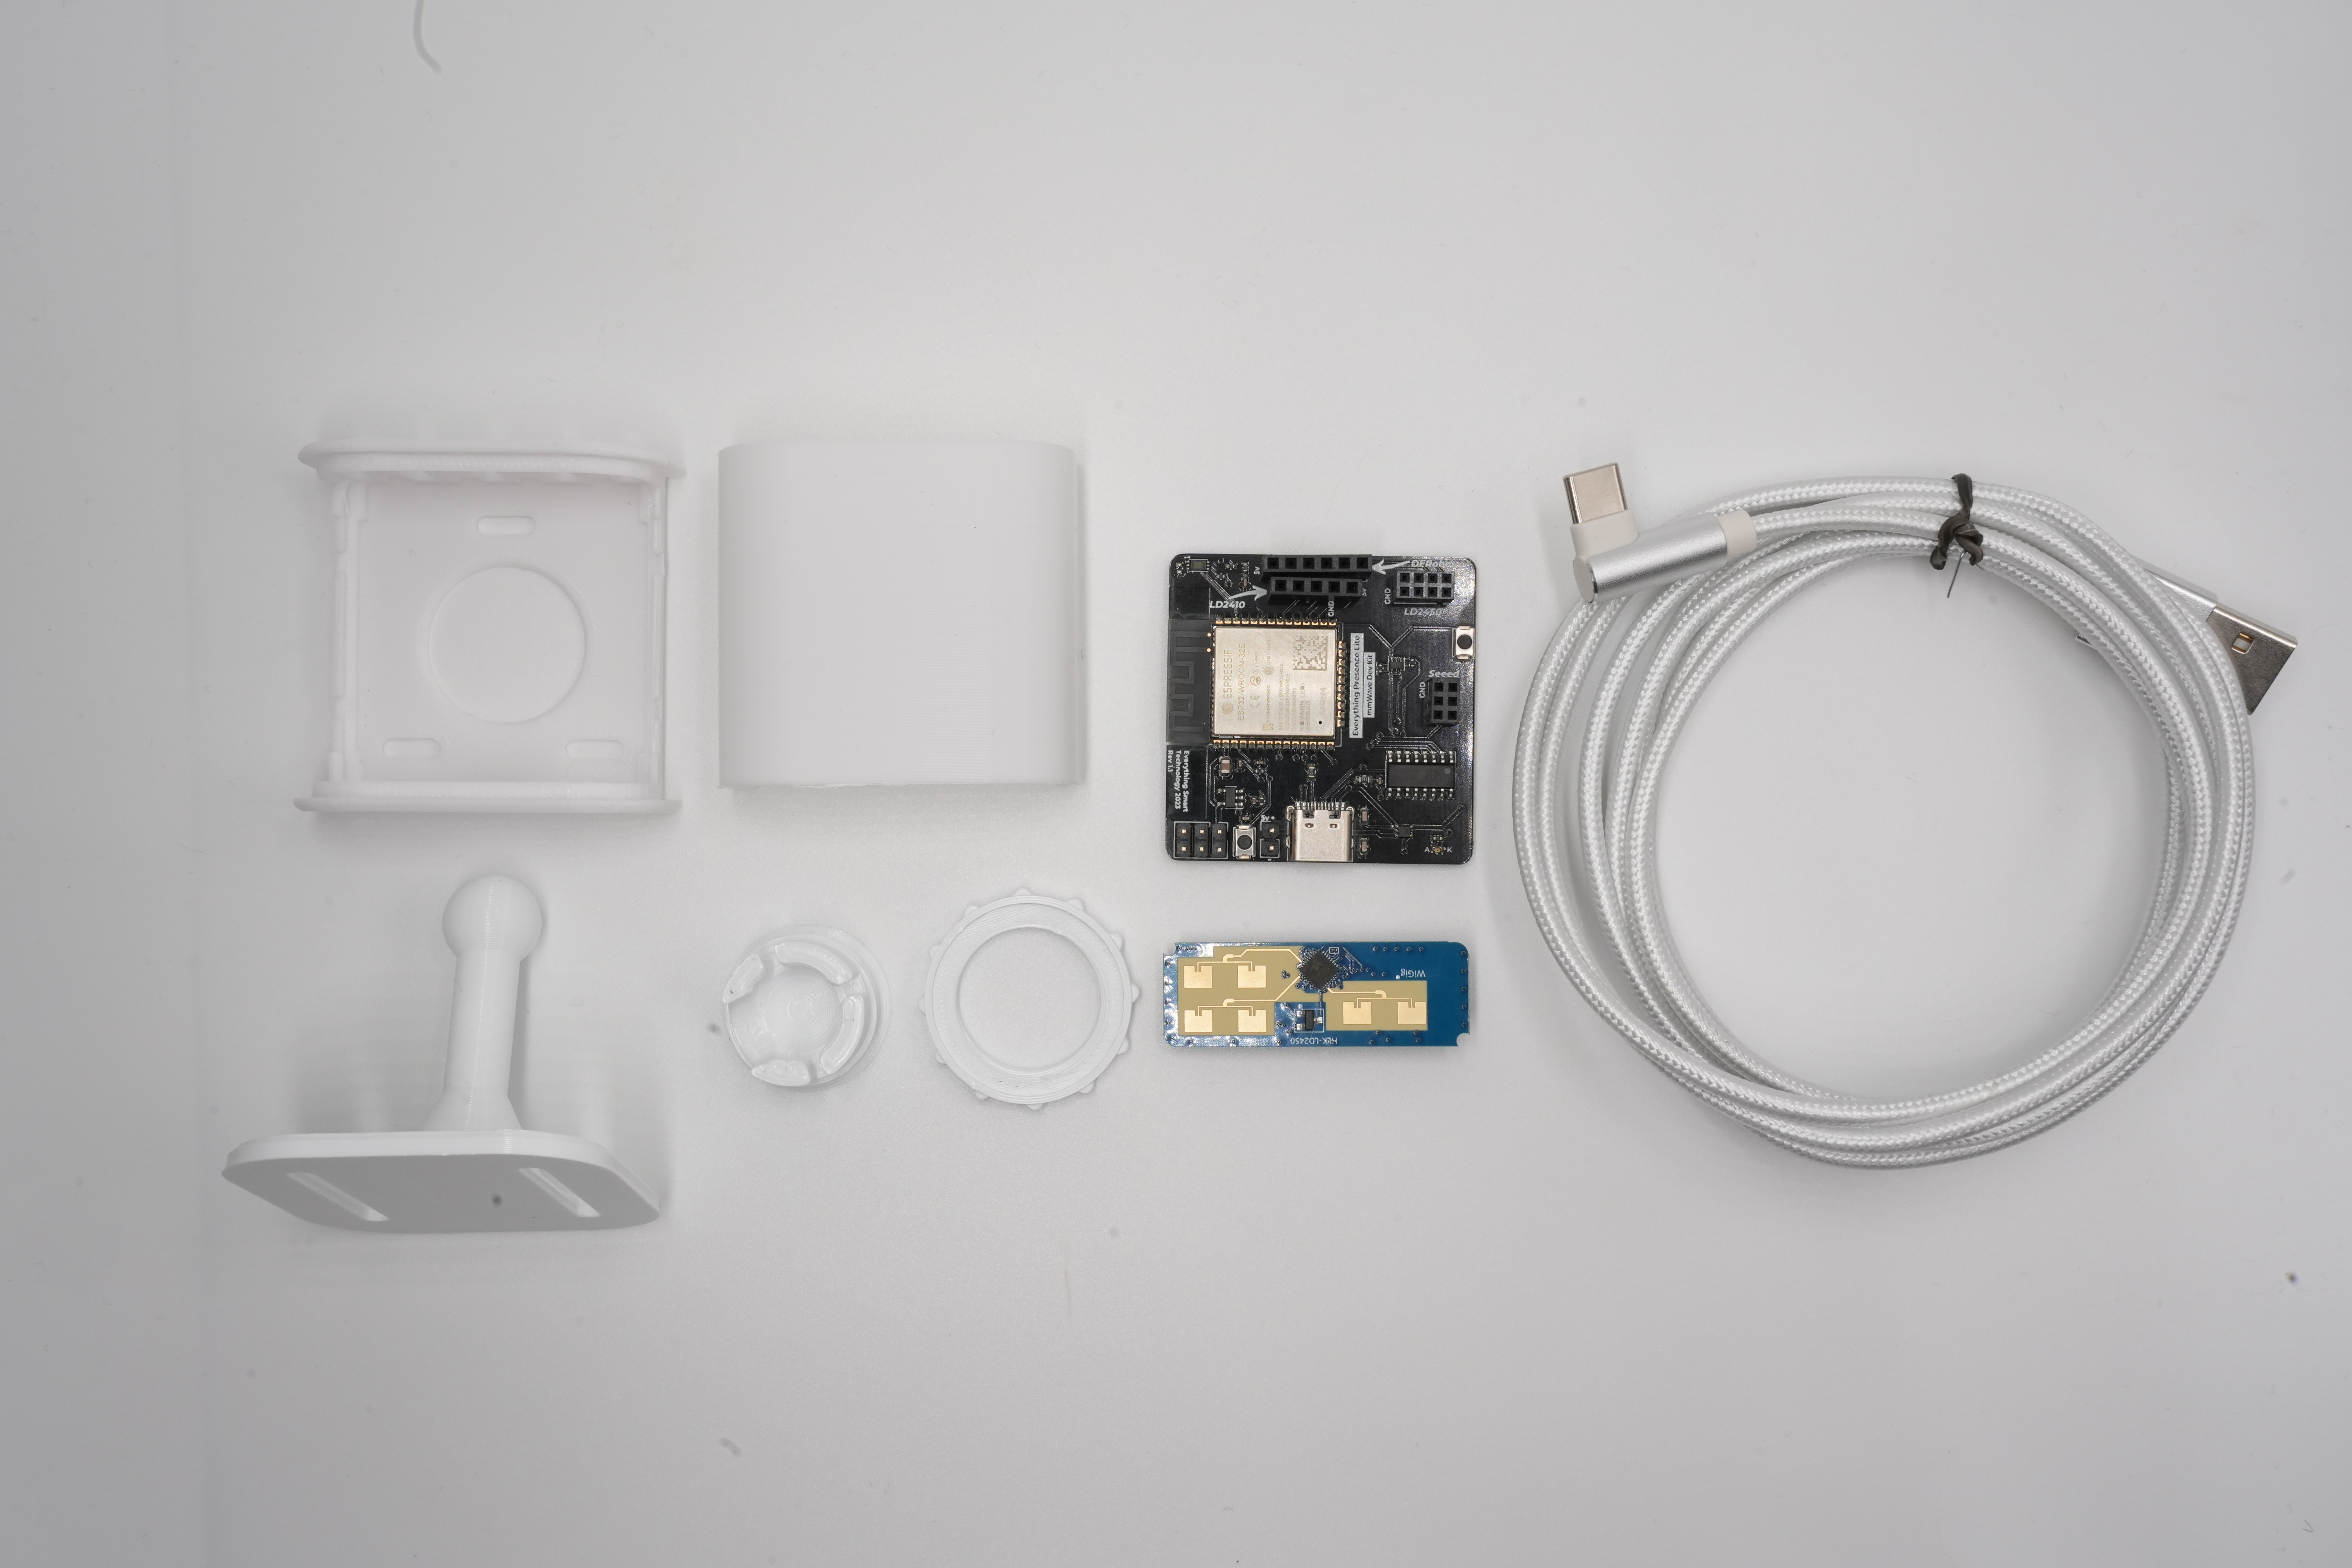
Your Everything Presence Lite package may include different components depending on the version you purchased. If you bought the board only, you'll need to provide a compatible mmWave sensor separately.
If you have the fully assembled Everything Presence Lite with the injection-molded case, you can skip ahead to Set up your EPL device in Home Assistant
Everything Presence Lite Board
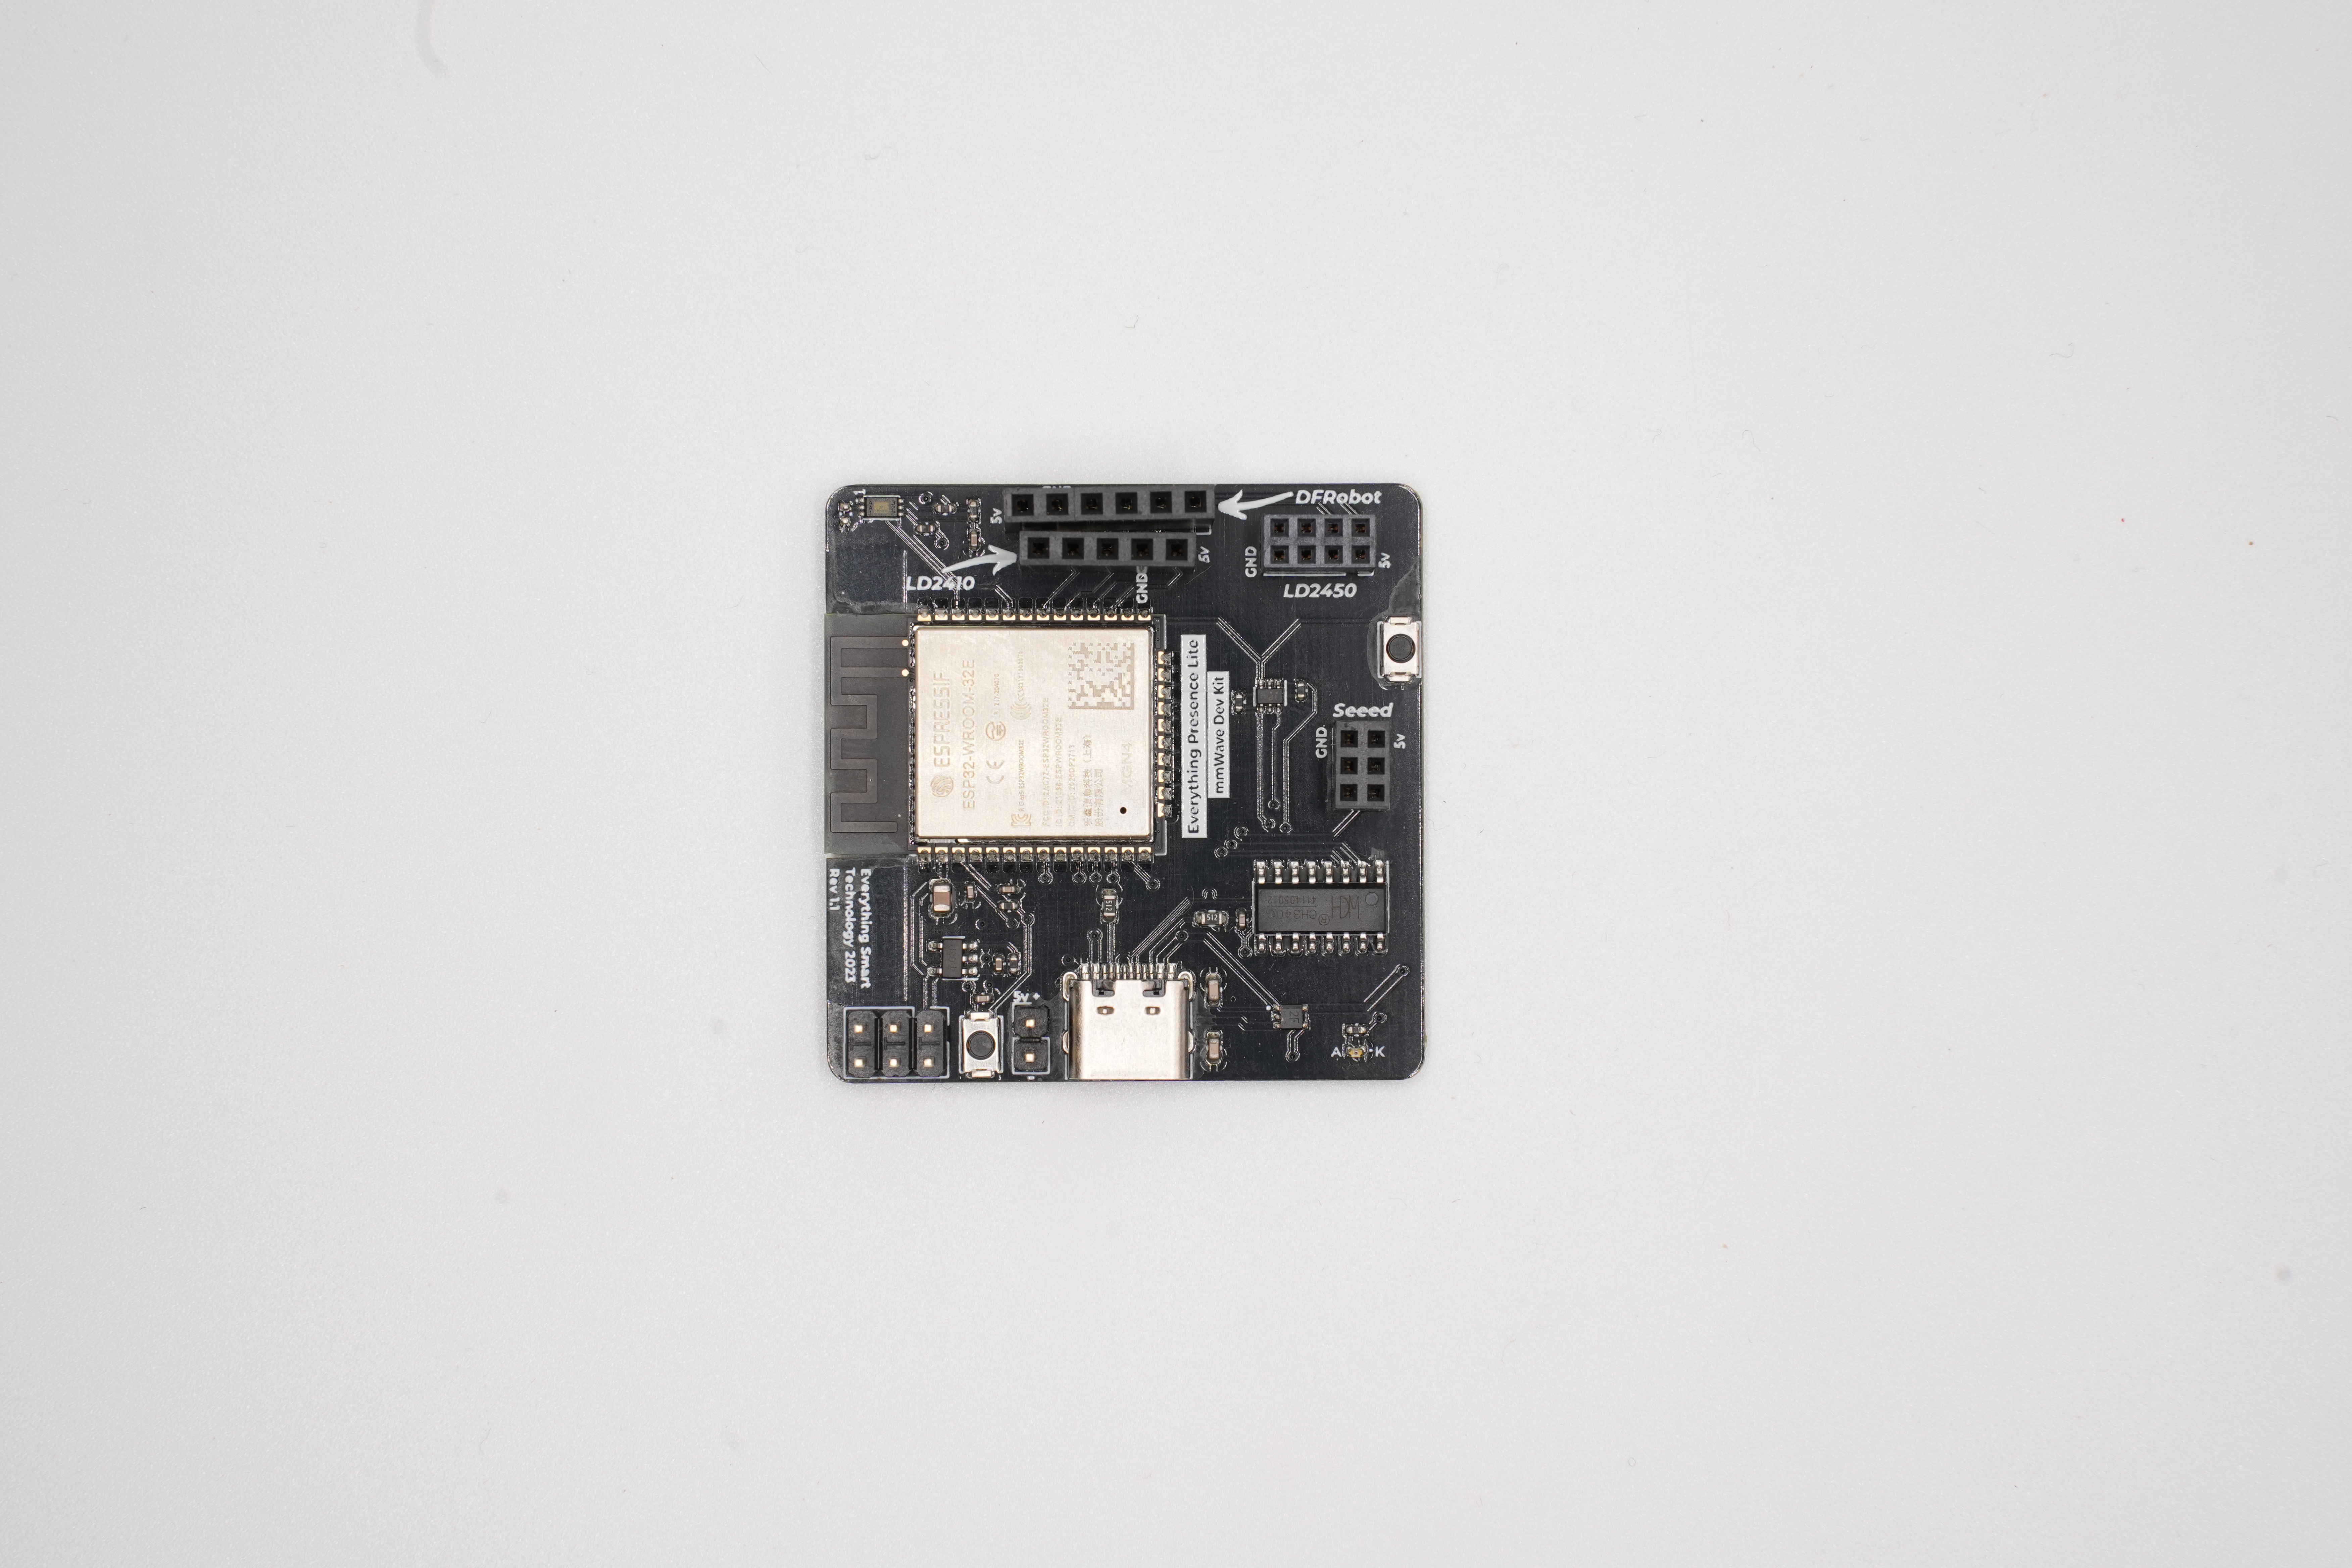
The Everything Presence Lite board is the main circuit board of the device. It features an ESP32-WROOM-32E module, which provides Wi-Fi connectivity and serves as the processing unit for the sensors.
Key components on the board include:
- ESP32-WROOM-32E (4MB flash version)
- BH1750 Light Illuminance Sensor
- mmWave Sensor Slots for:
- HiLink LD2450 (default)
- HiLink LD2410C
- DFRobot SEN0395
- DFRobot SEN0609
- Seeed MR24HPC1
- USB-C Port for power and programming
- 5V Header Input for optional power sources
- 4 GPIO Pins for additional expansion
Each component is labeled directly on the board for easy reference during assembly.
Connector and Pinout Quick Reference
The board has a few connectors that are useful when flashing, expanding, or swapping sensors.
| Connector / Part | What it is for | Notes |
|---|---|---|
| USB-C port | Power and flashing | This is the normal port for power, firmware flashing, and logs. |
5V header input |
Alternate 5V power input | Useful if you want to power the board without USB-C. |
RESET button |
Reboots the ESP32 | Use this for a normal board restart. |
BOOT / FLASH button |
Manual flashing / recovery | Usually not needed for normal setup because automatic flashing should work. |
| Bottom expansion header | Supported module and GPIO expansion | The validated module connection here is 3.3V, GND, GPIO26 (SDA), and GPIO27 (SCL) for the CO2 module. |
mmWave sensor sockets (LD2450, LD2410, DFRobot, Seeed) |
Sensor-specific headers | These are dedicated sensor sockets, not general-purpose GPIO headers. Use the firmware that matches the sensor you install. |
Practical Notes
- The CO2 module uses the bottom expansion header and should be aligned so
3.3VandGNDmatch the board markings. - The mmWave sockets are keyed by board labels. Always check the silkscreen and fitment before powering on.
- If you are doing custom expansion work, treat the documented CO2/header wiring as the supported reference point and verify any custom pin use carefully against your board revision.
- The two board buttons serve different purposes:
RESETrestarts the board, whileBOOT / FLASHis for recovery or manual flashing only.
Official Case
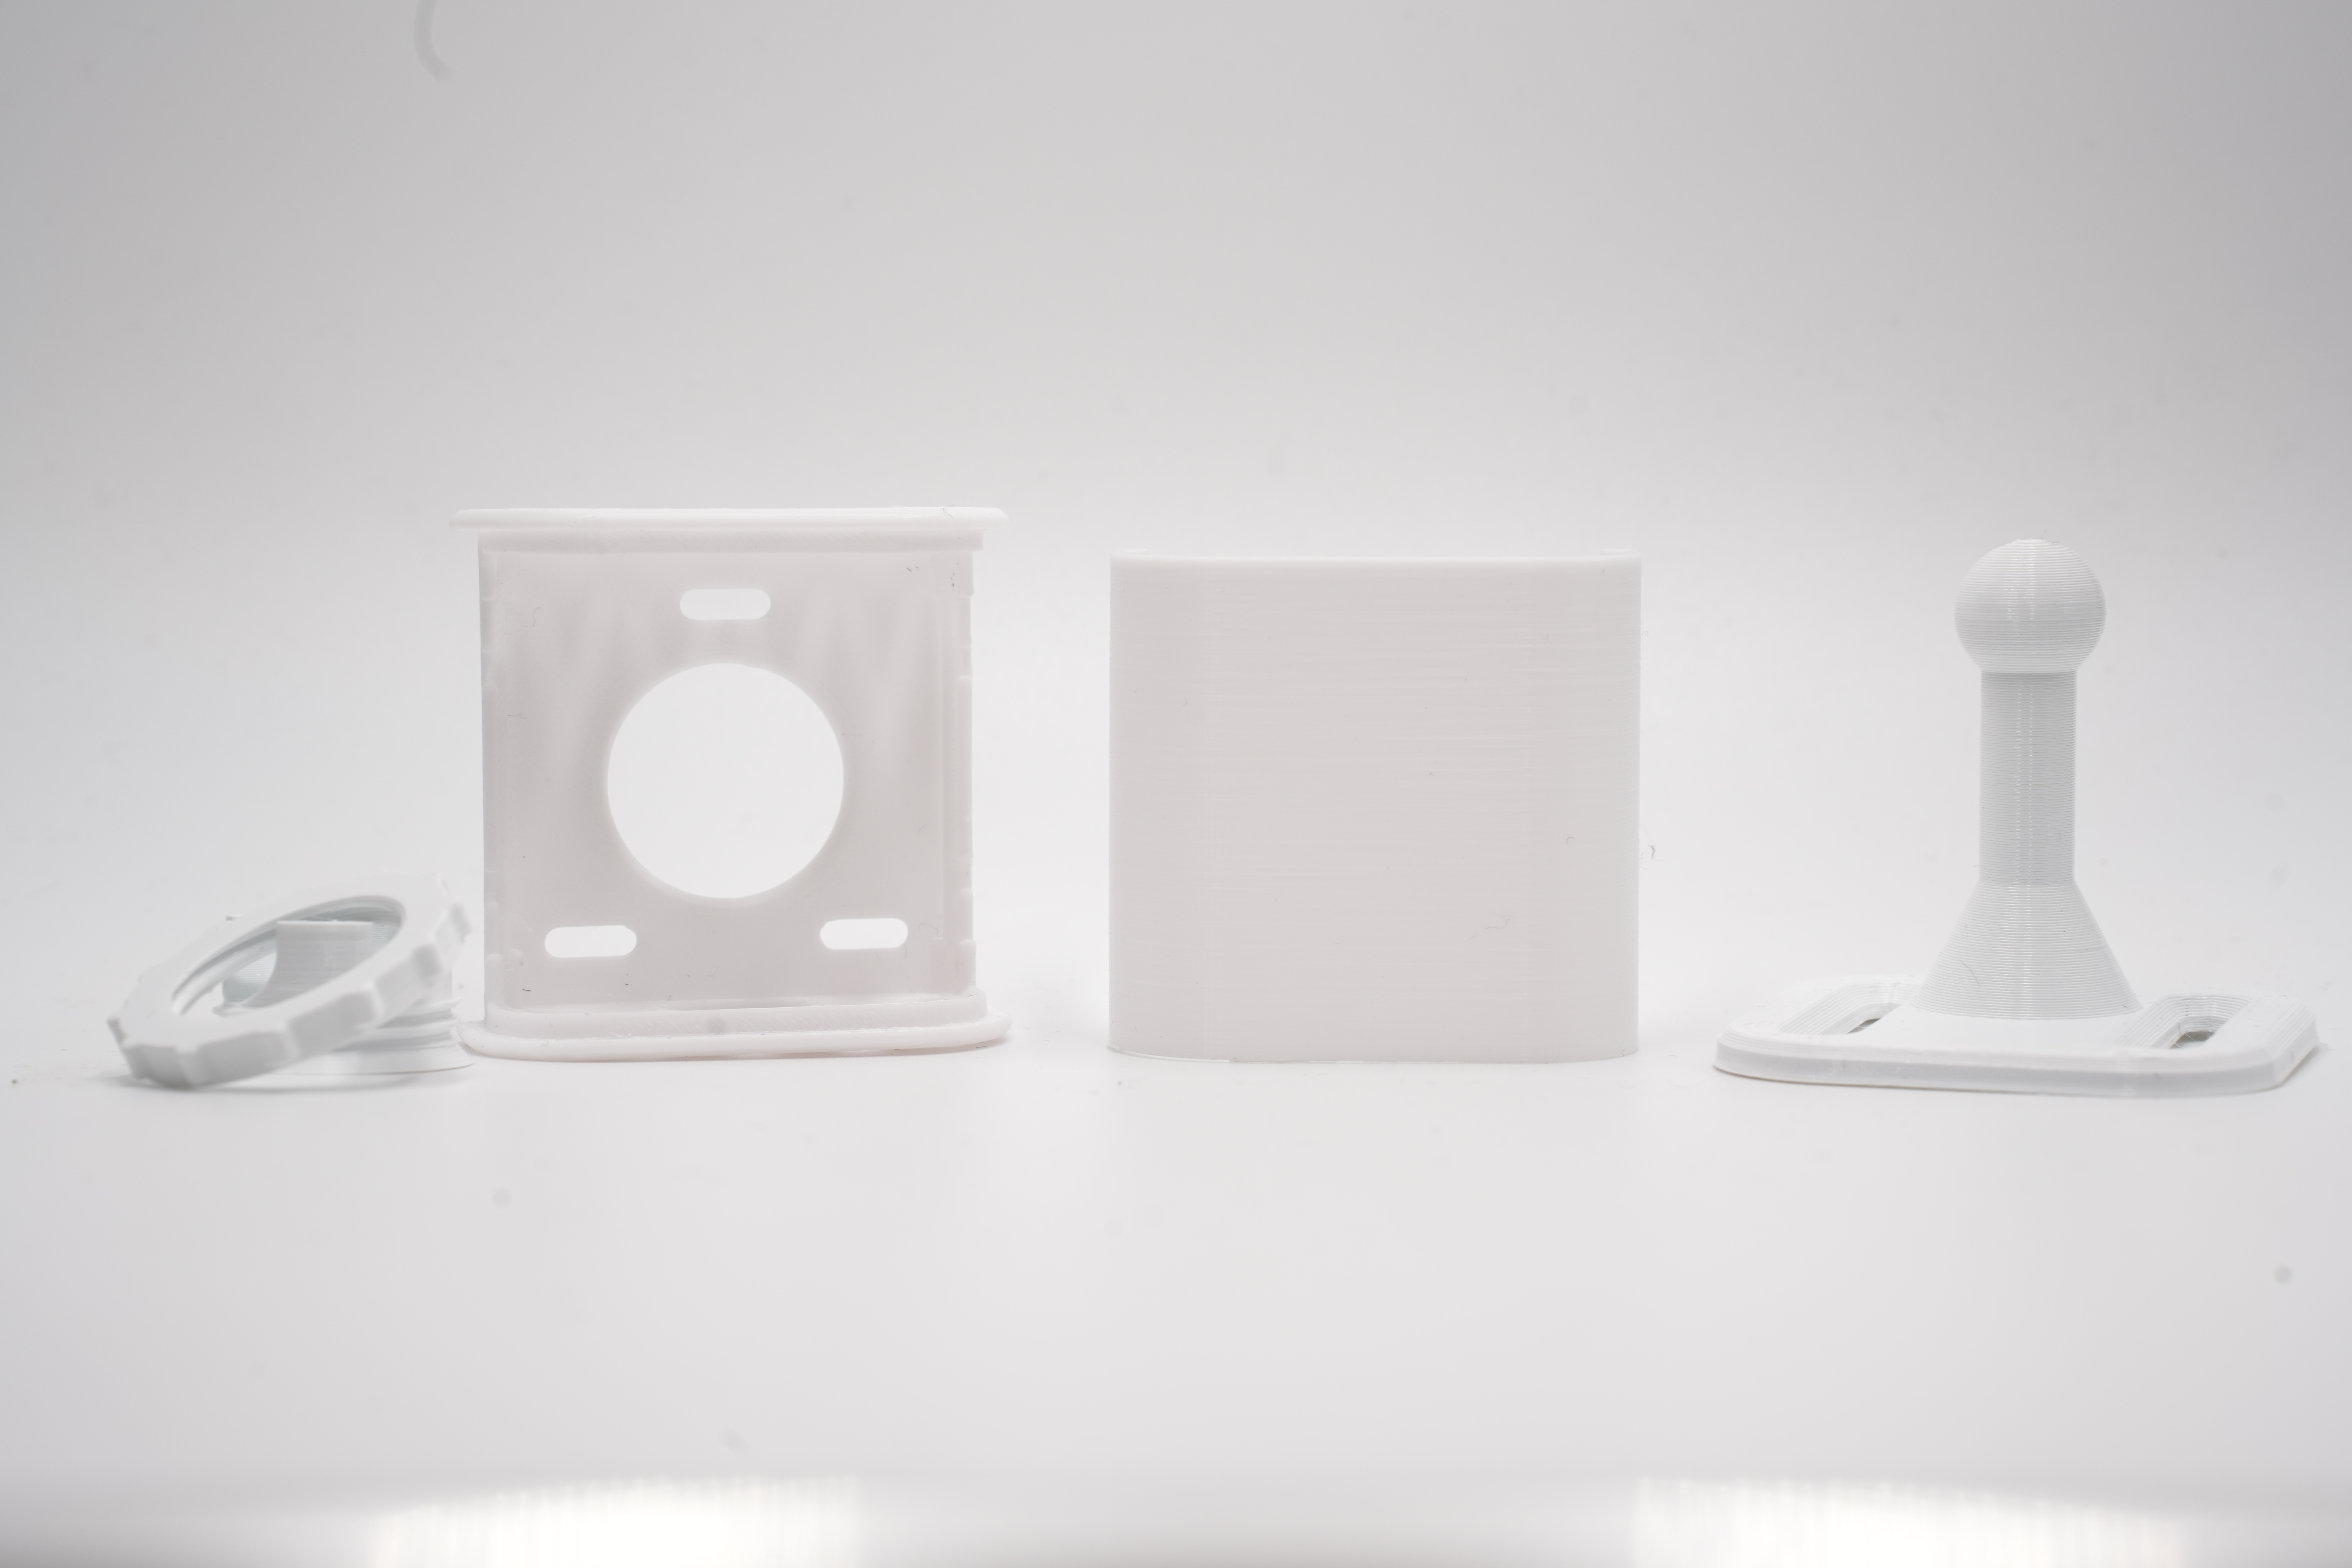
The Everything Presence Lite includes an official case, which consists of five parts:
- Front panel
- Back panel
- Stand
- Ball joint
- Locking ring
If you prefer a different color or material, you can print your own case using the STL file available on Printables.
mmWave Sensor
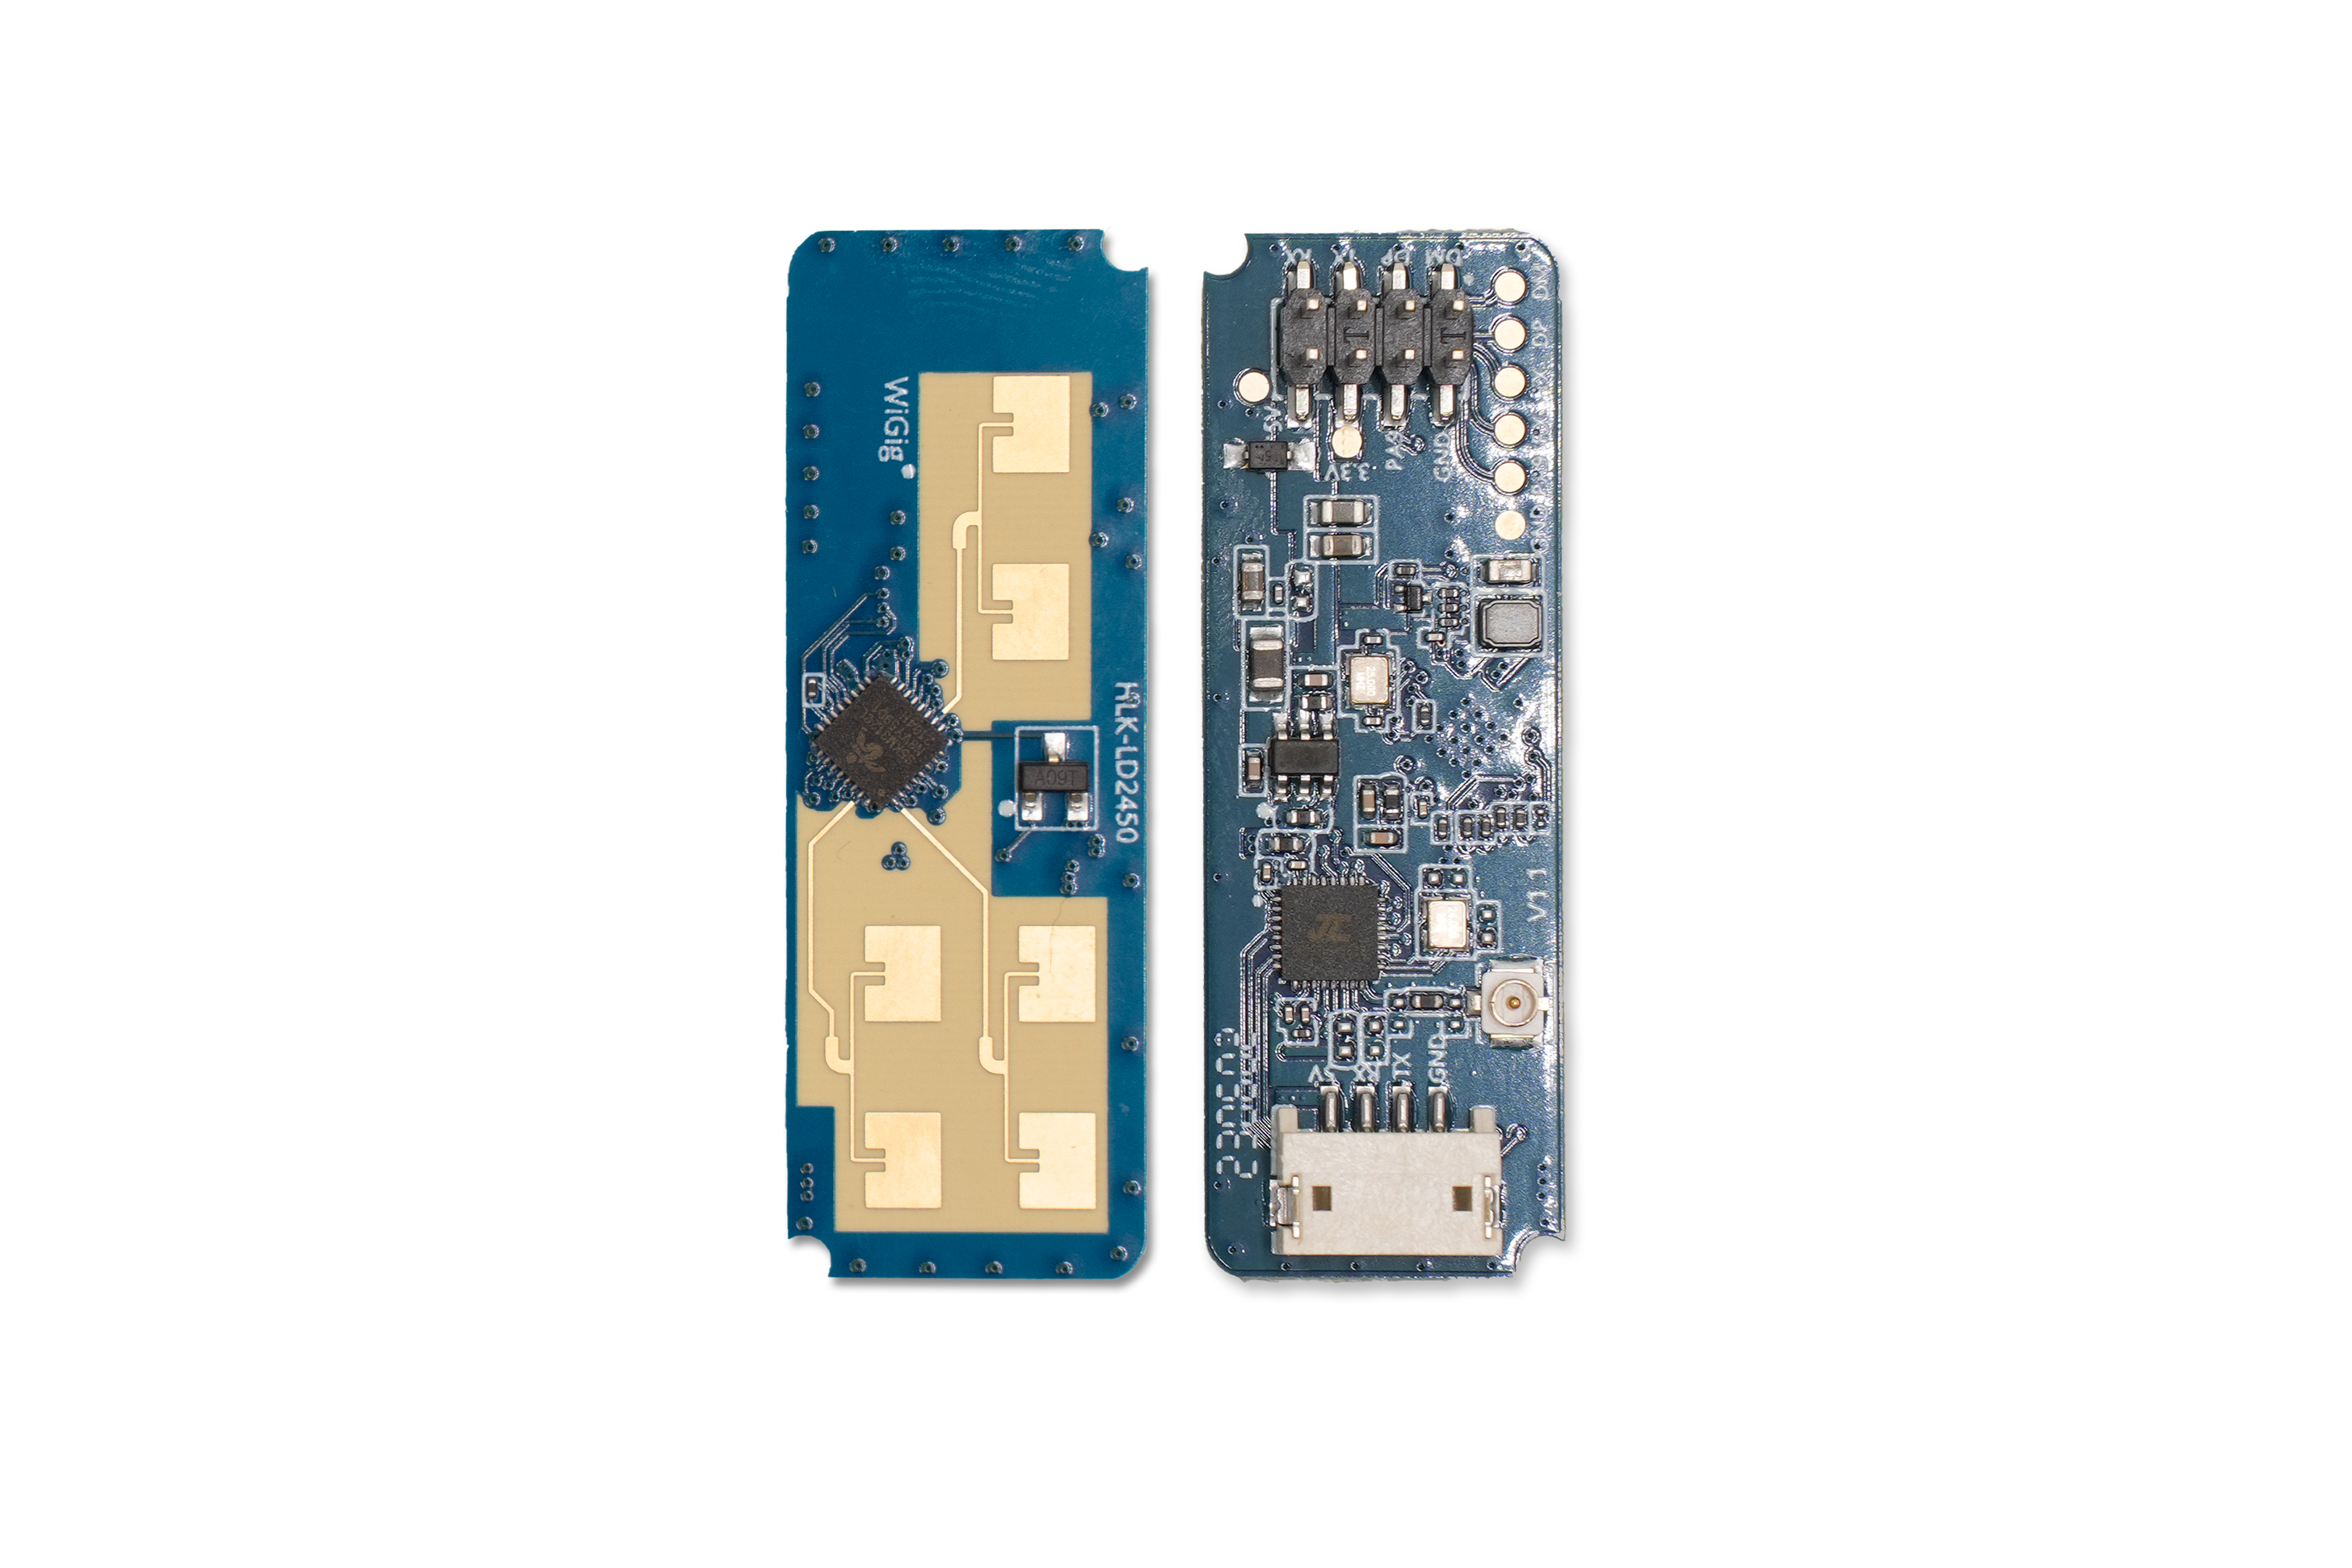
The Lite board is compatible with various mmWave sensors, making it ideal for developing and testing mmWave applications. By default, the package includes the HiLink LD2450 mmWave sensor, which supports tracking up to three targets in 2D space.
Alternative mmWave Sensors
The EPL board supports several alternative mmWave sensors beyond the default LD2450. Each sensor has different capabilities and requires its own firmware variant.
Warning
Important: You must install the correct firmware for your sensor. The default EPL firmware only works with the LD2450 sensor.
Sensor Comparison
| Sensor | Target Tracking | Zones | Range | Best For |
|---|---|---|---|---|
| LD2450 (default) | Yes - up to 3 targets in 2D | Yes | ~6m | Zone-based automations, target tracking |
| LD2410C | No | No (gate-based) | ~6m | Simple presence detection with per-gate sensitivity |
| SEN0395 | No | No | ~8m | Basic presence, budget option |
| SEN0609 | Limited | No | ~25m | Long range detection |
| MR24HPC1 (Seeed) | No | No | ~5m | Scene-based presets, sensitivity control |
LD2450 (Default)
The standard sensor included with EPL. Features real-time 2D target tracking with support for zones, masks, and entry/exit detection.
Key features:
- Tracks up to 3 targets simultaneously
- X/Y coordinate tracking
- Zone and polygon support
- Entry/exit zone detection
- Occupancy masks
LD2410C
A simpler sensor from HiLink without target tracking. Uses "gate" based detection where each gate represents a distance range.
Key features:
- Gate-based detection (0-8 gates)
- Per-gate movement and still sensitivity
- Moving and still target distinction
- Engineering mode for diagnostics
- No zone support
When to use: If you need simple presence detection without zone features, or already have an LD2410C sensor.
DFRobot SEN0395
The legacy DFRobot sensor with basic presence detection.
Key features:
- Single sensitivity control (0-9)
- Min/max distance settings
- Simple on/off presence output
- 8 metre detection range
When to use: If you have this sensor from previous projects or need budget-friendly basic detection.
DFRobot SEN0609
The newer DFRobot sensor with extended range and more features.
Key features:
- Separate trigger and sustain sensitivity
- Extended 25 metre range
- Distance and speed mode
- Micro-motion detection (breathing, typing)
When to use: For long-range detection scenarios or when micro-motion sensitivity is important.
Seeed MR24HPC1
A sensor from Seeed Studio with scene-based presets and custom modes.
Key features:
- Pre-configured scene modes (living room, bedroom, bathroom, etc.)
- Custom mode support
- Movement confidence scoring
- Motion to static time control
- Sensitivity adjustment
When to use: If you prefer scene-based presets over manual tuning, or already have this sensor.
Installing Alternative Sensor Firmware
To use an alternative sensor:
- Go to the EPL firmware page
- Select the firmware variant matching your sensor (e.g., "LD2410", "SEN0395", etc.)
- Follow the standard flashing procedure
- Connect your alternative sensor to the EPL board
Tip
After flashing alternative sensor firmware, the available entities in Home Assistant will be different from the standard LD2450 documentation. Refer to your sensor's specific features listed above.
Physical Installation
All supported sensors connect to the same header on the EPL board. Ensure proper orientation when connecting - the sensor pins should align with the marked slots on the PCB.