Integrate the Carbon Dioxide (CO₂) Module
Add the optional CO2 module to Everything Presence One. Follow the hardware and firmware setup guide and check the sensor readings in Home Assistant.
Warning
The CO₂ module is compatible with Home Assistant and Homey. It does not support SmartThings.
Enhance your Everything Presence One with CO₂ monitoring.
Hardware Setup
- Power off your Everything Presence One.
- Locate the GPIO pins in the bottom corner of the board. The exact layout may vary by revision.
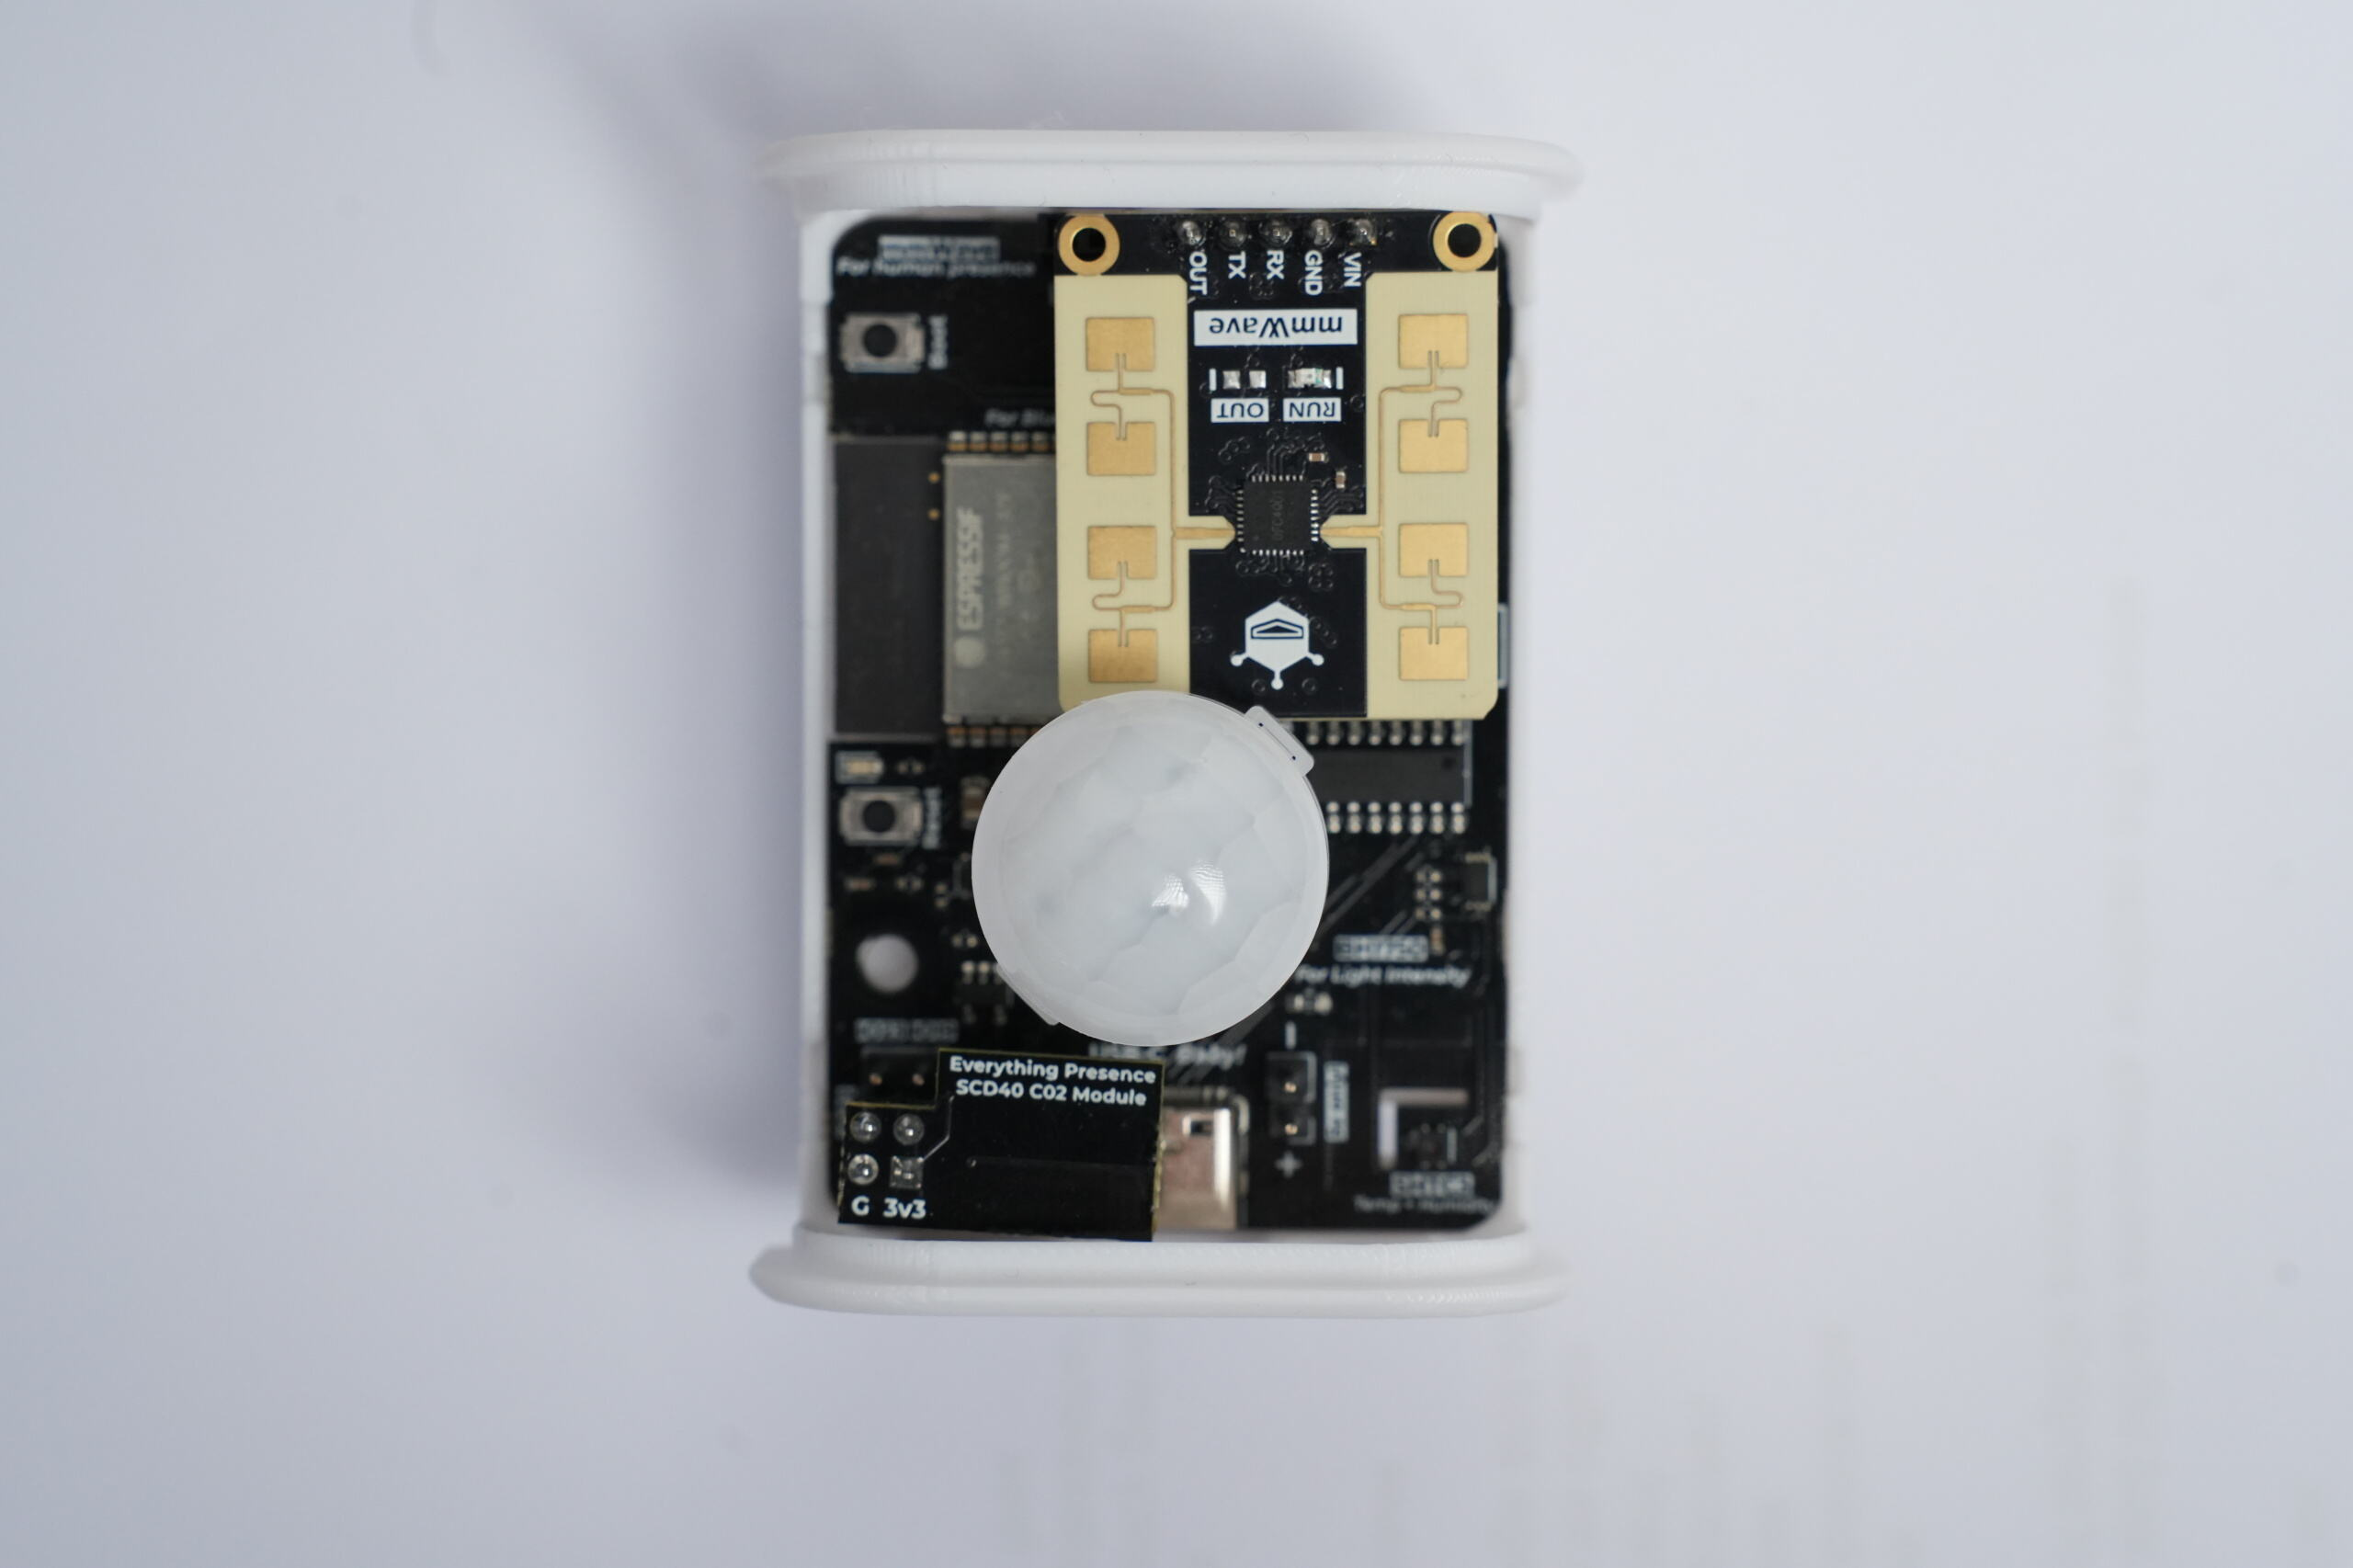
- Align the CO₂ module with the pins, ensuring the 3.3V and Ground connections match.
- Firmly push the module into place.
Software Setup
- Using the flasher below select the following settings.
- Select:
- Home Assistant
- Your mmWave sensor
- CO₂ module
- Your board revision
- Choose Bluetooth firmware
- Click Connect and follow the on-screen instructions.
Once installed, the CO₂ sensor should automatically appear in Home Assistant.
/flash/everything-presence-one.html
Using the CO₂ Sensor
Once installed, you'll find a CO2 sensor entity in Home Assistant that reports the current carbon dioxide level in ppm (parts per million).
Typical CO₂ levels:
- 400-450 ppm: Fresh outdoor air
- 450-700 ppm: Well-ventilated indoor space
- 700-1000 ppm: Acceptable indoor air quality
- 1000-2000 ppm: Poor ventilation, may cause drowsiness
- 2000+ ppm: Very poor air quality
Calibrating the CO₂ Sensor
The CO₂ sensor may need calibration if readings seem inaccurate. A Calibrate CO2 button is available in Home Assistant.
When to Calibrate
- If readings are consistently too high or too low
- After the sensor has been powered off for an extended period
- If readings don't match a known reference
How to Calibrate
- Place the sensor in fresh outdoor air (or a well-ventilated room with a window open) for at least 5-10 minutes.
- In Home Assistant, find the Calibrate CO2 button under your device's configuration.
- Press the button. The sensor will calibrate to 419 ppm (approximate outdoor CO₂ level).
Tip
For best results, calibrate on a day with good air quality and ensure the sensor has been running for at least 10 minutes before calibrating.