Advanced Setup Guide for EPL in Home Assistant
Follow the advanced Home Assistant setup guide for Everything Presence Lite, including the configuration steps for a customised installation.
Follow these steps to complete the alternative setup of your Everything Presence Lite if you are unable to use Bluetooth adoption from Set up your EPL device in Home Assistant :
This will take you through setting up the device in Home Assistant over USB.
Quick Overview
- Using the included USB-A to USB-C cable, plug your Everything Presence Lite in to a laptop or desktop.
- Select your device options\nOn the device flashing segment below, choose the appropriate options for your device. If you want to use the factory settings, select LD2450, No Module (select CO2 if you have the CO2 Module), Standard.
- Hit the connect button, select the USB port from the drop down and press install.
- Complete the installation\nOnce the installation finishes, click Next to proceed.
- Configure Wi-Fi
- On the "Configure Wi-Fi" screen, select your network.
- Enter your Wi-Fi password and click Connect.
- Add your device to Home Assistant
- Open Home Assistant.
- Go to Settings → Devices & Services.
- Your device should now be ready to add.
Your Everything Presence Lite is now set up and ready to use.
Guide
We are going to install the latest firmware on the Everything Presence Lite, connect it to WiFi and then connect it to Home Assistant using the USB-C port.
Prepare
Using the included USB-A to USB-C cable, plug your Everything Presence Lite in to a laptop or desktop running Windows, MacOS or Linux.
Info
MacOS users with M-series processors may not have required drivers installed by default and may need additional installation.
Installing the Firmware
Using the firmware selector below, select the options you would like to use with your Everything Presence Lite to customise your firmware. If you would like to use the recommended settings, select LD2450, No Module (select CO2 if you have the optional CO2 module) and standard.
Once you’ve made your choice, the connect button will appear. Hit the connect button, select the USB port form the list (should show as something like “USB Serial”).
Then hit Install Everything Presence Lite. This process should take around 2 minutes to complete.
Warning
If you do not see a connect button after customising the firmware, make sure you are using a browser that supports the Web Serial feature like Chrome, Edge or another Chromium based browser.
/flash/everything-presence-lite.html
Connecting to WiFi
After the firmware has finished being installed, you will be prompted for WiFi details:
- Select your WiFi SSID from the dropdown (select Manual if it doesn’t appear)
- Enter the WiFi password
- Hit connect
Connecting to Home Assistant
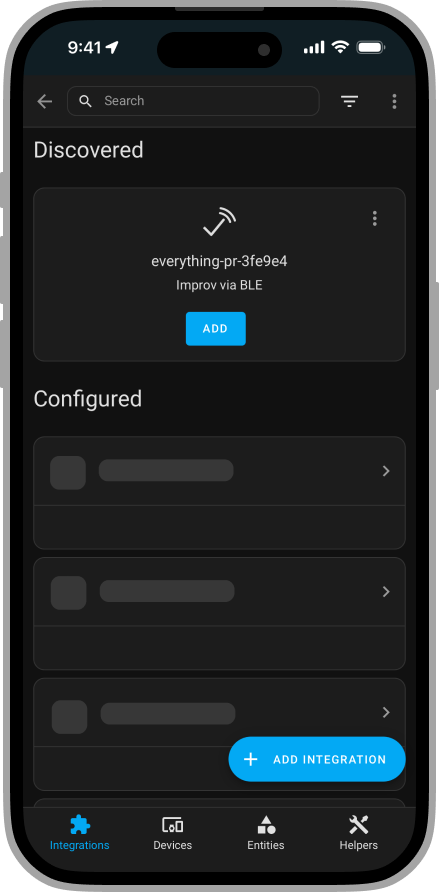
-
Unplug the device from your computer/laptop and you can now plug it in to a power adapter in the location that you want to use it permanently in.
\
-
You should see a flashing red light, indicating that the device is on.
\
-
Open the Home Assistant app on your mobile device and navigate to Settings → Devices & Services.
\
-
Look for a new device labelled ‘everything-presence-lite-xxxxxx’ (ESPHome) and tap Add.
\
-
Wait a few seconds, assign it to an area and then press finish.
Warning
We don’t recommend renaming the device at this point if you want to use the Everything Presence Zone Configurator tool, keep the default name to maintain compatibility.
If you still need help
Choose the error or message that appears:
- Connect button does not appear on flashing page
- Failed to initialize. Try resetting your device or holding the BOOT button while clicking INSTALL.
- Preparing installation
If you're still unable to restore your EPL to factory settings, contact us for further assistance. Get service, or join us on Discord to discuss with the community.